Pages

Showing posts with label 15th century. Show all posts

Sunday, February 12, 2012

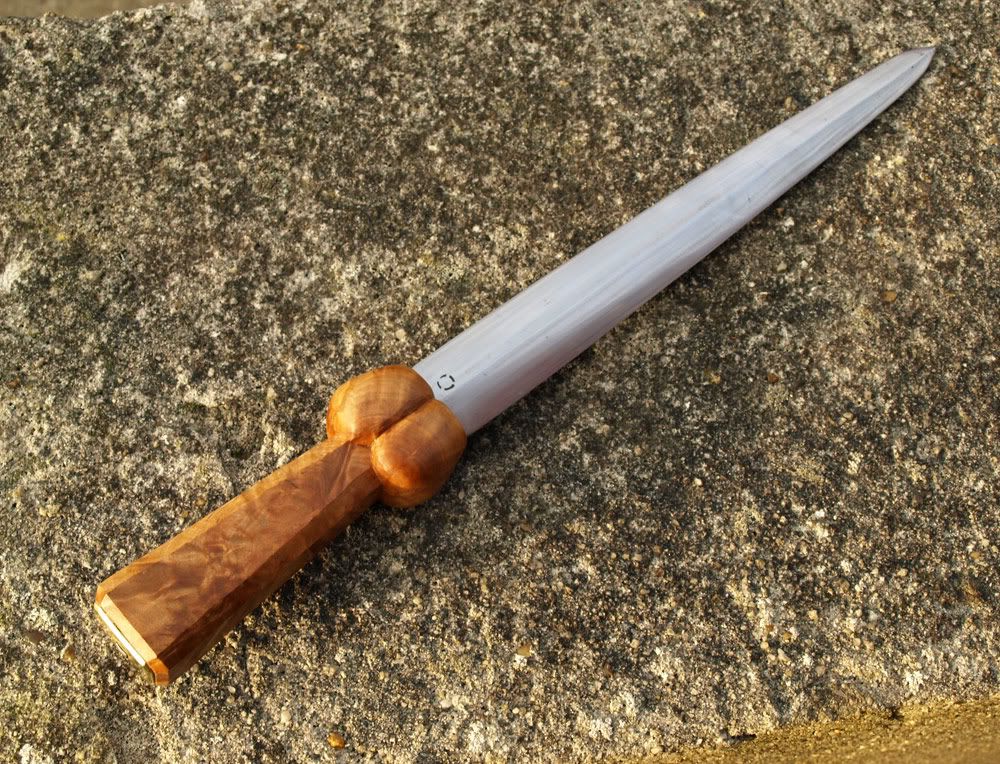
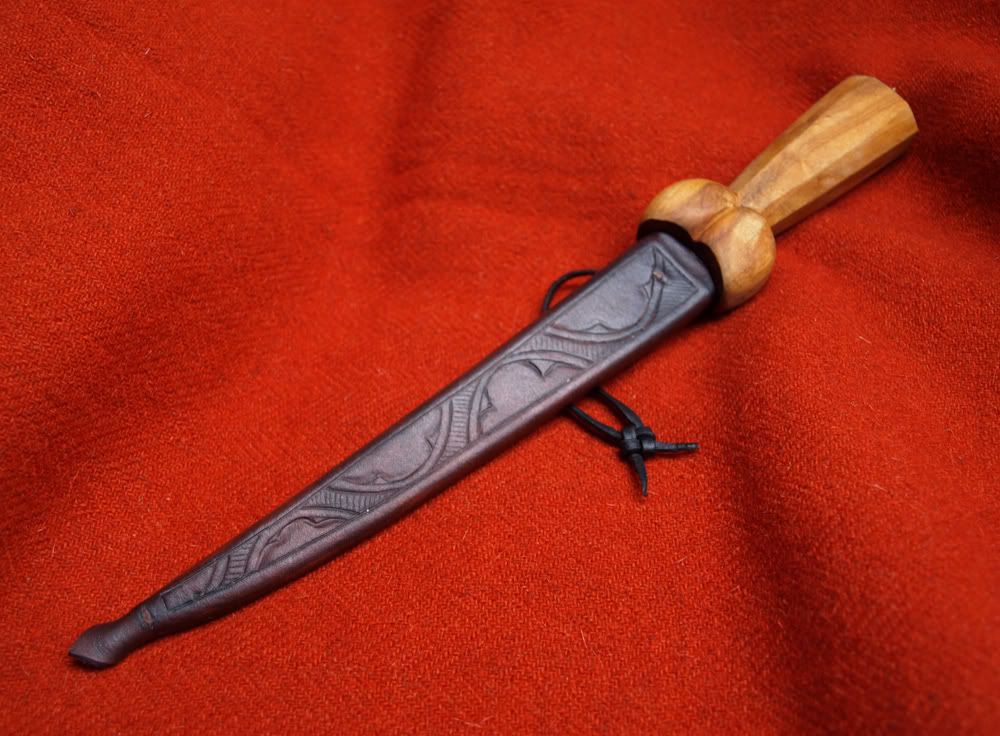
Bollock dagger - Vol. 2

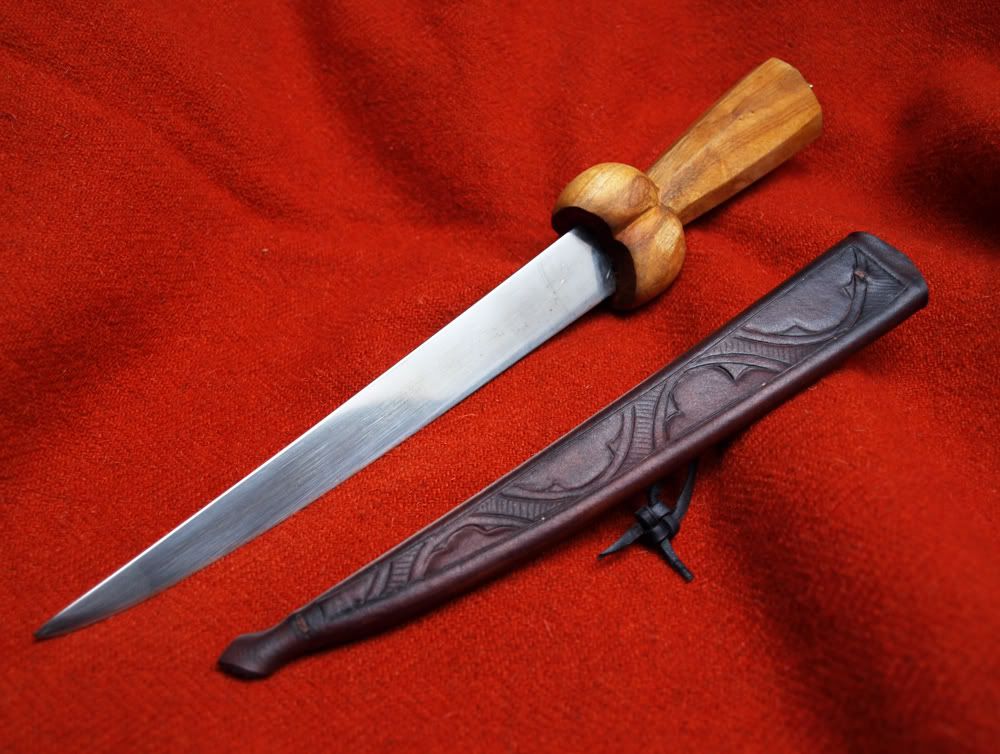
A couple of months ago I finished a bollock dagger for a friend of mine.
I dont have a lot to say about it, but it is based on the same type of handle as the last one I made. If you want to know more you can take a look at the post i wrote about the other one.

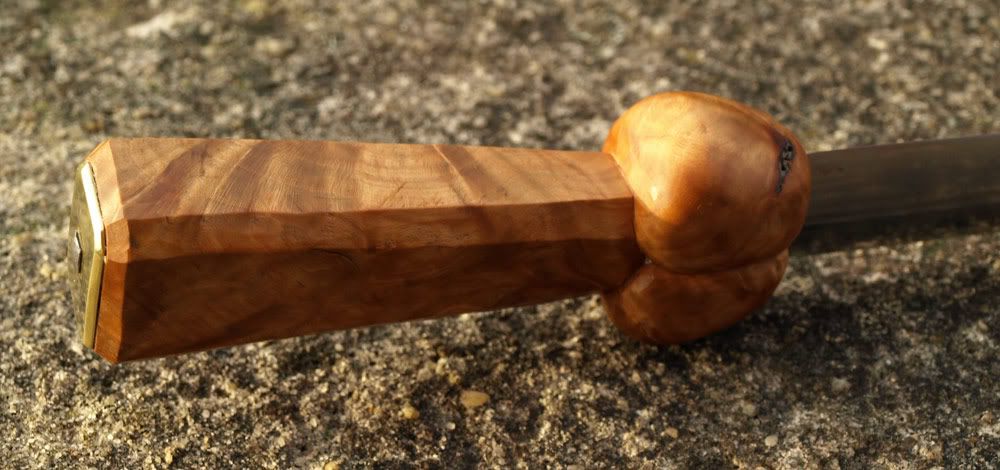
The handle is made from beech burl, with a brass plate on the top. The blade is was made by Tod.


Sunday, February 5, 2012

Crossbow quiver - Pt.1

For the last couple of weeks I have been working on a project for at friend og mine: A quiver for crossbow bolts.
I have been thinking about doing one of these for ages, so when I was aksed if I wanted to make one, I was very exited.

The shape and design of these quivers have always facinated me. But I had been struggleing with finding propper sources to base the item on. Luckily my friend had an article published in the "Journal of the Society of Archer-Antiquaries", wich explained the construction of a german quiver from around 1480, wich is now part of the collection of the "Stibbert Museum" in Florence (http://www.museostibbert.it/).
The article is titeled "A Quiver for Crossbow Bolts", and written by Alessio Cenni.

I read the article, looked at some period illustrations of quivers and some pictures of original quivers from the late 15th/ early 16th century. Then made some sketches and discussed the design with my friend. We arrived at something that we both liked and the I got to work.

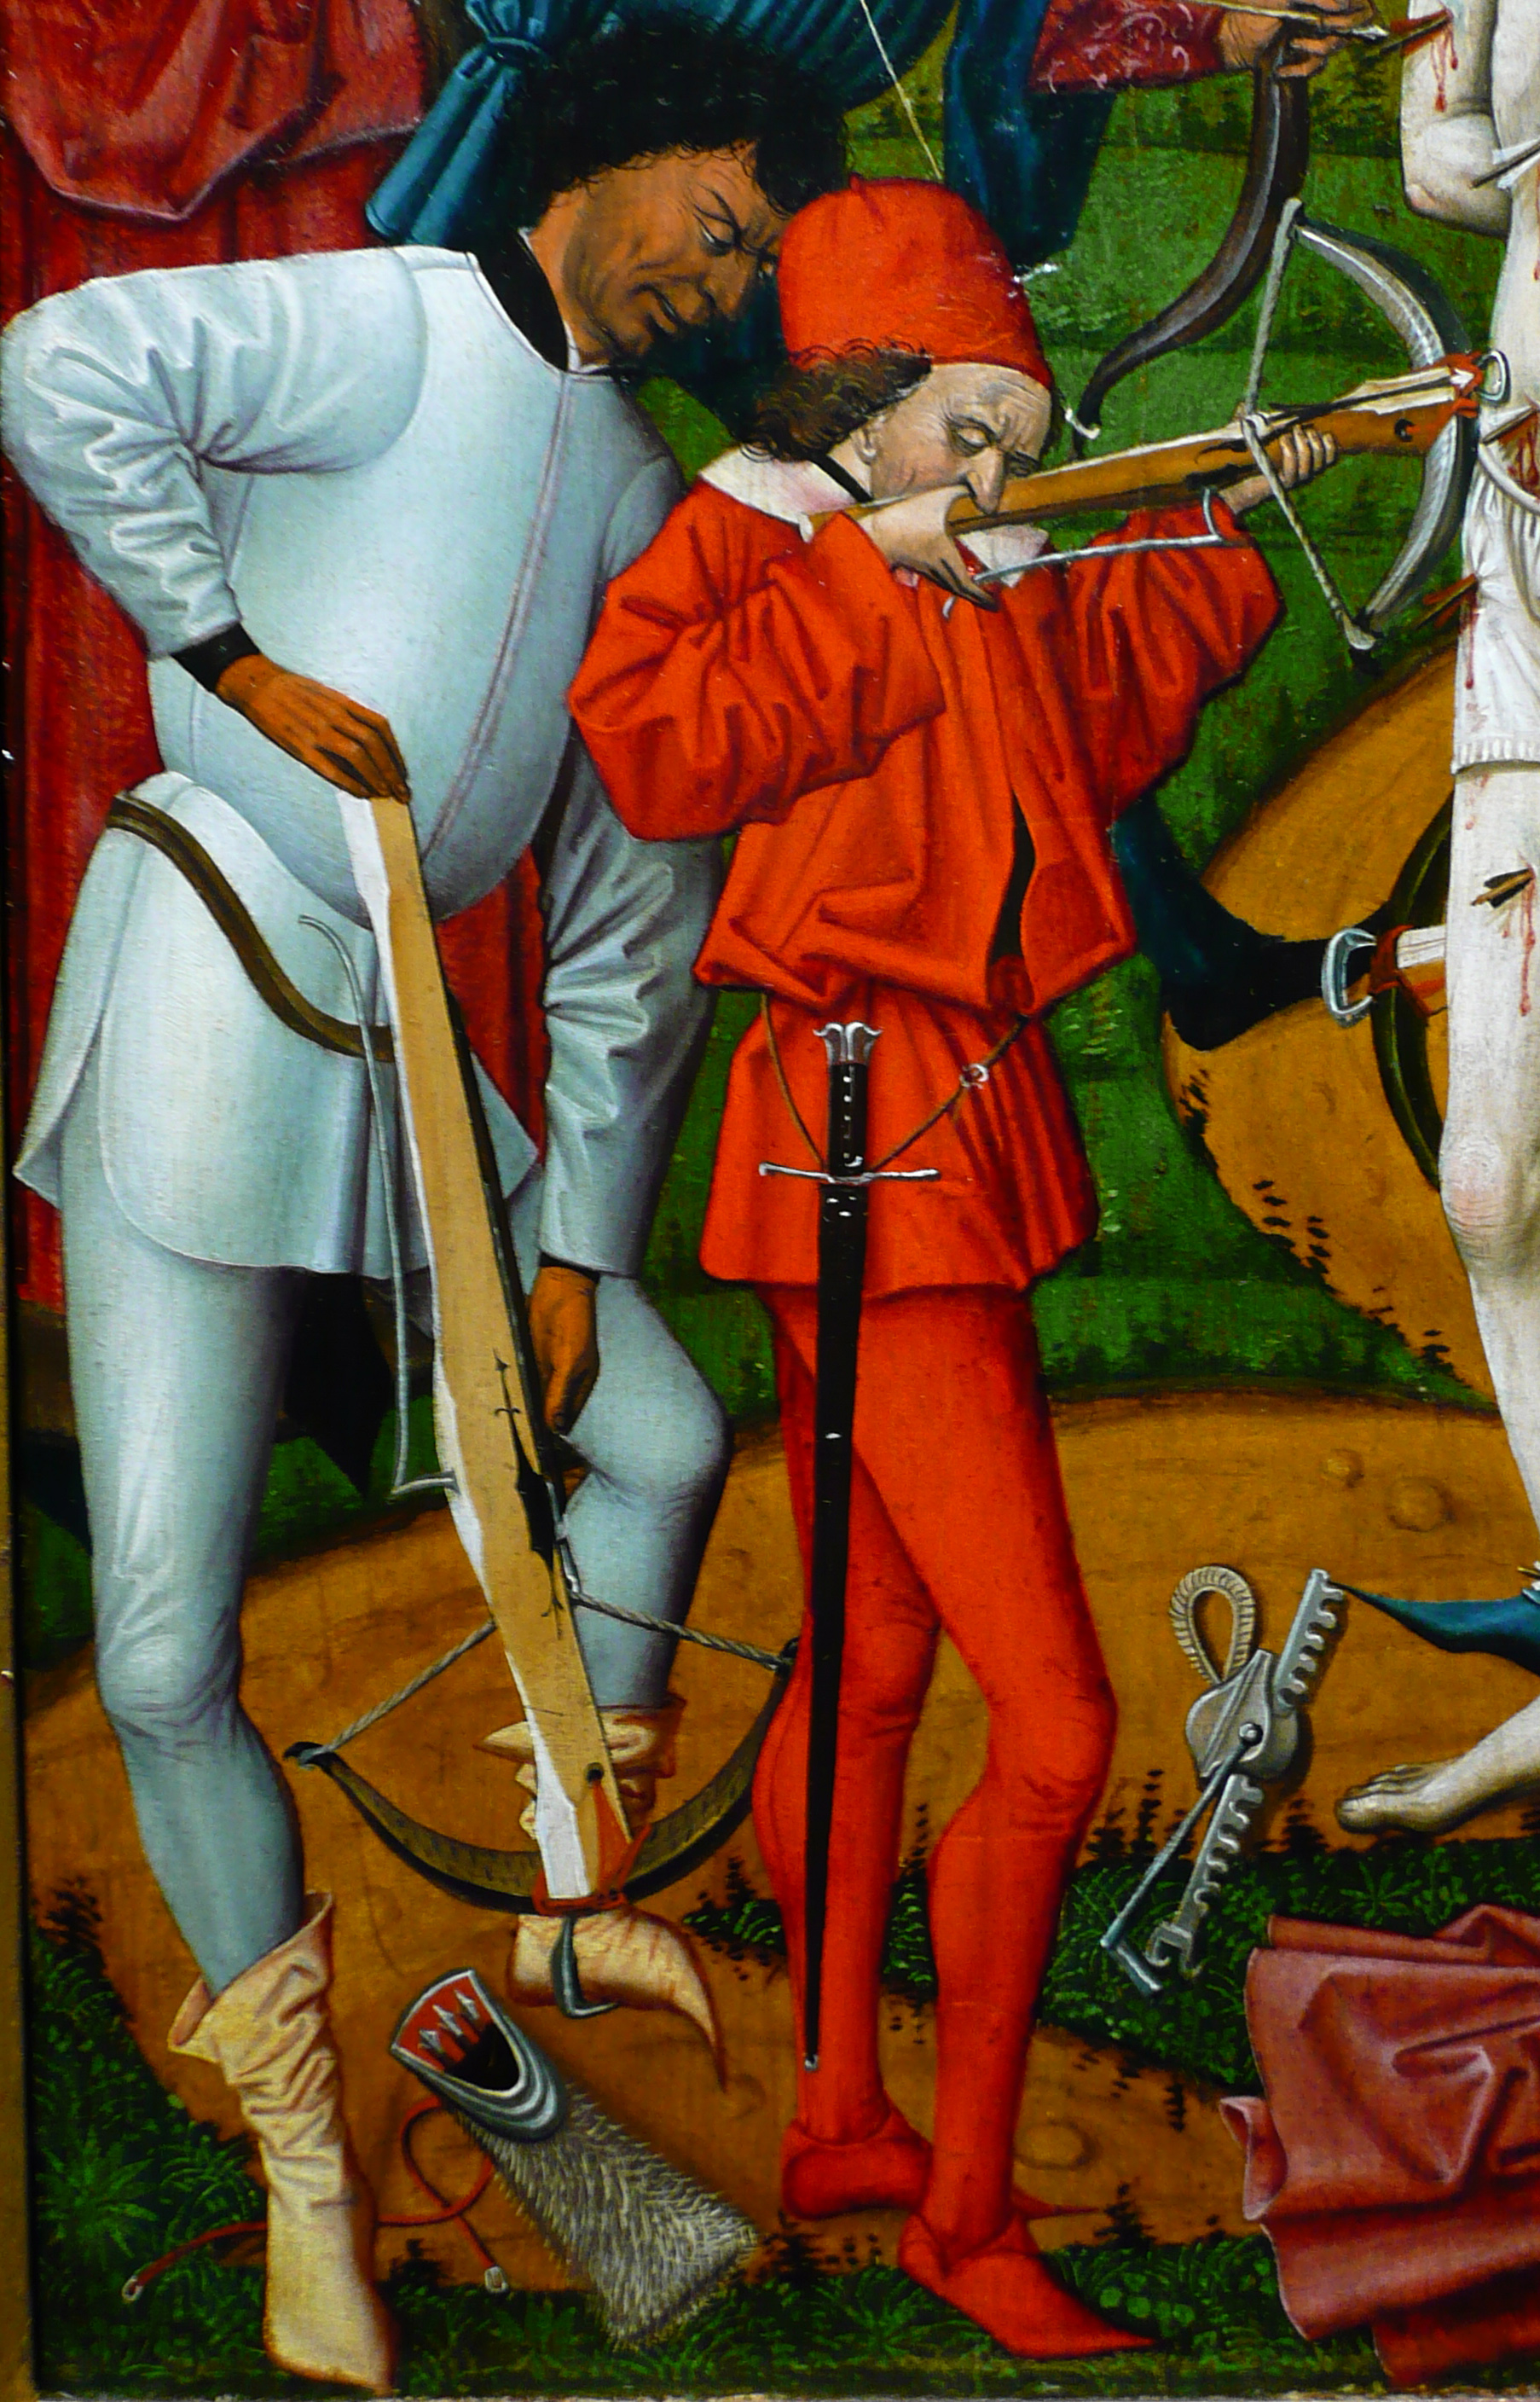
The quiver that I am makeing is not a reproduction og the quiver discussed in the article by Alessio, but a model wich is seen in al lot of period illustrations.
This type is partly covered in fur and tied to the waist of the user with a belt.

Detail from "The martyrdom of St. Sebastian", Oberbayern, 1475.
Picture from Wikipedia
This first post will be about the wooden parts of the quiver. In future posts i will be writeing about the fur and leather covering as well as the suspension holes and some neat bone fittings.
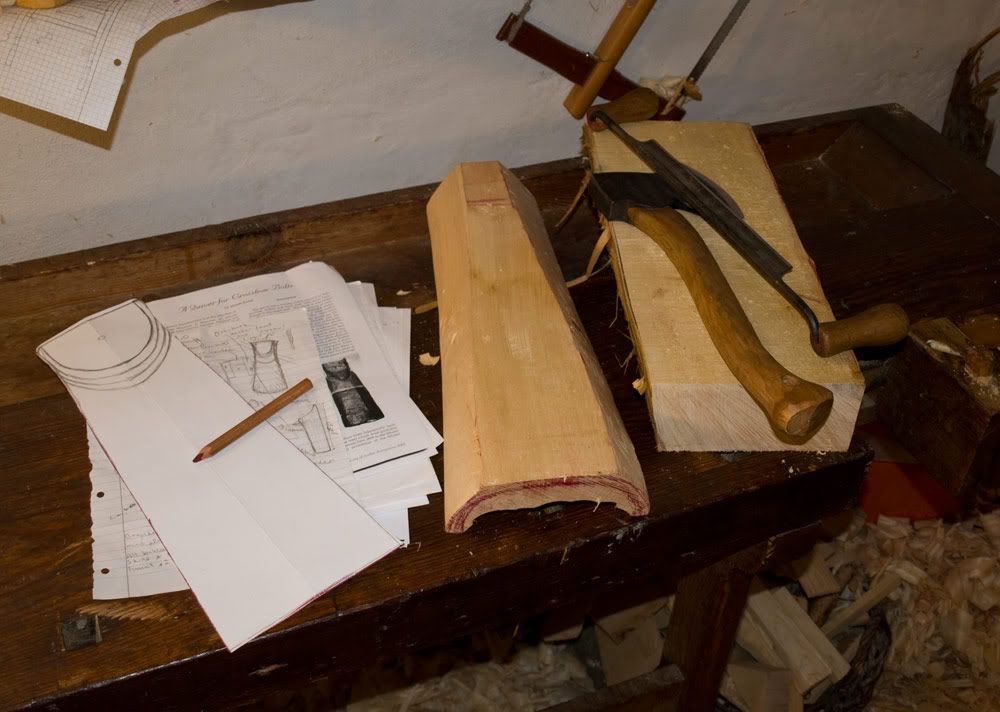
Making a paper template will help getting the shape and dimensions right.
Alessio writes in his article that the german quiver is probably made from lime (Tilia sp.) or poplar (Populus sp.) wood. He describes it as a light weight wood without porous rings and suggests the two species. These species are not only light weight, but are also really easy to carve.

I bought a board of lime wood, 7,5cm thick (That is 3" , for our american readers)

The quiver is basicly made from 3 pieces of wood. A thin (6mm/ 3/16") board for the back and bottom, and a thick piece for the concave front.
Be sure to plane the backside og the front piece before you start shaping and hollowing, because you need an even surface for laying out the rabbet that holdt the back. This is done after the hollowing is done.

I started by roughly shapeing the outside with an axe and a bandknife.


The inside is shaped by holloving the thick front board. I used gouges for this, but if you have an adze, I will recommend using that. The final thickness of the front piece should be no more than 6-8 mm (3/16"-4/16"), but leave it a bit thick at the mouth, so there is wood enough to carve the lips at the top.
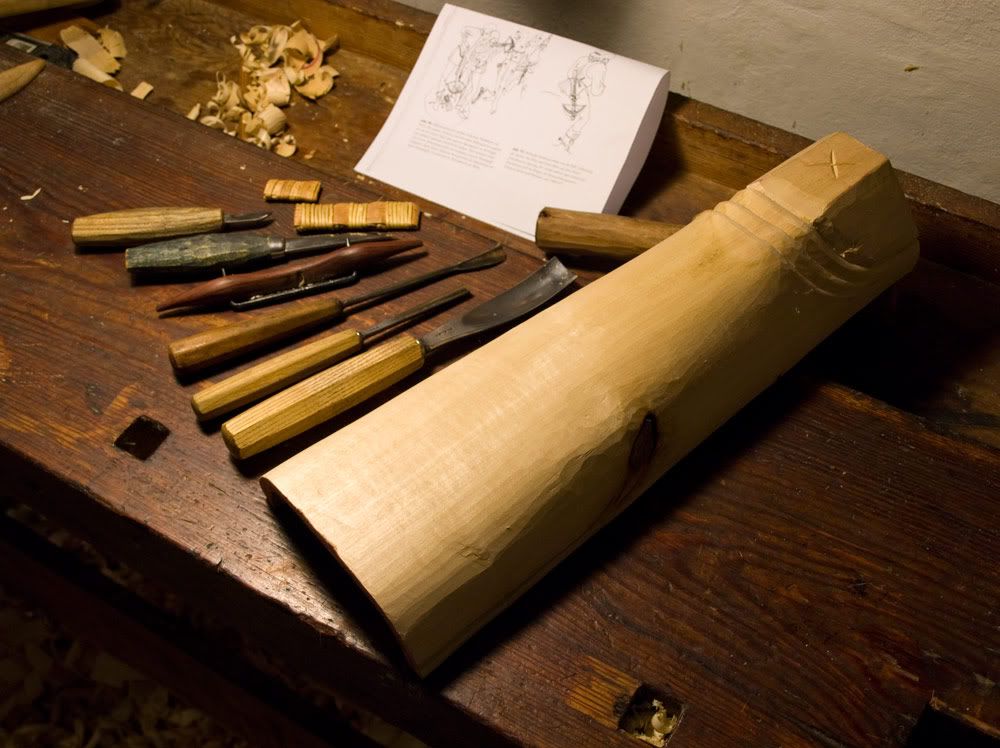
Tools (Left to right): Chip carving knife, mora-knife no. 106,
 small wooden spokeshave, backswept gouge, v-tool,  spoon-bent gouge.
After hollowing the front I started carwing the lip at the mouth of the quiver. I used a couple of different gouges for this, but my chip carving knife and mora-knife also came in handy. I also remembered that i had a backswept gouge for carving convex shapes and ended up using i quite a lot for this part of the project.

The outside shape was refined with a small spokeshave and a scraper. Lastly i sawed out the mouth with a coping saw. 
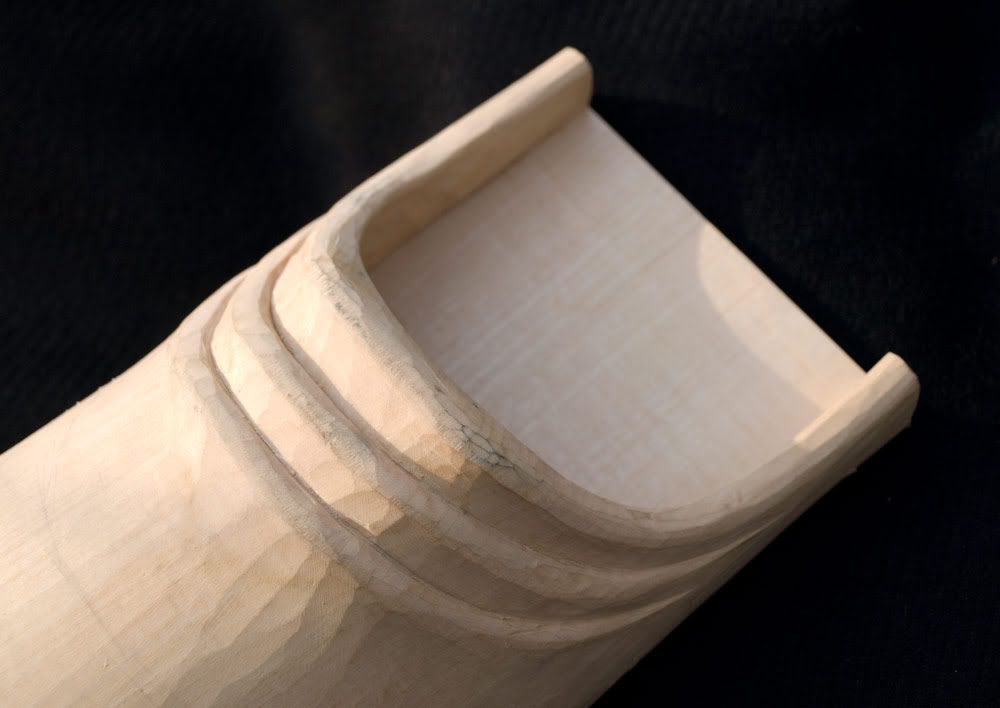
The lips are slightly undercut.
An important thing about the lips is that they have to be big enough to still be plainly visible when covered with leather. So make sure you make them a bit larger than you think nessecery.  

The good thing is that you don't have to worry too much about the final finisk of the survace. The toolmarks will be covered and evened out by even a very thin piece of leather. The lover part can be even more rough as it vill be covered in fur.
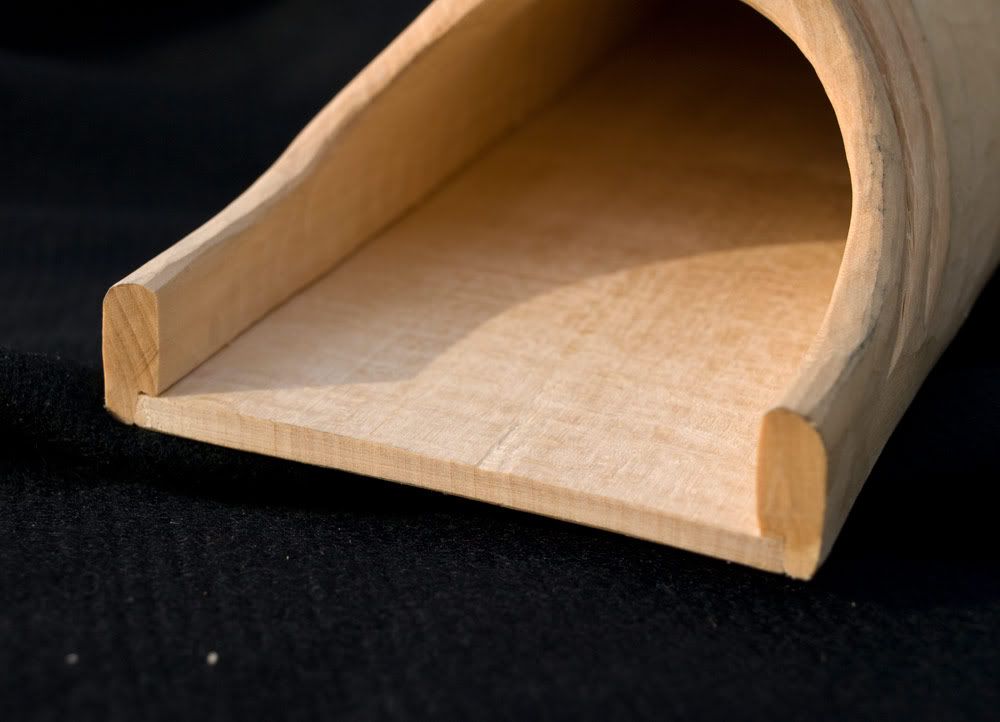
Rabbet
Here you can see the rabbet wich the back board is slotted in to. The three pieces are glued and pegged togeather. I used 3mm pegs made from some dry birch that I had. 


One of the pictures of surviving quiverse that my friend showed me, had a small hatch on the back. We thought that it might be for inserting bolts into the quiver without the risk of damaging the feathers. But after making a similar hatch on this quiver I can safely say that this i not the case. The hatch on my quiver is actually a bit larger than tha one on the original, but it is still to small to allow room enough for a bolt. The bolt will be jammed between the bottom and the front, before it can be fully inserted.

But the hatch seems to be a neat feature none the less... Just have to figure out what it's for :-)


The bottom is also joined to the front and back with a rabbet, glued and pegged.


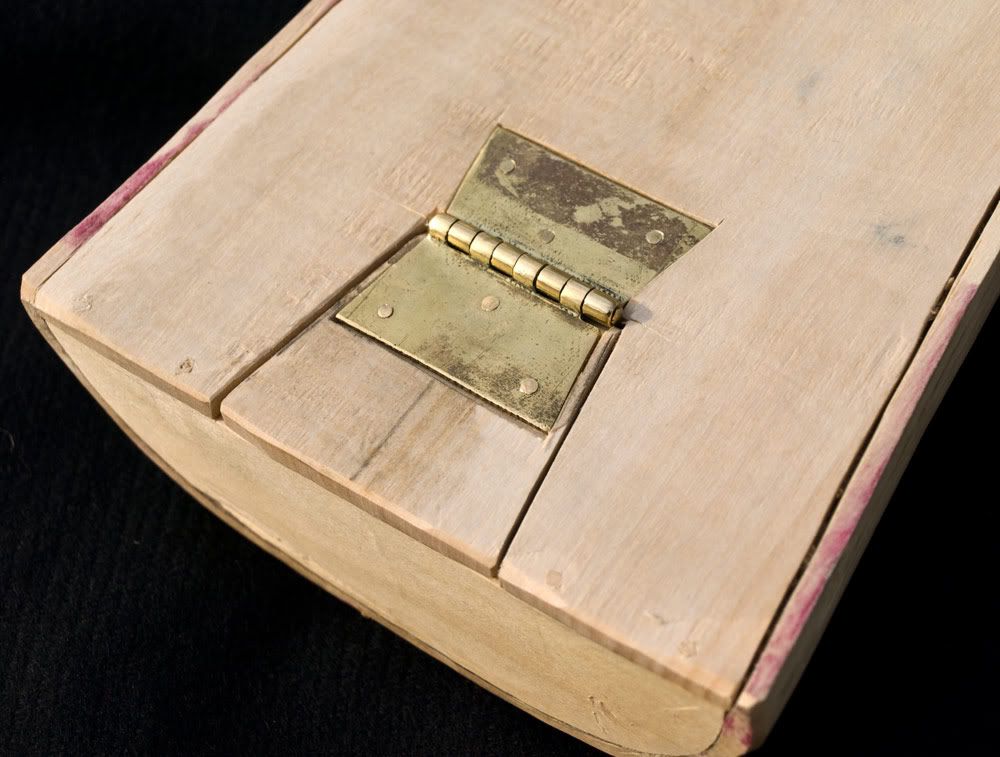
The plates of the hinges will be covered by leather, so I thought that I would just show it off before it gets covered. I am quite pleased with it.
Its made from brass plate and riveted to the back, using cast brass nails, that have been cut to length.


Hope you enjoy the reading. Feel free to comment.
I am really looking forward to doing the covering, and it is nice to be writeing again :-)

Saturday, July 2, 2011

A new workshop for me, and a small birthday present for Louise

A wonderfull thing happened in decempar last year. I got myself a workbench!

I have been doing woodcarving for a couple of years now, and have been making all kinds of small stuff at home. Things like spatulas, spoons and other household items. This is always nice to do, but i have been aching to make something bigger.
I have been looking at old danish and scandinavian furniture for quite a while. Looking for inspiration for all kinds of stuff.
I have also been collecting a lot of tools, like planes, saws, chisels and the like.
... Now I just need some wood, so I can get going on a larger project.

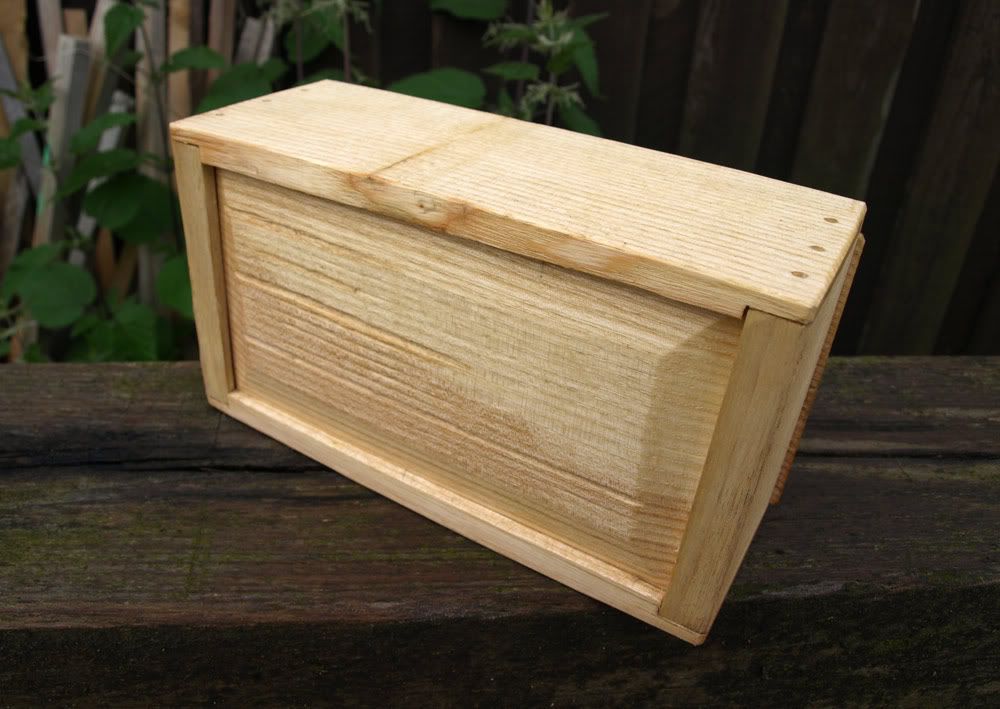
The last couple of months have been dedicated to school and I have not been able to get a lot of Workshop-time. One thing that I found the time to do is this sliding lid box. A birthday-present for Louise.


This box is the first project that I have made using only handtools. And I must say that it was a real joy to do. It is great to experience how much you can actually do on your own, without using machines for the job.
Of course it takes some practice to learn how to use the tools, but that is all part of the joy of working wood.

I made the box from some riven ash, that I had left from when I made the shaving horse. It proved to be very nice wood to work with.


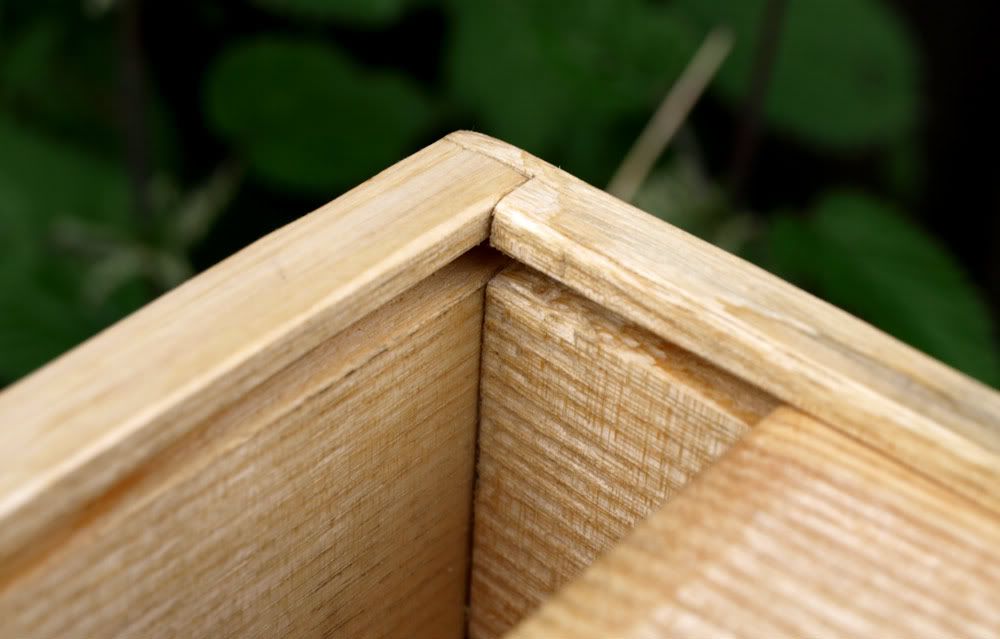
Both the bottom and the lid fits in to a groove in the top and bottom of the box. The corners are joined with glued rabbets and wooden pegs.
The joinery definately could have been more precisely done, but I like the box all the same.

Doing these small projects is a great chance to try out different techniques and think about the process of working. Especially efficiency of wokring is a good thing to think about. When working with hand tools you can end up spending too much time on the different steps of the project. I find that I enjoy working more, when I feel like I am getting somewhere. If things take to long to do, it gets boring. The best thing is when you are working efficiently, without compromising the quality.


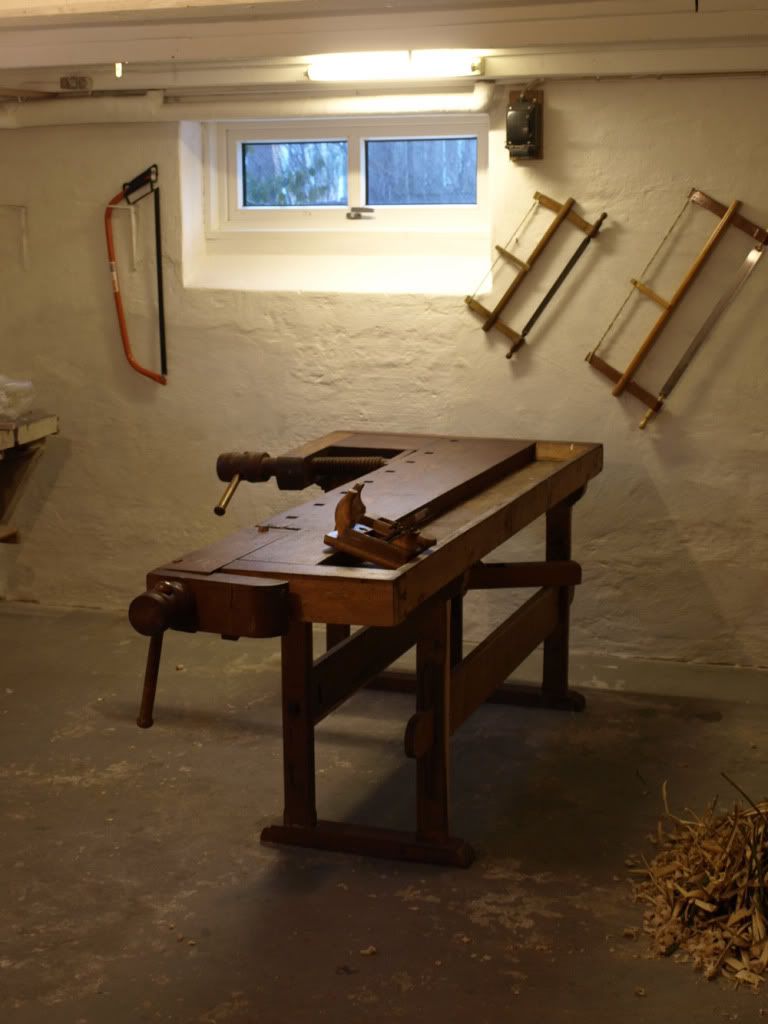
Lastly I want to show you my new (old) workbench. A real beauty!
I put some grease on the spindles and after that it worked like a dream.

I dont know how I even got by without this tool in the past. It really is a very versatile tool to have in the workshop.


Thursday, March 17, 2011

Pouch purses

I realise that it has been quite a while since my last update. My last post was in may last year... So I quess it's high time that I post something new.
The lack of posts does not mean that I have not been making stuff. I certainly have. Just never got round to putting it online. It's time to do something about that.

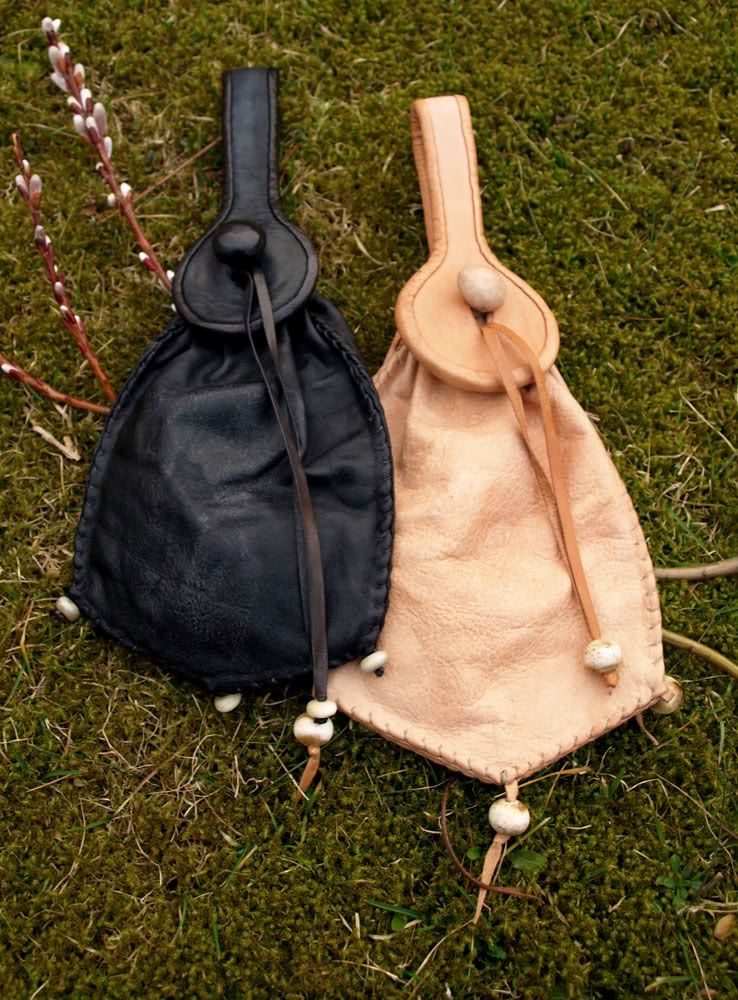
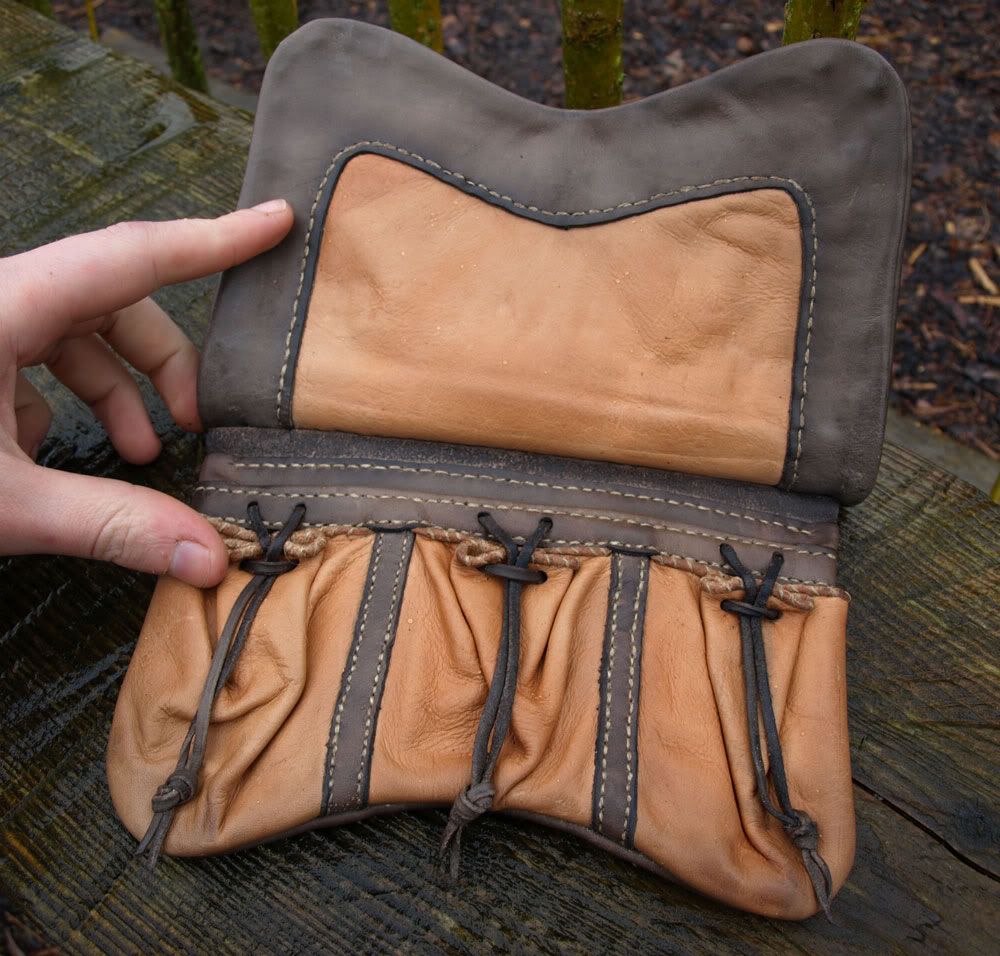
The first post is the latest project. Two 15th century pouch purses. A type of purse worn by men and women alike.


The main compartment is a pouch, seperated on the inside into two seperate compartments. It is all joines togeather with stitches sewn from the outside.

The buttons have a wooden core and are wrapped in leather. Same type of leather as the pouch is made from.

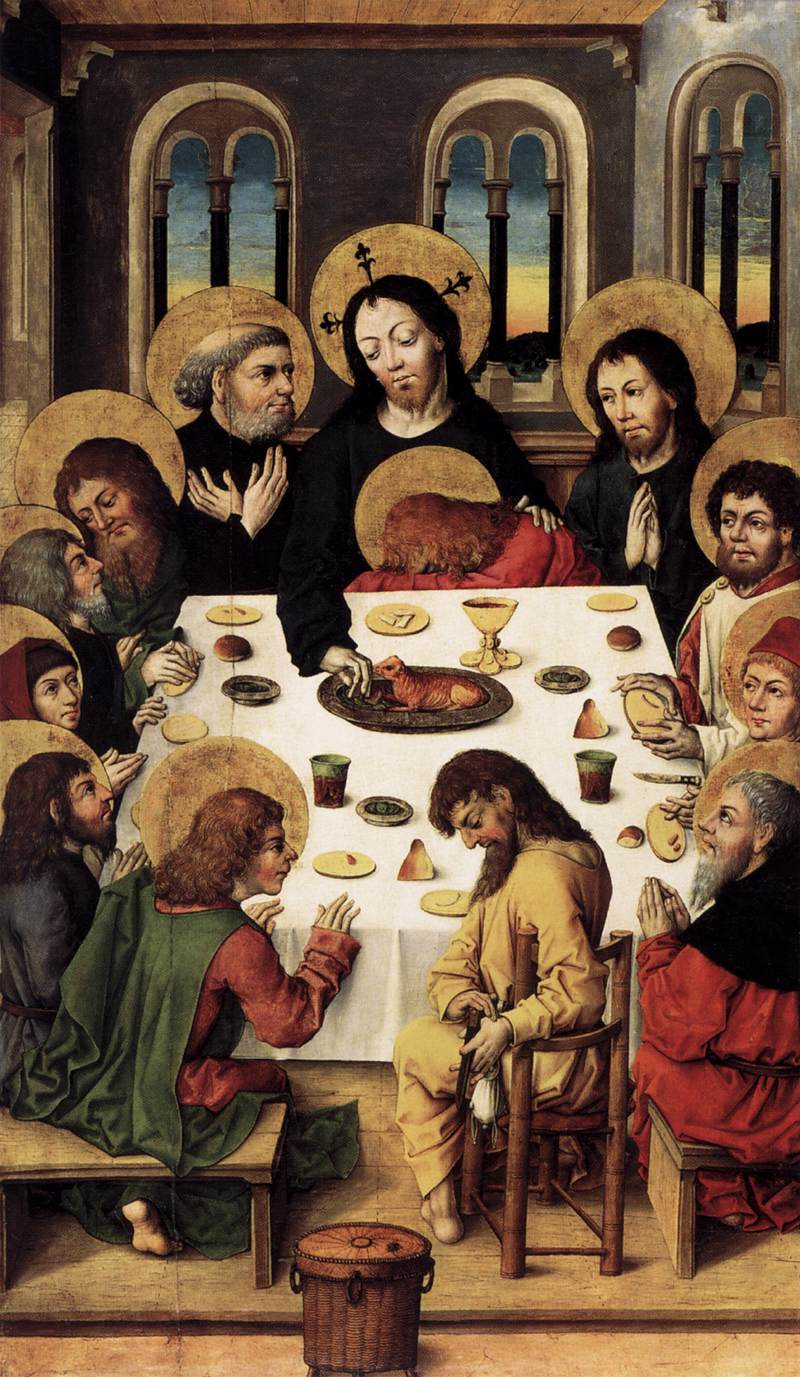
The inspiration comes from two different places. A painting of the last supper and of course "Purses in Pieces" by Goubitz.

Hope you like them :-)

... And shame on Google for changeing the system that I used to use for reducing the size of pictures!

Wednesday, February 24, 2010

Bollock dagger

I have had this blade for a bollock dagger lying around for almost two years now. So I thought that it was due time to do something about it.
Therefore I spent some time during my winter holiday carving a handle for it.

I first ordered the blade when I saw this bollock dagger at the National museum in Copenhagen a couple of years ago. I really liked the octagonal handle and wondered why I hadn't really seen any reproductions of these daggers with that type of handle.
My handle is not a reproduction of the one I saw though. Just inspired by the shape of it.

Here is the one I made:


The handle is made from the root of waht I believe was a cherry tree. I'm not exactly sure, since It had been on the ground for a long time. The bark was falling of and the leaves were long gone. But I managed to get a good chunk of one of the roots sticking up from the ground.


The scabbard-design is inspired from some of the scabbards in "Knives and scabbards" and is made from two layers of leather.

Monday, February 22, 2010

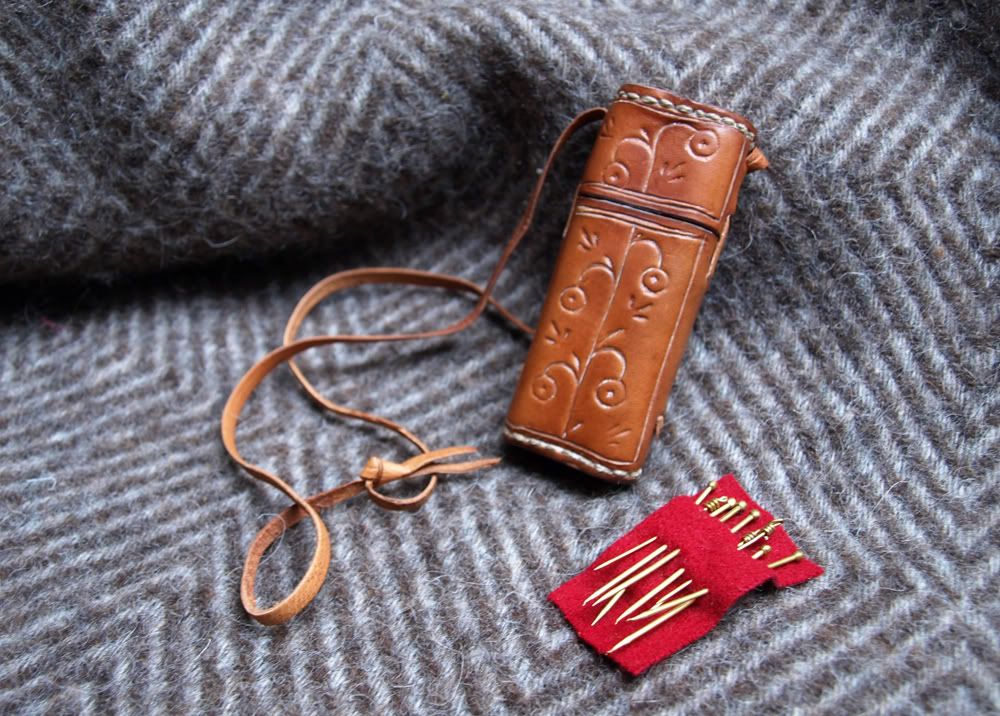
Needlecase

It's been a long time since I did one of these. So I decided to make one.
Hope you like it.

I made the inside from a piece of half tanned leather. This gets very stiff after drying, so the inside won't get wobbly after some time of use. If the inside gets soft it can't keep the top in place, wich is a problem.

Saturday, January 9, 2010

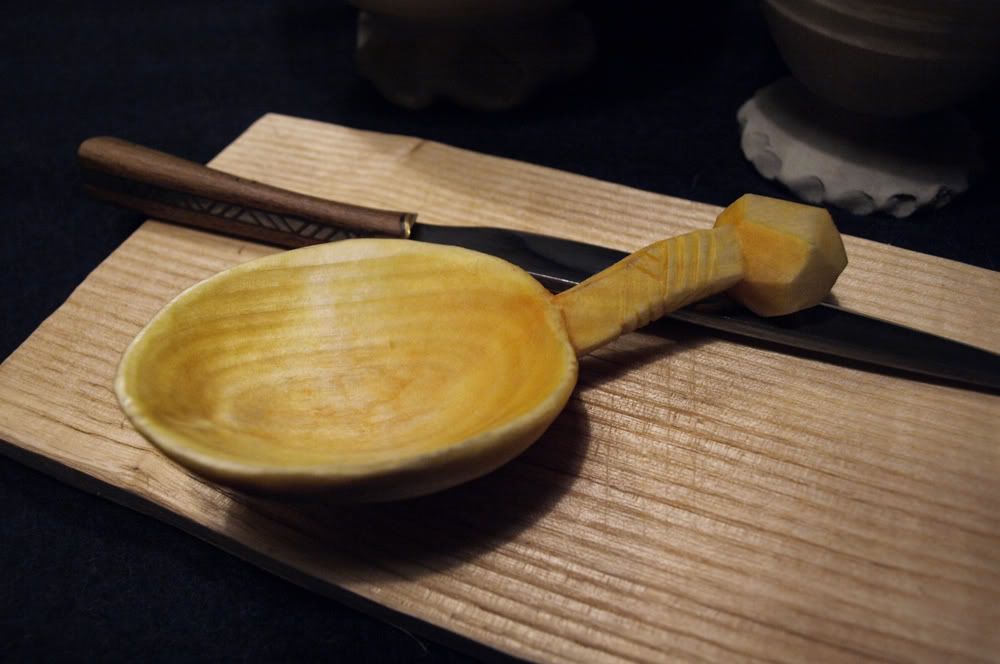
Spoon carving

As I am writing a project for an upcomming exam, I was getting desperate to get to do something other than writeing. So I decided to do a bit of carving.
The result is this spoon.


It is based loosely on a type og medieval spoon. Charaterised by a wide cirkular bowl and a quite short handle.
This one is carved from birch wood (Betula pendula).

The inspiration came from this 15th century spoon... and the spoon to the right in this picture (From Nationalmuseet in Copenhagen)

The trick to eating with a spoon like this is to drink from the edge of the bowl rather than putting the whole thing in your mouth.

Thursday, September 24, 2009

A treatyse of fysshynge wyth an Angle


Sometime a couple of years ago I came across this text somewhere on the internet. I have read it several times and thought that I would recomend it to all you reenactors out there.

It is nothing less than period instructions to making, fishing rods, lines, hooks and catching bait.
The original text was first printed in 1496. And I believe that I have read somewhere that the text was written sometime in the earlier (around 1465).
Additional info can be found HERE.

What I really like about the text is the very detailed instructions on how to make a variety of items that the fisherman needs. Not only the preparation of the rods, but also how to make hooks from needles, how to make lines from horsetail-hair (and dye them in the correct colours), as well as where to find the correct worms and other animals for bait.
Even tools and matierals are described thoroughly.

The entire text can be read here: http://www.uoregon.edu/~rbear/berners/berners.html


Sunday, August 23, 2009

Another ladies purse

Just this weekend I finished another ladies purse. It is basicly the same design as the last one. This new one has two pouchlets, rather than just one and it is a bit larger. The pouch measures 20 x 20 cm.


I also found this picture from the Mendel Hausbuch at this fantastic site: Die hausbücher der Nürnberger Zwölfbrüderstiftungen
(It contains a great amount of 15th century craftsmen (as well as 16th and 17th century craftsmen))

A purse very similar to the one I made lies on the table.

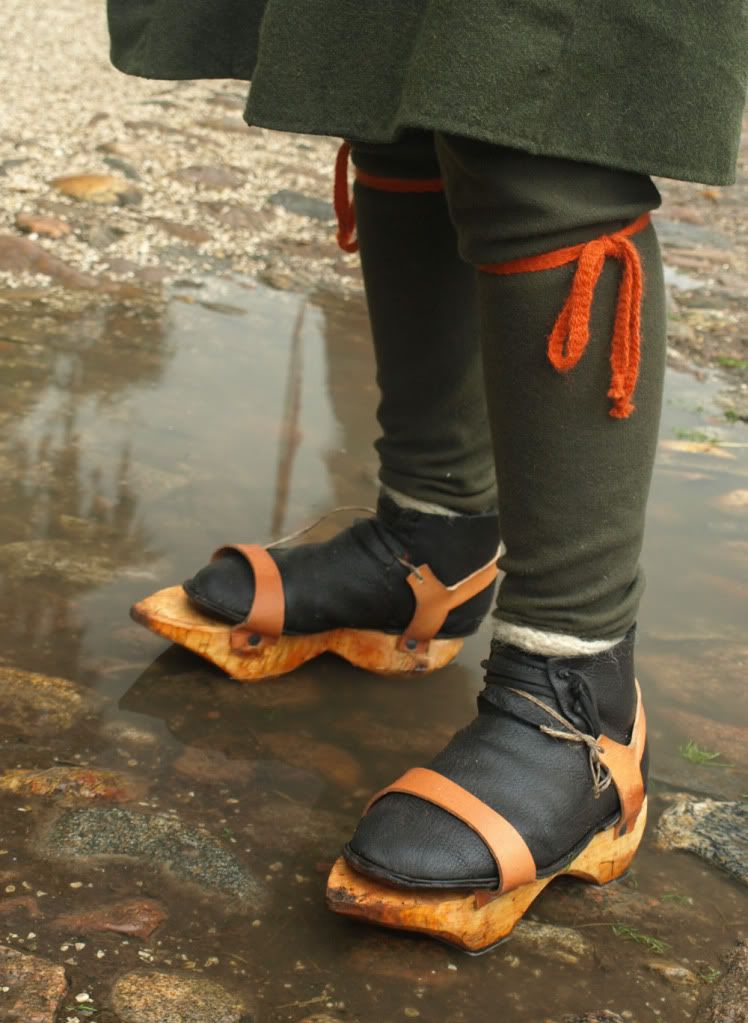
Pattens

Tha last project I did at Voergaard was a pair of pattens. They were made purely out of necessity, as we had a lot of rain that week.

They are made from alder (Alnus glutinosa), which was cleft and worked from the still fresh wood.
Alder will get very light when it dries, so the pattens won't be too heavy. Poplar or willow would also do just fine for pattens.

The most important thing about making pattens is to place the raised wedges in the right position, so it won't hinder the movement of the foot.
They need to be places right under the heel and right where the toes bend when you take a step.


And I really recomend people using medieval shoes (with leather soles) to get a pair of pattens!
They keep your feet warm and dry, and they make a fabulous noise when walking on cobblestone pavements :-)
Thursday, July 23, 2009

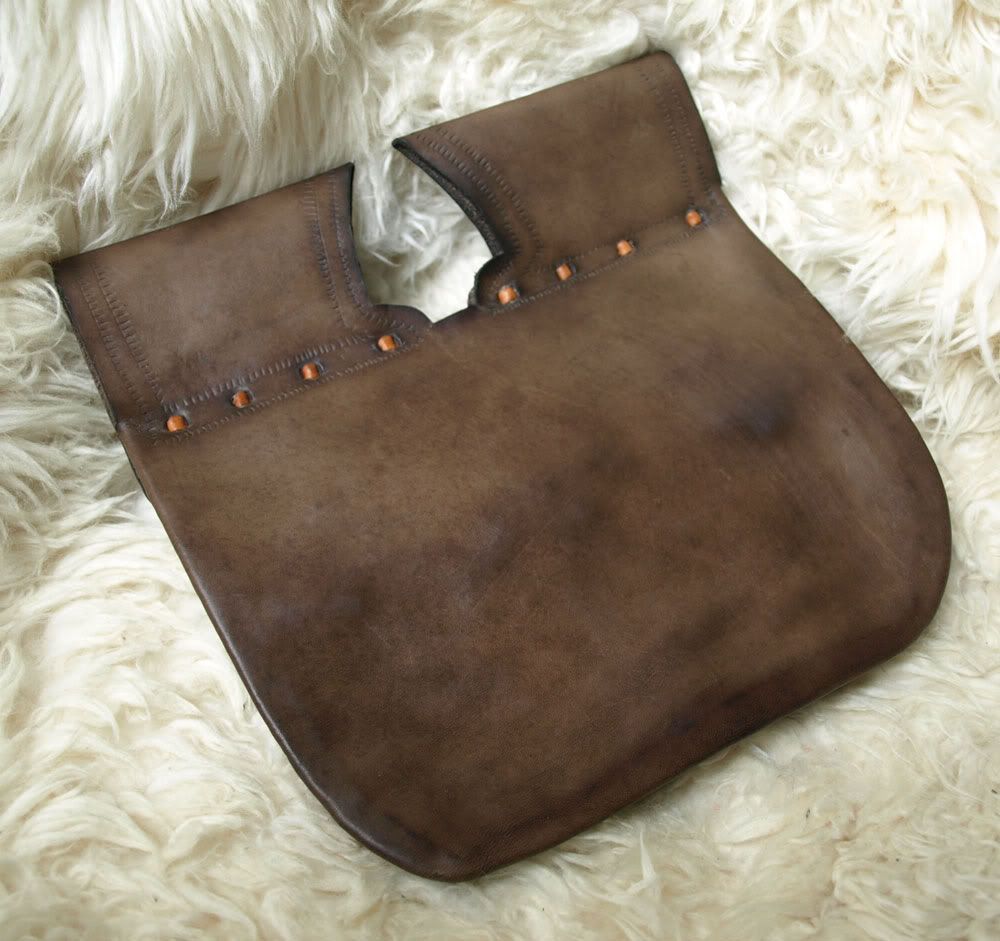
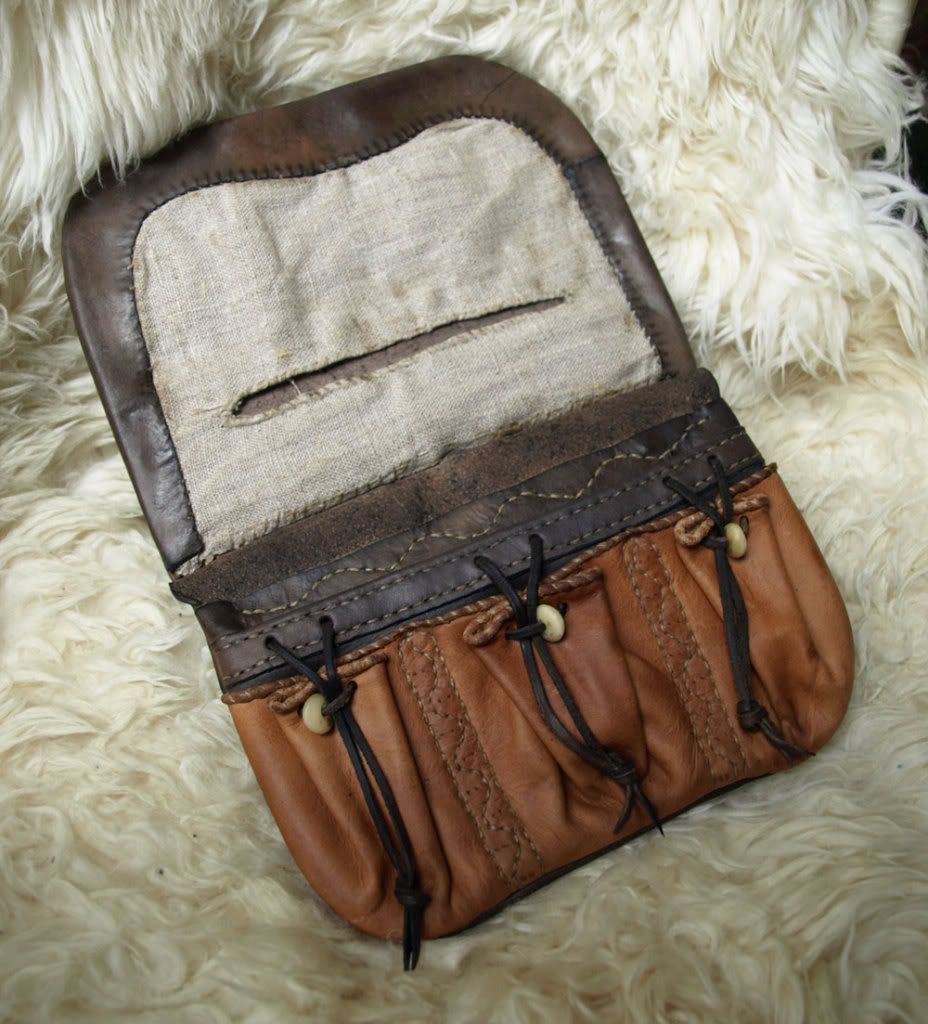
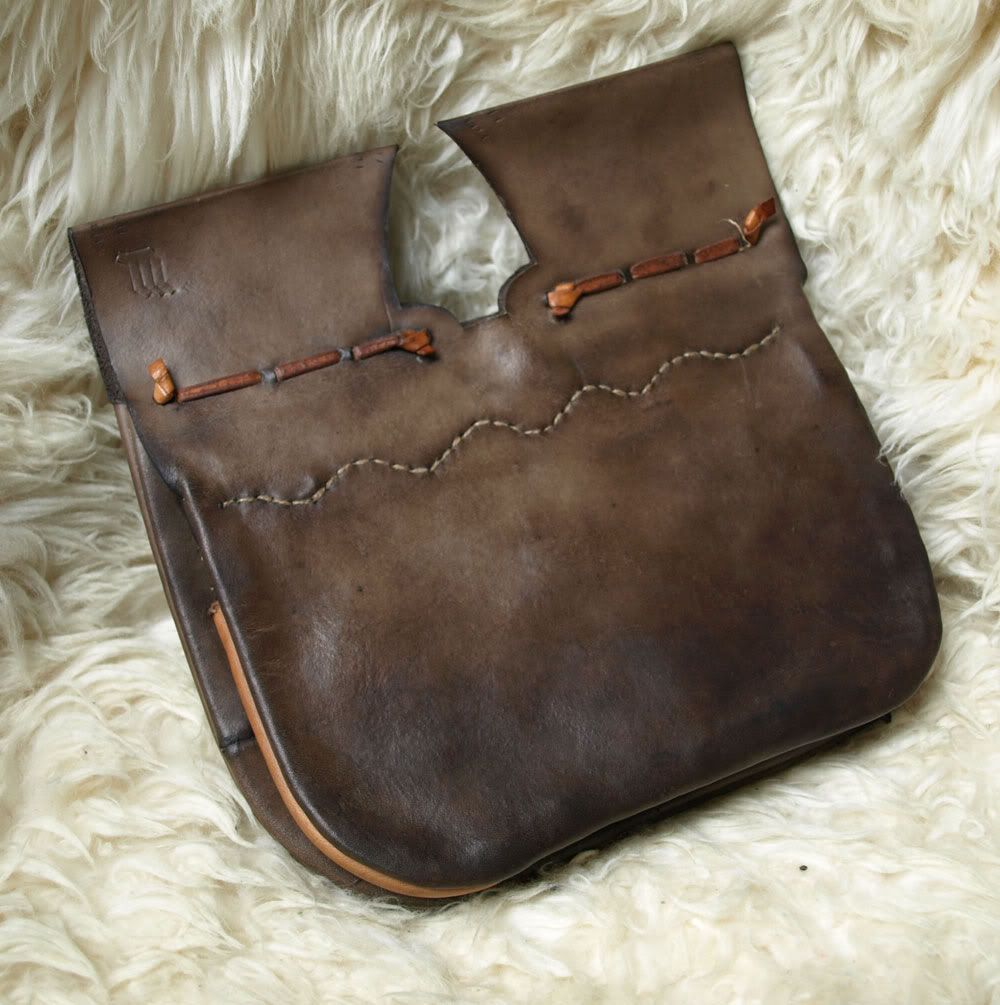
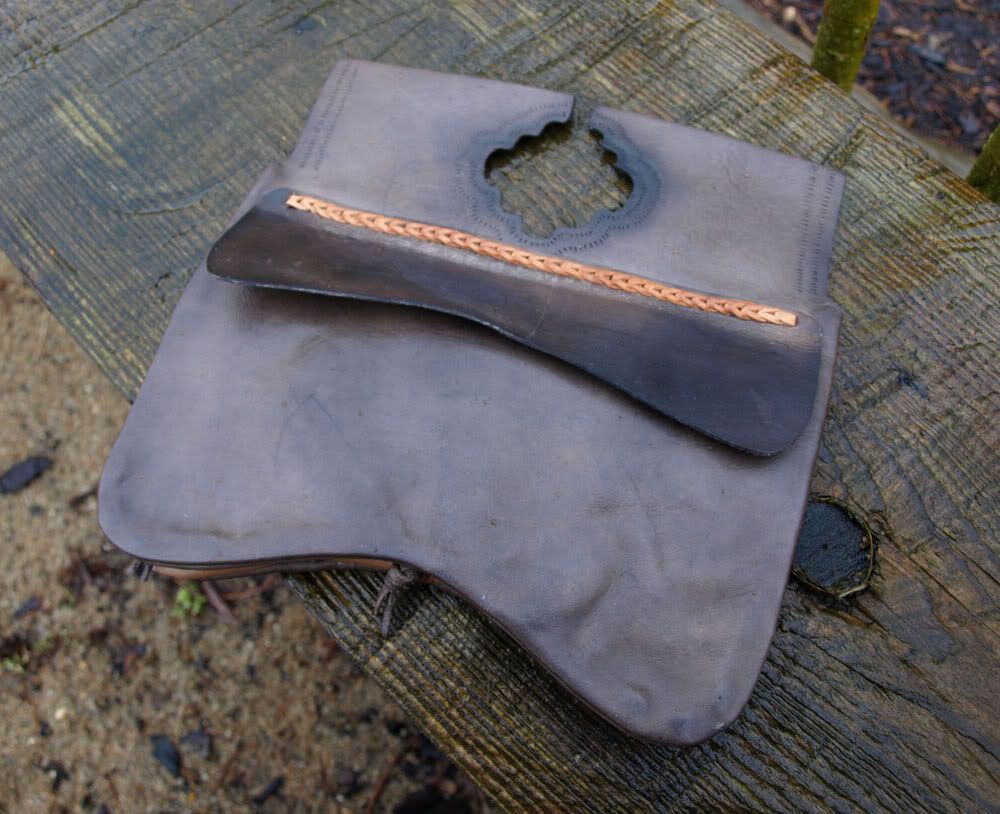
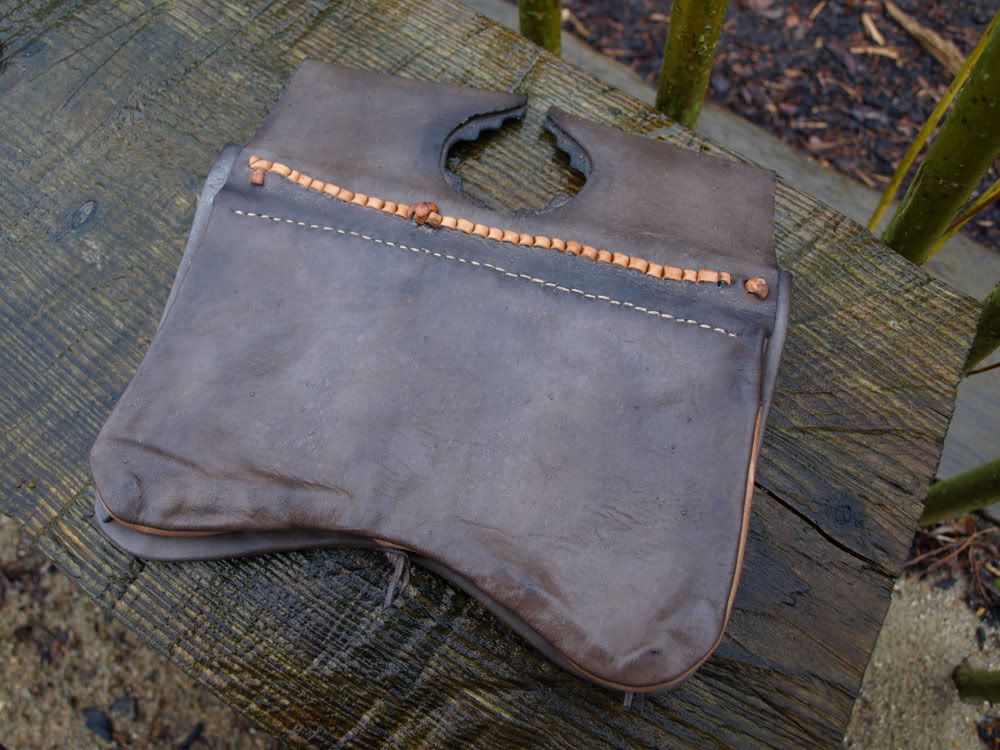
15th century girdlepurse

At Voergaard I also made a girdlepurse.

The most interesting feature on this purse is the decoration on the flap. I have never made a purse with a decorated flap before, so this was something to try out.

The decorarions are made using an awl, but later I will try using a wooden board with some carved lines, and press the leather into those. Hopefully this will result in deeper lines.

Photobucket

Photobucket

Photobucket

Wednesday, April 29, 2009

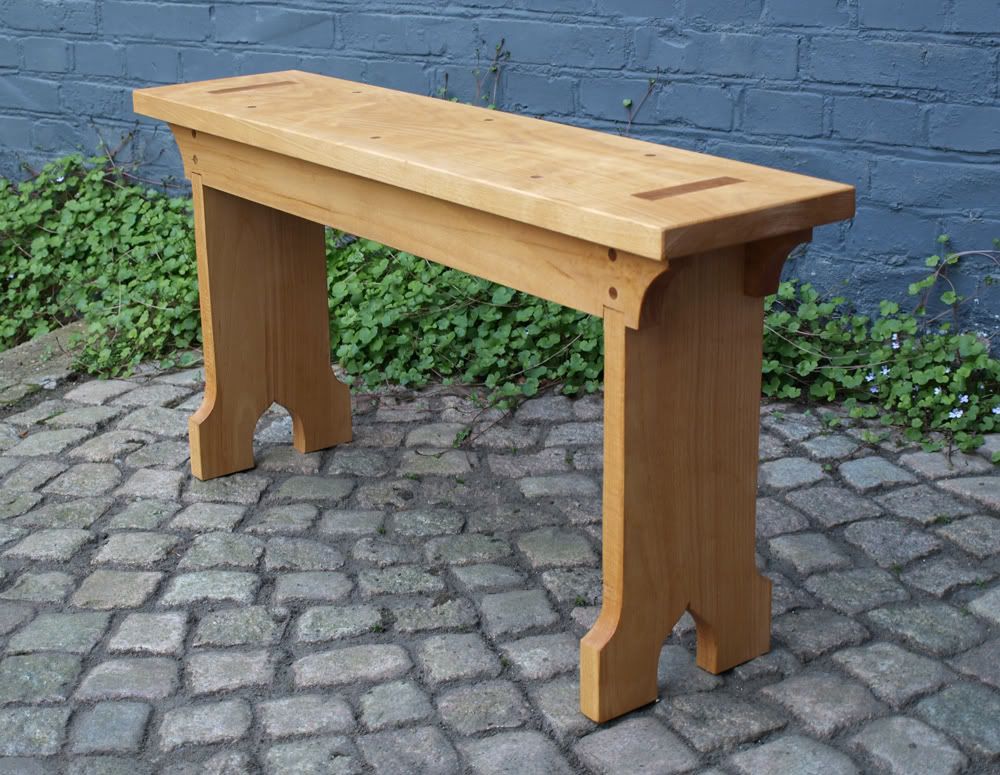
15th century bench

I am currently working on some new furniture to put in our (soon to be finished) tent. I am working on two tables (+ trestles), some tent-poles and I am also going to make at lantern.

But today I finished a small bench.

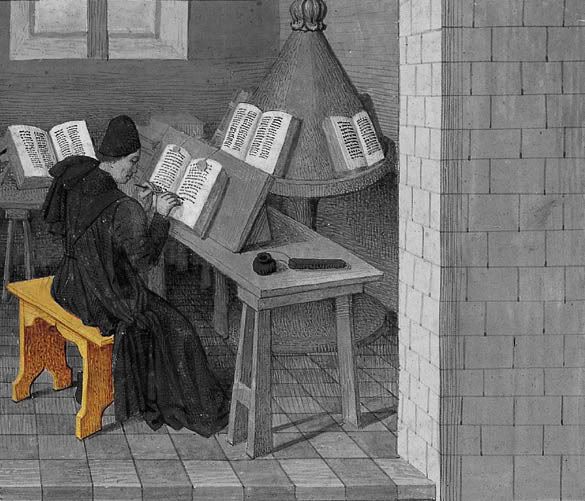
The bench-type that I have made can be seen on various 15th century paintings, and seem to be very common. It can be found in many variations, both simple and vith lots of fancy carvings.


I went for the simple style.


The construction is very simple and seem to be quite stable. So it was a nice project for a novice woodworker like me.
Again I used beech wood. And the whole thing is held togeather with wooden dowels (no glue).

The bench is 90 cm long, 25 cm wide and 45 cm high.


Here is a picture from 1475 of this specific type of bench. I am also going to make a couple of the 3-legged trestles that you see holding the table.


Hope to show you more furnifure soon!

Wednesday, April 22, 2009

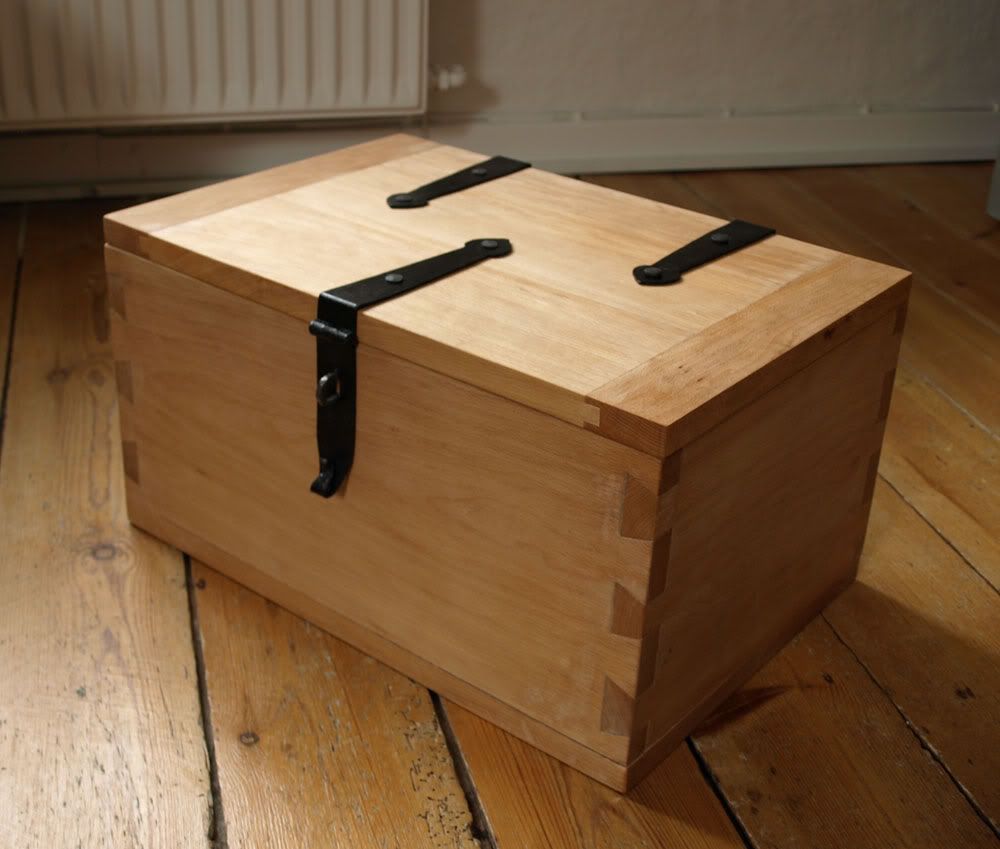
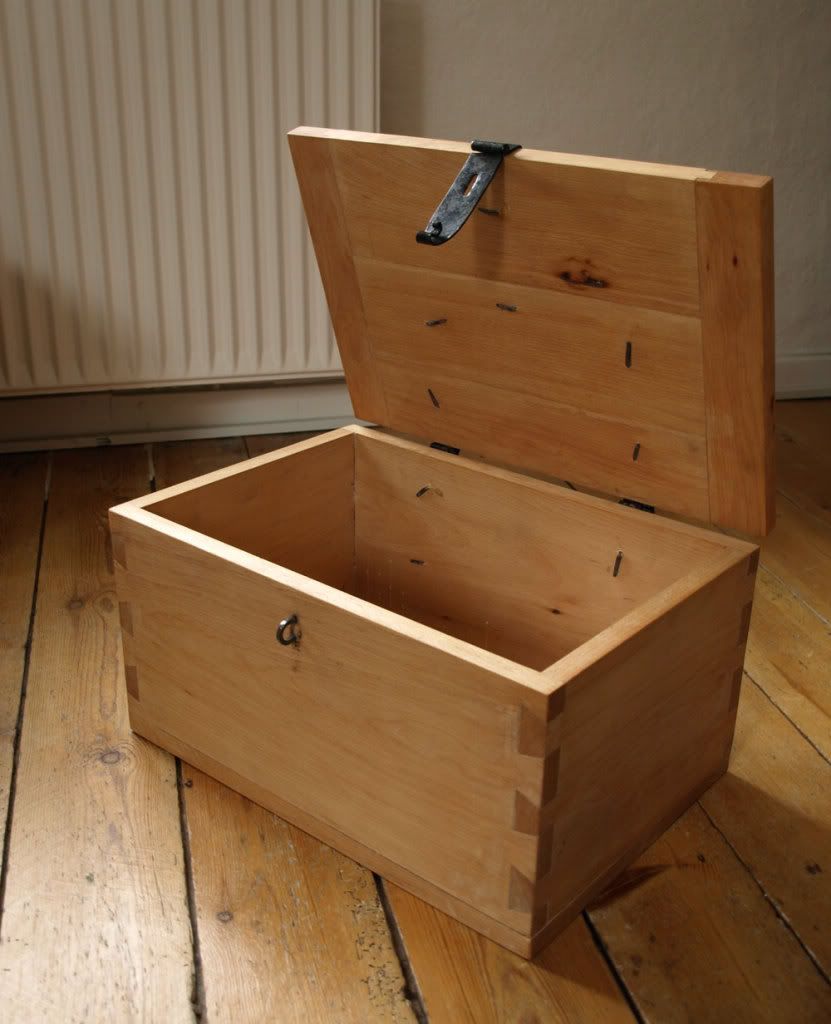
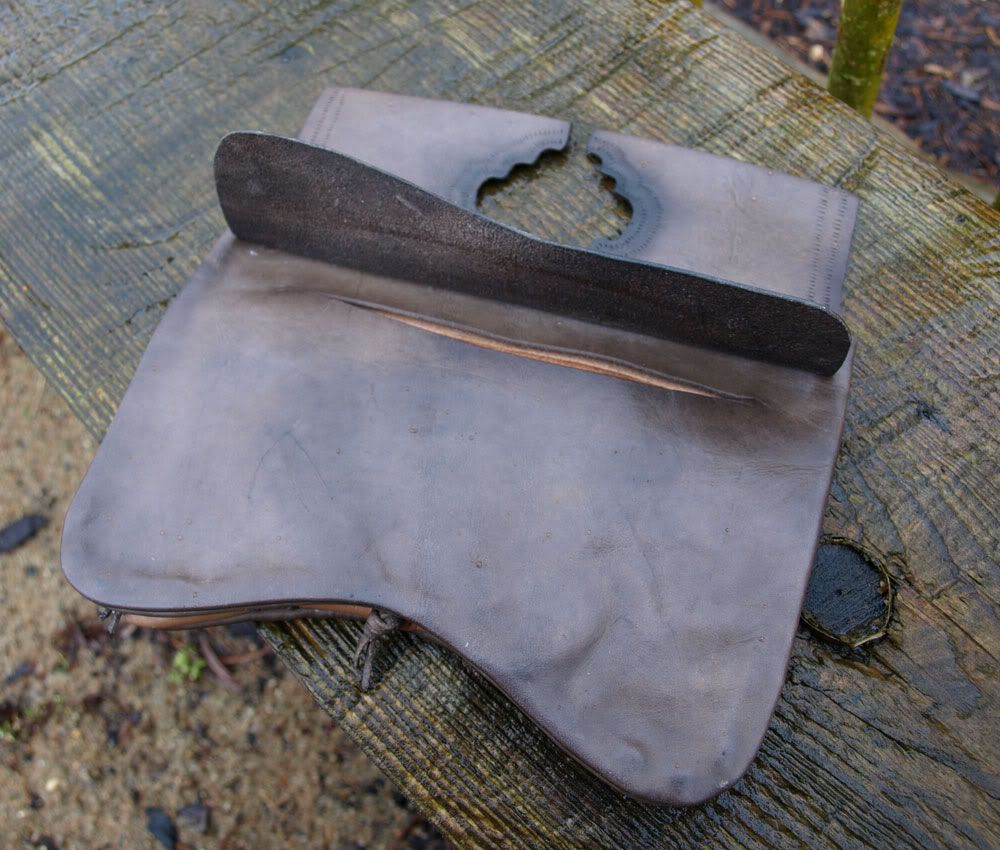
Toolbox

This is a box that I have had lying around half-finished for a couple of months. I made the box myself sometime before Christmas, but have been waiting for at friend to make me some nails.

Yesterday I recieved them in the mail and spent the evening drilling holes and hammering in the nails.

Now I have a nice sturdy toolbox!


The box is made from beech (Fagus sylvatica). A very common tree here in Denmark.


The design came from a chest that I saw at mittelalter möbel, so I´m guessing that the technique is somewhat authentic. Although it isn't based on a particular find.

I really liked this project because it´s (almost) the first wood-working project that I have done. And thus I learned a lot from it. Now I just hope to get to do some more of this type of woodwork! Eventhough most of the sawing and planeing was done using modern powertools I sawed and chiseled the dovetails by hand.

Now I just need to fill it with tools :-)
Saturday, March 28, 2009

Purse from Dordrecht

Another purse finished!

This purse is also depicted in "Purses in pieces" and was found i Dordrecht (Holland).

The front compartment has its opening on the inside of the front flap. And this time i decided to make the front compartment from textile, rather than leather.
the description of the purse said thet the front compartment had been made from either chamois or textile.
I used unbleached linnen canvas.

(BTW: If you know where to get good quality chamois. Please tell me!)


The reason why I wanted to make this purse is the three pouchlets.
They are made from a single piece of leather. All the other purses I have made have pouchlets made from seperate pieces.
I think this solution gives the purse a much simpler look.


The dye that i used for this purse is the same that i used for the Nieuwlande-purse.

Thats two purses done. Now theres only two more to go :-)

Monday, March 23, 2009

Purse from Nieuwlande

Time for another purse! :-)

This time it´s a find from Nieuwlande (Holland), and based on drawings from "Purses in pieces" by Olaf Goubitz.
I can't supply you with a dating of the purse, as the author does not provide one. All I can say for certain is that it is medieval... Late medieval that is.

I decided to make this one because I really like the stabbed decoration and the shape of the girdle loops (or rather the space between them).


The binding is a typical split seam and the front compartment opens to the front of the purse rather than on the inside.

The leather was coloured using a mixture of iron and oak galls. The result is a nice bronwnish black.
After compleation the purse was greased with a mix of tallow, beeswax and pine tar. This gaves the purse a pleasant smokey odour.


On the inside are 3 small pouchlets.


And here you can see the opening to the front compartment.

The things that weren't preserved from the original are: The binding, the front flap, the pouchlets and the dravstrings.
Therefore these things might not correspond with the original purse. These parts of the purse are therefore based on guesswork - I hope that I have come close.

This is the first of 4 purses that I am currently working on. So there is more to come!

Friday, February 20, 2009

A couple of weeks ago Louise and I went to visit some friends (and hopefully soon-to be contributors to this blog).
We had a very pleasant experience and got to try some new and interesting crafts.

For my part I got an oppotunity to try some blacksmithing. This was something new to me, and also a very enjoyable experience!
I starded by making a couple of S-hooks (wich I wont post any pictures of) and went on to make an eatingknife for Louise.
I won't get into the details of the whole process, but I will post a picture.


Tha blade was forged from spring steel and the handle is made from beech... and I'm pretty pleased with the result. Especially since it's only the third thing I have ever tryed smithing. Perhaps it's only beginners luck ;-)

Monday, February 2, 2009

Leather costrel


In my last post I mentioned some "advanced stuff" that I was working on.

Well now it is done and I can finaly show you some pictures of what I have been doing.
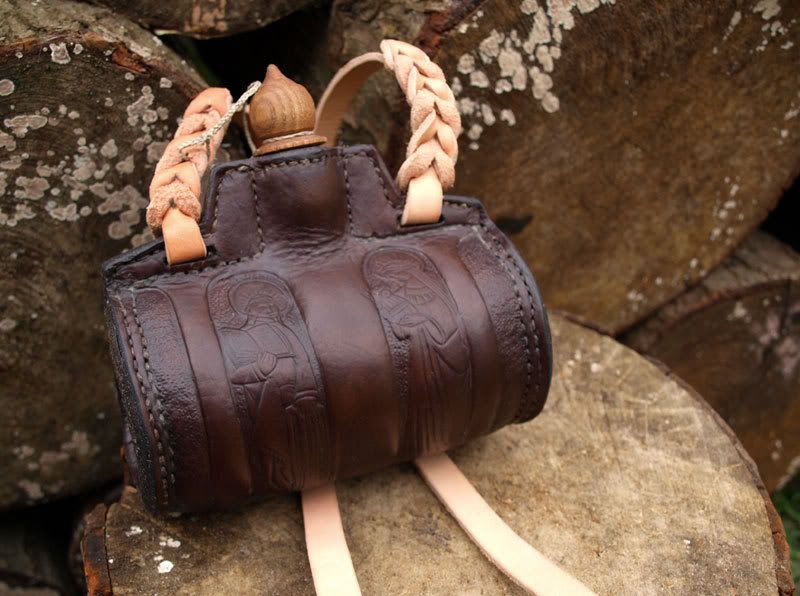
This time it is a leather drinking bottle (also called a "costrel"). It is a bottle made from relatively thick leather (I used 2-3mm vegetable tanned leather) that has been sewn togeather, and lined with pitch (A cripy, yellowish resin derived from pine-trees) or beeswax (wich I used).

The costrel is decorated with pictures of saints that I copied from some very nice frescoes in Sahl church. A small church situated near Vinderup here in Denmark.
The frescoes are from ca. 1500... give or take a couple of years...


- Front and back of the bottle. The cork is made from oak.

Some of the edges of the costrel consist of several layers of leather. The top of the bottle where the strap is attached is made from 4 layers. The sides are made from 3 layers and the "mouthpiece" is made from 2 layers. The thick edges help to waterproof the seams, and the seams were actually almost watertight before I coated it with beeswax.

All seams were done with a double thread. Otherwise the thread would tear through whilst sewing with it.

- This is the bottle before I cut the holes for the strap end dyed it.

The extra layers only cover the seams, and does not extend more than a couple of millimeteres into the inside of the bottle.

When I cut the pieces to be sandwiched between the outer layers of the top the costrel I only cut the size to fit the inside of the bottle. When I have sewn them in place I trim down the excess. This makes it much easier to get a nice finish on the edges (I also sanded the edges with some sandpaper to get a nice even surface, and to remove some bad cuts that I made)

In the sides of the bottle I just insert a band of the same with as the seam allowance.


- The overlapping cut of the band and the inside of the bottle.

The band that I have sewn in to the sides and the mouthpiece are both cut exactly to size, and the edgs are cut at an angle to make a tighter seal.
The side piece is an almost "pearshaped" piece, that is pushed into the side of the bottle, while holding the "welt" or band in place. This is a bit tricky, and maybe it is easier to just start sewing in one side and then fit the side piece into place as you go...
Start by sewing the inmost seam.

Also I should be mentioned that the shape of the side piece determines the shape of the bottle. So if you want a flat bottom for the bottle to stand on, the end of the side piece should have a flat bottom too.
- This is the side of the bottle after the side piece has been sewn
in place (and the edges have been trimmed off).

When I had finished sewing the bottle together I dyed it with wallnut shells (as explained in an earlier post), rinsed it under running water and, stuffed the (still wet) bottle with dry sand.
You really have to force in the sand to get it tight enough to expand the leather. I used a funnel and the wide end of a chopstick to do this.

The bottle won't get much bigger, but it should expand a bit.
It is important to really pack the sand tightly in the bottle, beacuse makes it easier to mould the ornaments later on.
Now the bottle should be left to dry, for a day or two or until the leather has become completely dry.

If you want to do some ornaments on the bottle it should be done now... If not, it is ready to be sealed with wax.


- The braid on the strap.

To seal the bottle you need some beeswax, a hot oven, a small paint brush and a pot for melting the wax. First melt the wax. I do this in a pot directly on a hotplate and it works fine a long as you make sure that the wax won't burn the leather. Do this by holding a small scrap of leather into the molten wax. If it starts bubbleind around the piece of theater the wax is too hot. If no bottles can be seen the wax is fine.

The molten wax is then poured into the bottle and slushed around the entire inside of the bottle. Especially the seams!

Do this a couple of times till you feel sure that you covered everything.
Maybe the wax will start seeping through the leather and turning the colour darker. This is ok!
Now put the bottle in the oven and turn it on (Ca. 100 degrees celsuis). When the bottle is heated the wax will start seeping through the leather (this happens because all the pores in the leather are filled with wax)
Turn the bottle around a couple of times so that the leather sucks up all of the molten wax inside the bottle. Most of the bottle (maby exept for the edges) will turn dark.
The places that doesn't absorb the wax can be painted with molten wax from the pot, using a brush. Put the bottle back in the oven so the wax can be absorbed.

When the bottle has become dark all over it should be left to cool.
When the bottle is cold, puur in some water to make sure it is watertight. If it isn't you should pour out the water and let it dry. Then pour in some more molten wax and make sure it sets in to the seams.

This should do the trick! (If not try rubbing some soft wax in to the leaking places).

Now your costrel should be done, watertight and quite hard.

The leather turns almost plactic-like when it is saturated with wax. It shouldn't be necessary to grease the bottle itself. This might even dissolve the wax.

Now all that's left to do is attaching the carrying-strap. You can sew it in place or make a braid like the one I did.


-Pictures of the four the frescoes from Sahl church.