
Partly because the colour-range is limited (althoug the coluors can be mixed) and partly because the dyes are far from being historicly acurate (In must admit that I don't even have a clue as to wich pigments are used in the alcoholic dyes).
Therefore I have done some experiments with "natural" dyes. Two different dyes to be specific.
One based on iron and one based on tannins.
The reason for this experiment is also that I am currently working on a "reconstruction" of a purse found at Helgeandsholmen in Sweden.
I want this purse to be as authentic as I can make it... within the reach of my capabilities.
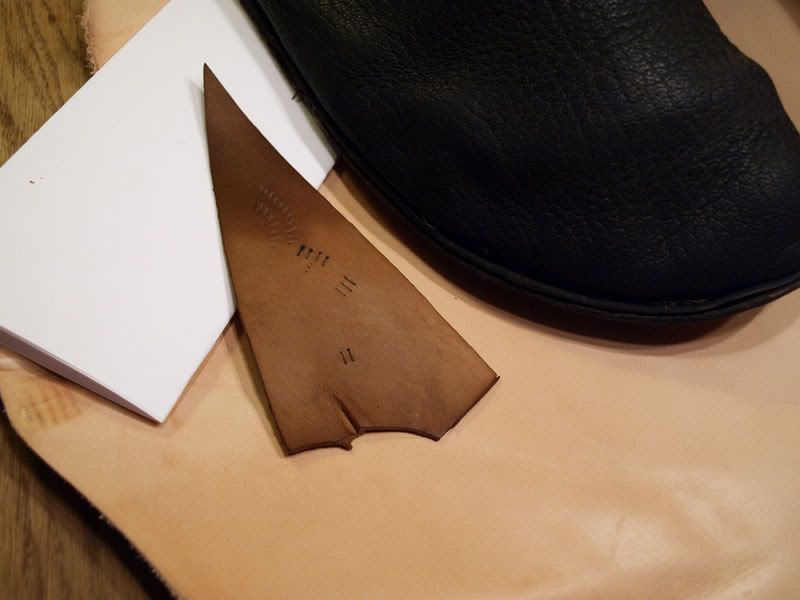
The picture above shows the two kinds of dye that I have used. The leather in the background is plain, undyed vegetable tanned leather (from a cow). The black shoe in the upper right corner is dyed with iron and the brown piece og leather in the middle is dyed with walnut leaves and shells (the green shells of the fruit, not the brown hard shells of the nut).
The paper in the background is there to give you some idear of the real depth of the colours.
Iron oxide (black):
this i made very simply by dissolving iron in an acidic liquid. The iron is dissolved and absorbed into the leather. When the leather is dried the iron oxidises and turns the leather black (a blueish black).
I used steel wool wich i immersed in water with a dash of vinegar. The tannins contained in the leather should be enough, but i added a bit of vinegar to speed up the process a bit.
The leather should be left in the water for a day or two and stirred about at least a couple of times daily.
The leather will slowly turn black... and when it is greased the colour will become somewhat deeper and darker.
Walnut leaves/shells (Dark brown):
by boiling leaves and shells of walnuts the tannins in the plant is drawn out and can be used as a dye.
The process is very simple.
Pick some leaves or shells fra a walnut tree. Put them in a pot and add as much water as is needed to barely cover the leaves. Boil the whole thing for a couple of hours until the water turns brown (like very strong cofee). Filter the dye to remove the leaves and shells.
When the mixture is cooled, it is ready for use.
The leather that is to be dyed, is then immersed in the dye and left there for 8-10 hours. Maybe longer if you desire a darker tone.
When you are happy with the colour the leather should be rinsed in running water for a short while and left to dry.
The result is a grayish brown, wich gaines a lot from being greased. This will deepen the colour (the tip of the brown piece of leather in the middle of the picture has been greased).


