Pages

Showing posts with label woodworking. Show all posts

Sunday, February 5, 2012

Crossbow quiver - Pt.1

For the last couple of weeks I have been working on a project for at friend og mine: A quiver for crossbow bolts.
I have been thinking about doing one of these for ages, so when I was aksed if I wanted to make one, I was very exited.

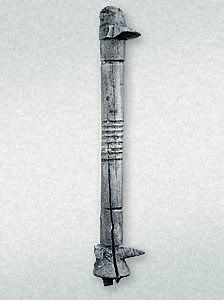
The shape and design of these quivers have always facinated me. But I had been struggleing with finding propper sources to base the item on. Luckily my friend had an article published in the "Journal of the Society of Archer-Antiquaries", wich explained the construction of a german quiver from around 1480, wich is now part of the collection of the "Stibbert Museum" in Florence (http://www.museostibbert.it/).
The article is titeled "A Quiver for Crossbow Bolts", and written by Alessio Cenni.

I read the article, looked at some period illustrations of quivers and some pictures of original quivers from the late 15th/ early 16th century. Then made some sketches and discussed the design with my friend. We arrived at something that we both liked and the I got to work.

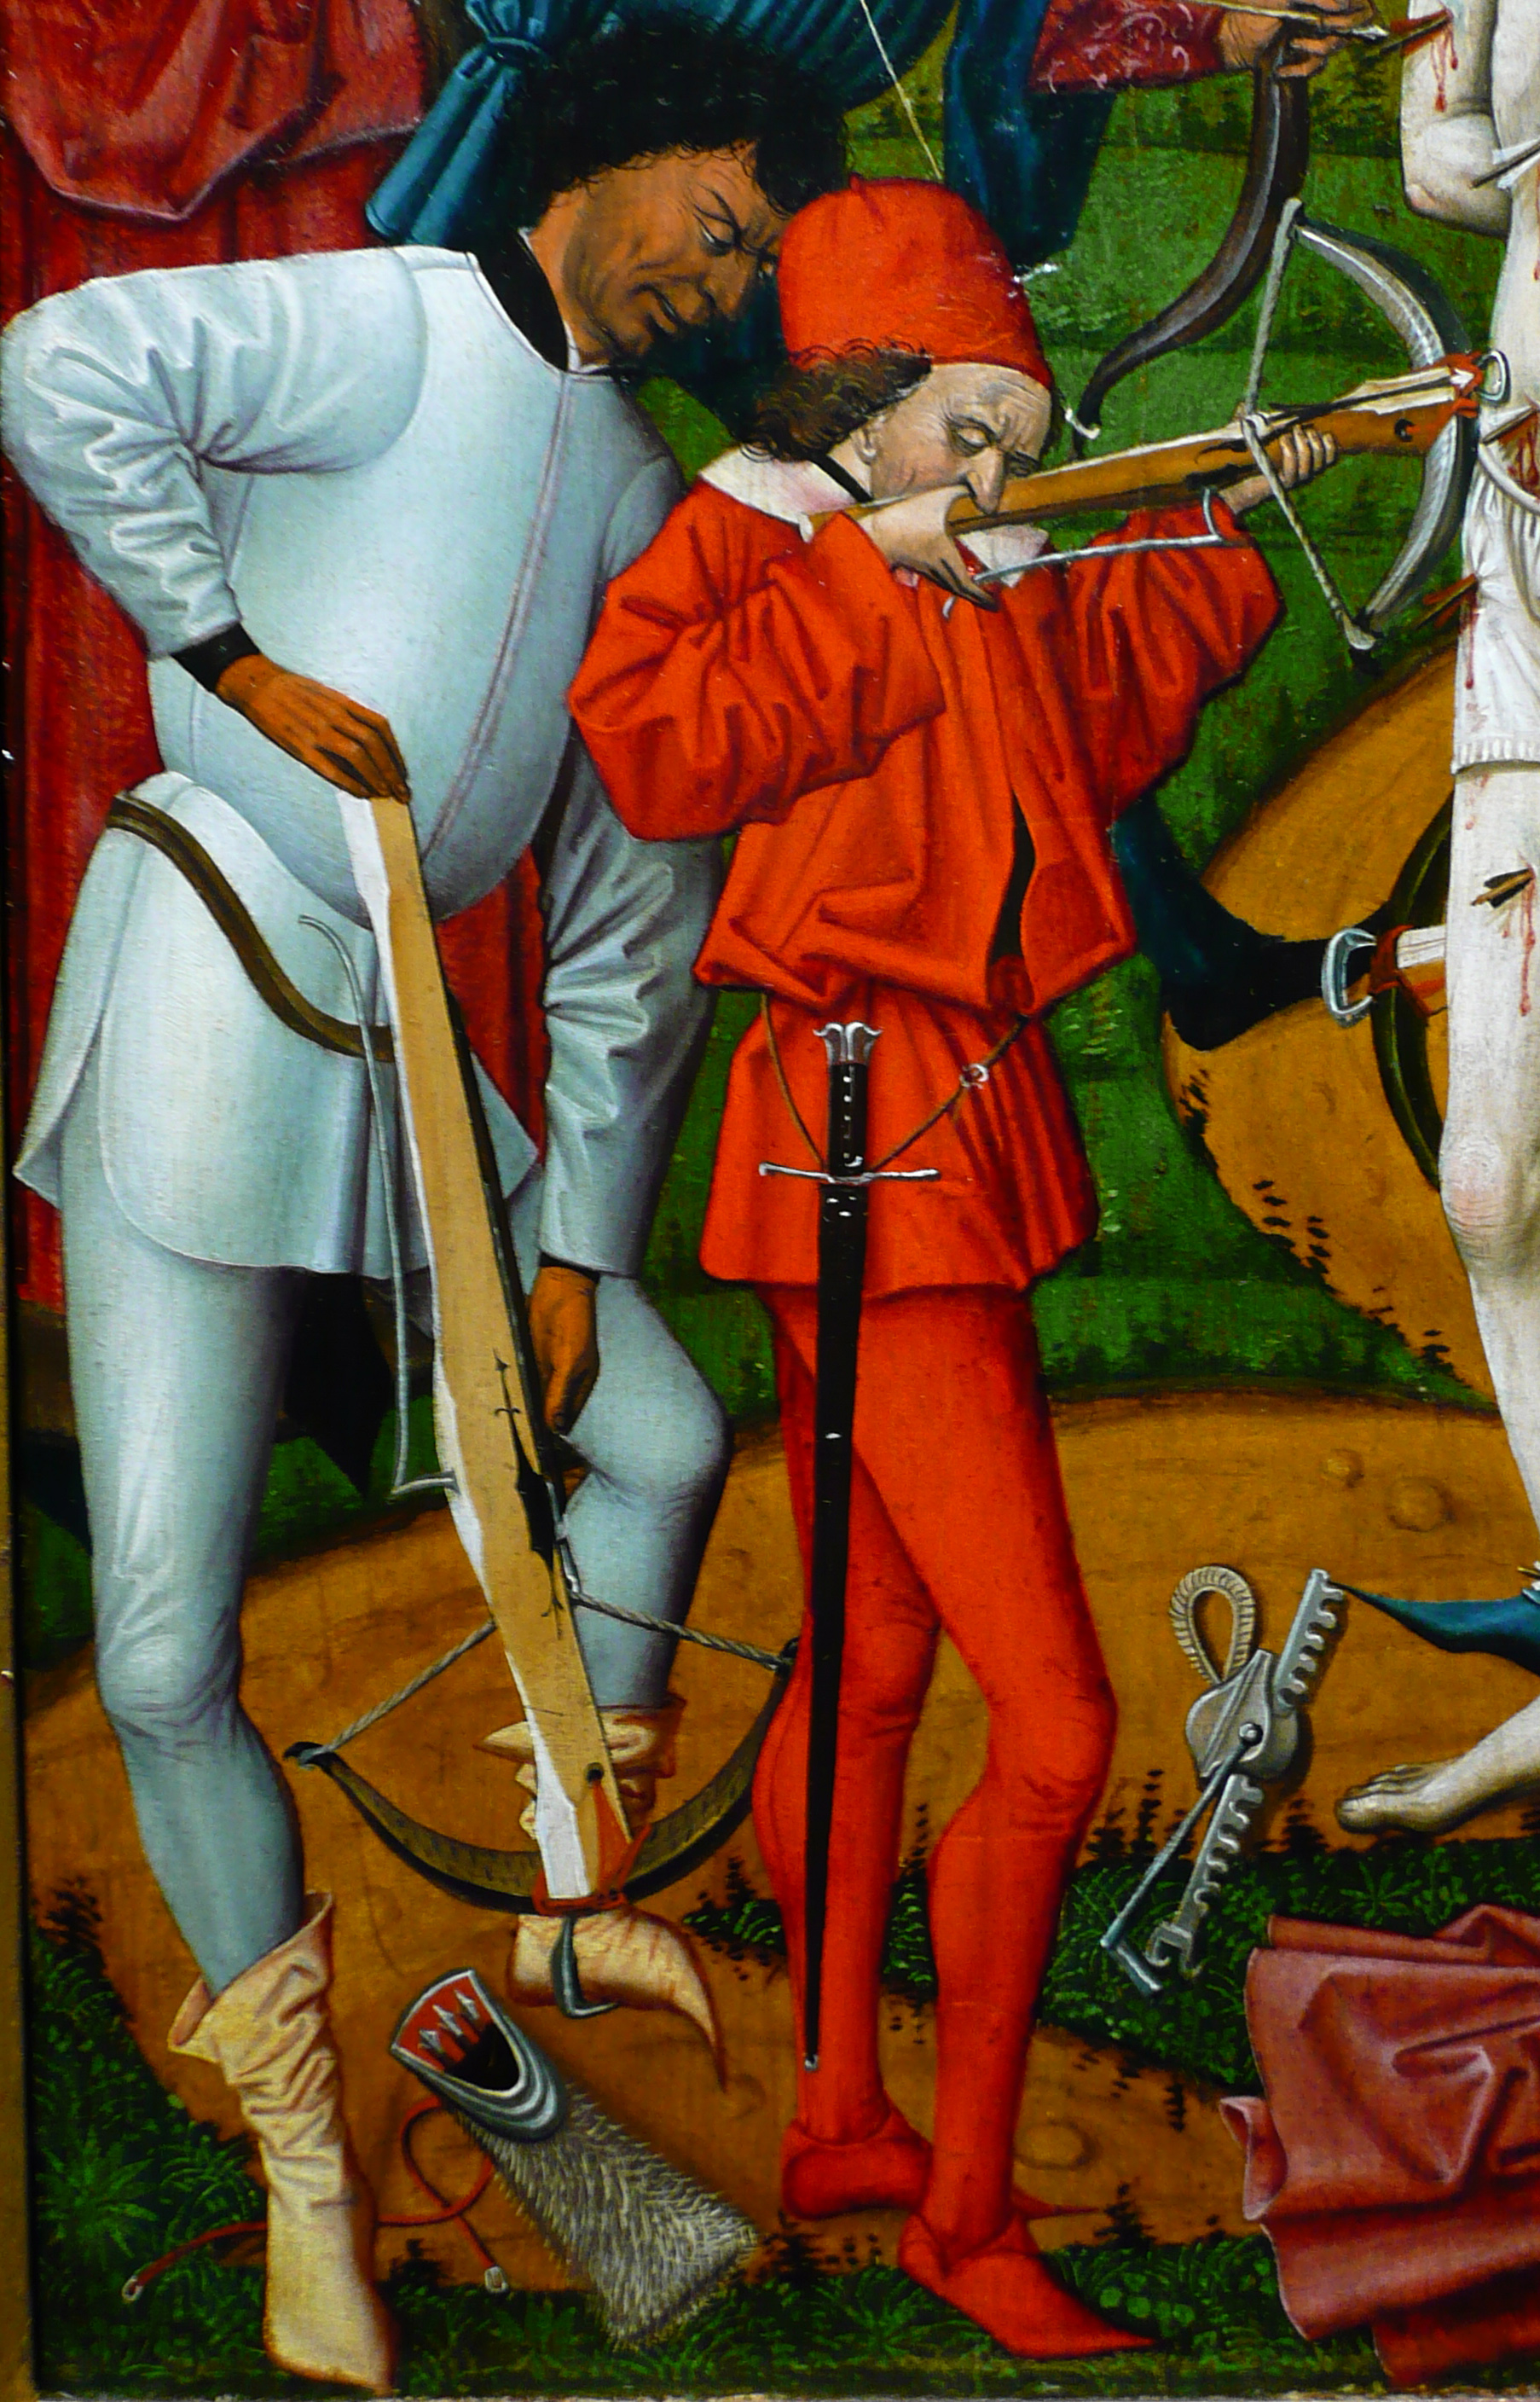
The quiver that I am makeing is not a reproduction og the quiver discussed in the article by Alessio, but a model wich is seen in al lot of period illustrations.
This type is partly covered in fur and tied to the waist of the user with a belt.

Detail from "The martyrdom of St. Sebastian", Oberbayern, 1475.
Picture from Wikipedia
This first post will be about the wooden parts of the quiver. In future posts i will be writeing about the fur and leather covering as well as the suspension holes and some neat bone fittings.

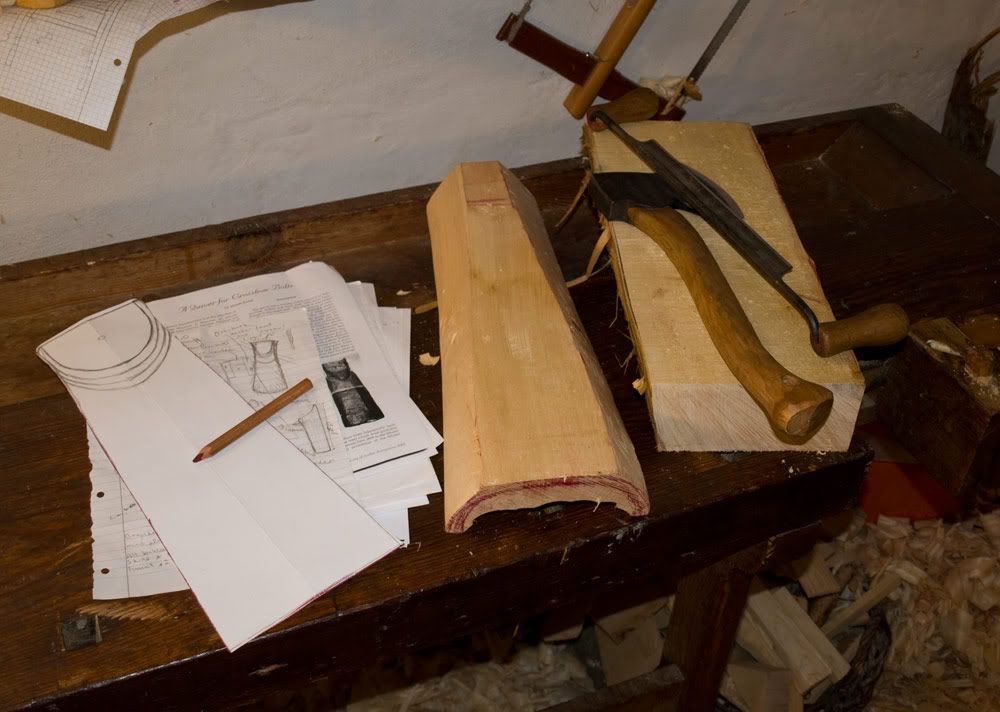
Making a paper template will help getting the shape and dimensions right.
Alessio writes in his article that the german quiver is probably made from lime (Tilia sp.) or poplar (Populus sp.) wood. He describes it as a light weight wood without porous rings and suggests the two species. These species are not only light weight, but are also really easy to carve.

I bought a board of lime wood, 7,5cm thick (That is 3" , for our american readers)

The quiver is basicly made from 3 pieces of wood. A thin (6mm/ 3/16") board for the back and bottom, and a thick piece for the concave front.
Be sure to plane the backside og the front piece before you start shaping and hollowing, because you need an even surface for laying out the rabbet that holdt the back. This is done after the hollowing is done.

I started by roughly shapeing the outside with an axe and a bandknife.


The inside is shaped by holloving the thick front board. I used gouges for this, but if you have an adze, I will recommend using that. The final thickness of the front piece should be no more than 6-8 mm (3/16"-4/16"), but leave it a bit thick at the mouth, so there is wood enough to carve the lips at the top.
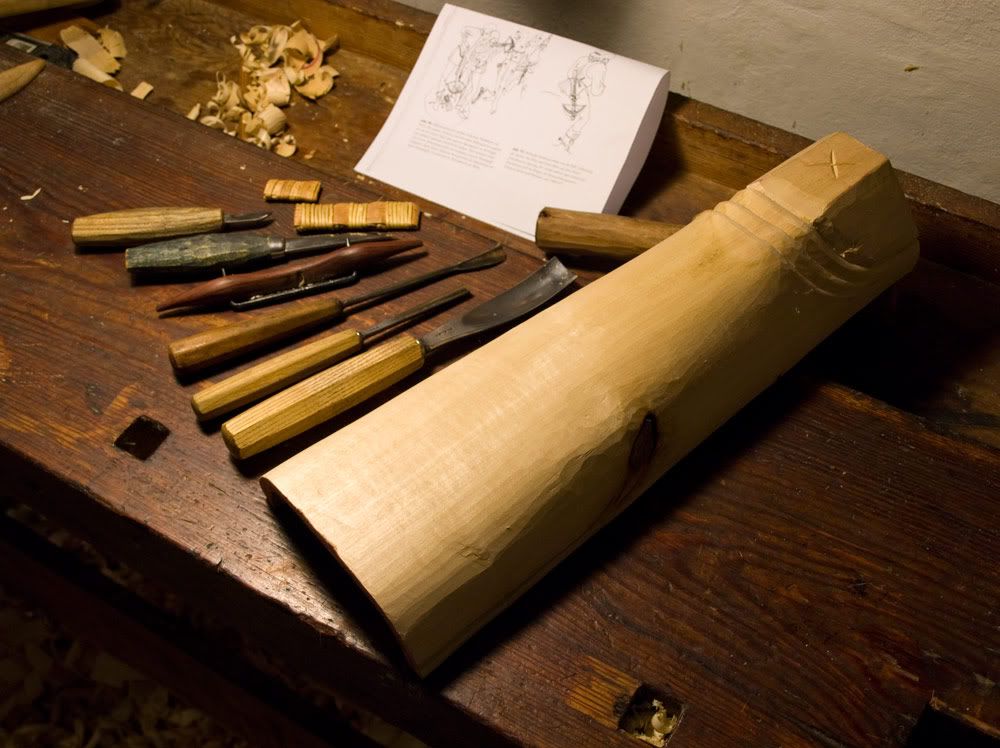
Tools (Left to right): Chip carving knife, mora-knife no. 106,
 small wooden spokeshave, backswept gouge, v-tool,  spoon-bent gouge.
After hollowing the front I started carwing the lip at the mouth of the quiver. I used a couple of different gouges for this, but my chip carving knife and mora-knife also came in handy. I also remembered that i had a backswept gouge for carving convex shapes and ended up using i quite a lot for this part of the project.

The outside shape was refined with a small spokeshave and a scraper. Lastly i sawed out the mouth with a coping saw. 
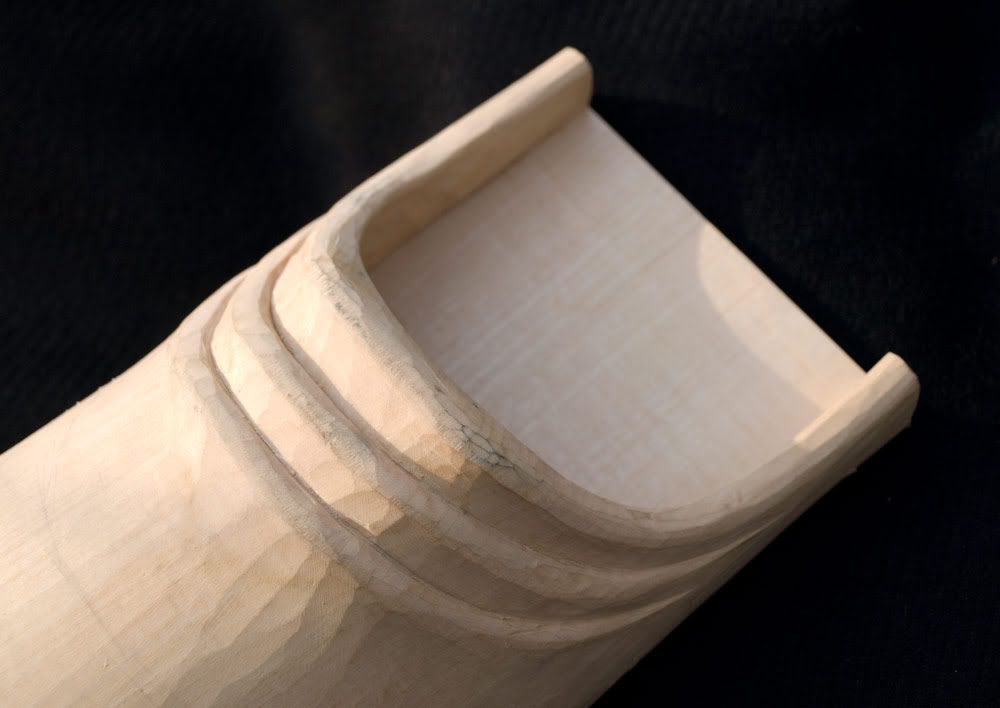
The lips are slightly undercut.
An important thing about the lips is that they have to be big enough to still be plainly visible when covered with leather. So make sure you make them a bit larger than you think nessecery.  

The good thing is that you don't have to worry too much about the final finisk of the survace. The toolmarks will be covered and evened out by even a very thin piece of leather. The lover part can be even more rough as it vill be covered in fur.
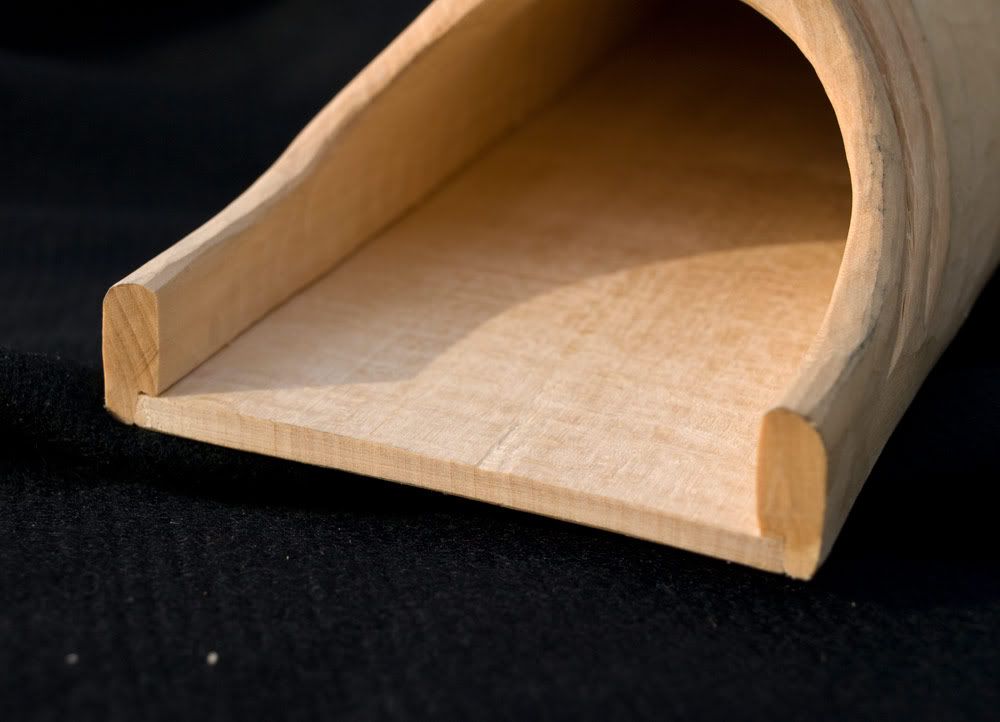
Rabbet
Here you can see the rabbet wich the back board is slotted in to. The three pieces are glued and pegged togeather. I used 3mm pegs made from some dry birch that I had. 


One of the pictures of surviving quiverse that my friend showed me, had a small hatch on the back. We thought that it might be for inserting bolts into the quiver without the risk of damaging the feathers. But after making a similar hatch on this quiver I can safely say that this i not the case. The hatch on my quiver is actually a bit larger than tha one on the original, but it is still to small to allow room enough for a bolt. The bolt will be jammed between the bottom and the front, before it can be fully inserted.

But the hatch seems to be a neat feature none the less... Just have to figure out what it's for :-)


The bottom is also joined to the front and back with a rabbet, glued and pegged.
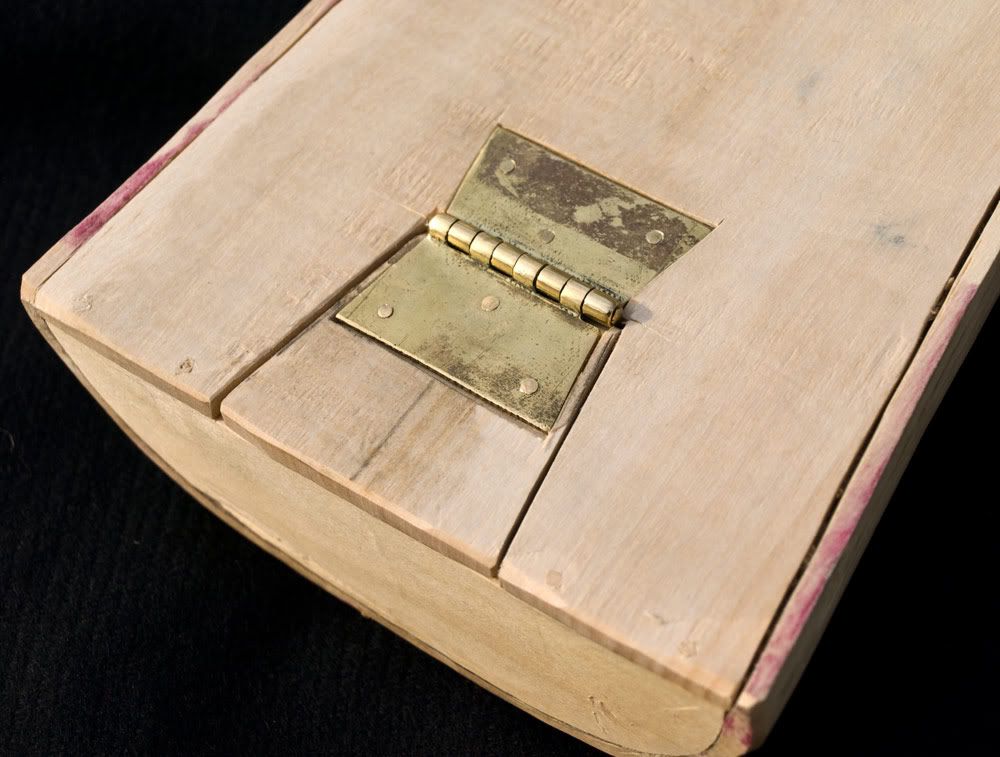

The plates of the hinges will be covered by leather, so I thought that I would just show it off before it gets covered. I am quite pleased with it.
Its made from brass plate and riveted to the back, using cast brass nails, that have been cut to length.


Hope you enjoy the reading. Feel free to comment.
I am really looking forward to doing the covering, and it is nice to be writeing again :-)

Saturday, July 2, 2011

A new workshop for me, and a small birthday present for Louise

A wonderfull thing happened in decempar last year. I got myself a workbench!

I have been doing woodcarving for a couple of years now, and have been making all kinds of small stuff at home. Things like spatulas, spoons and other household items. This is always nice to do, but i have been aching to make something bigger.
I have been looking at old danish and scandinavian furniture for quite a while. Looking for inspiration for all kinds of stuff.
I have also been collecting a lot of tools, like planes, saws, chisels and the like.
... Now I just need some wood, so I can get going on a larger project.

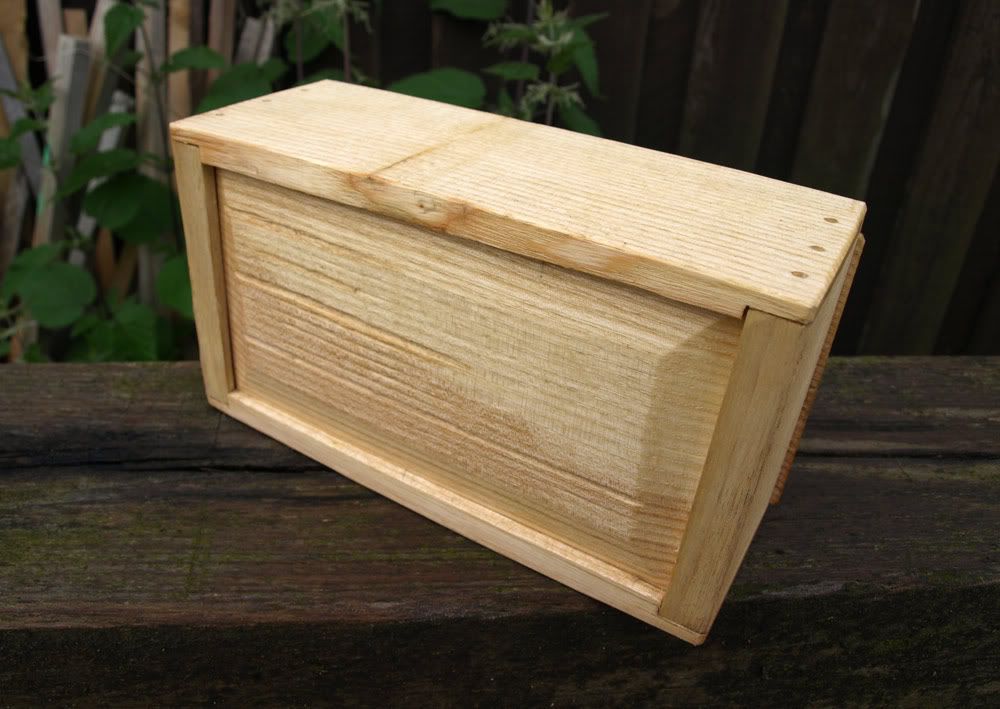
The last couple of months have been dedicated to school and I have not been able to get a lot of Workshop-time. One thing that I found the time to do is this sliding lid box. A birthday-present for Louise.


This box is the first project that I have made using only handtools. And I must say that it was a real joy to do. It is great to experience how much you can actually do on your own, without using machines for the job.
Of course it takes some practice to learn how to use the tools, but that is all part of the joy of working wood.

I made the box from some riven ash, that I had left from when I made the shaving horse. It proved to be very nice wood to work with.


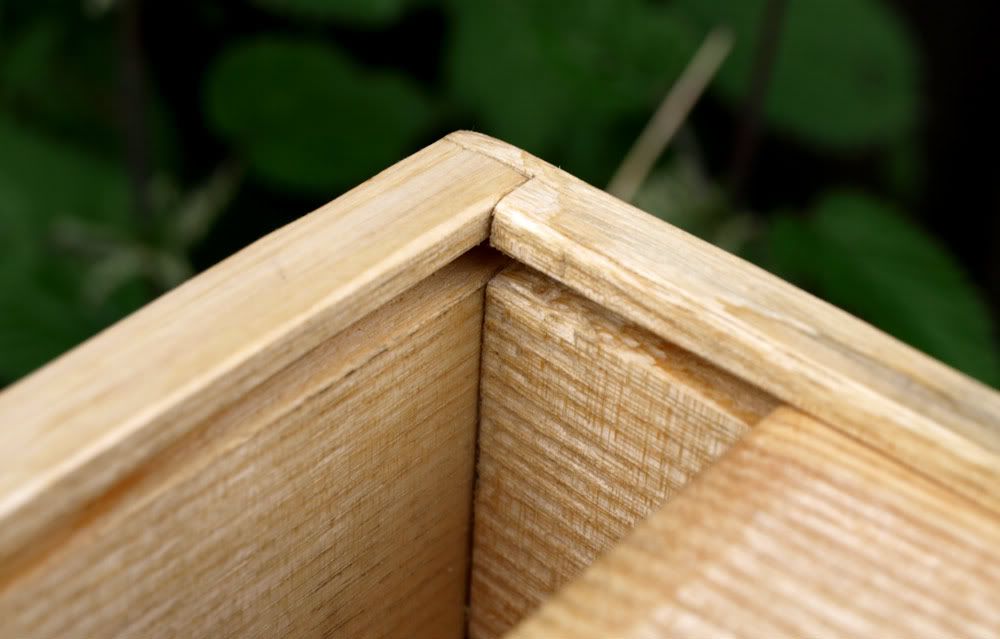
Both the bottom and the lid fits in to a groove in the top and bottom of the box. The corners are joined with glued rabbets and wooden pegs.
The joinery definately could have been more precisely done, but I like the box all the same.

Doing these small projects is a great chance to try out different techniques and think about the process of working. Especially efficiency of wokring is a good thing to think about. When working with hand tools you can end up spending too much time on the different steps of the project. I find that I enjoy working more, when I feel like I am getting somewhere. If things take to long to do, it gets boring. The best thing is when you are working efficiently, without compromising the quality.


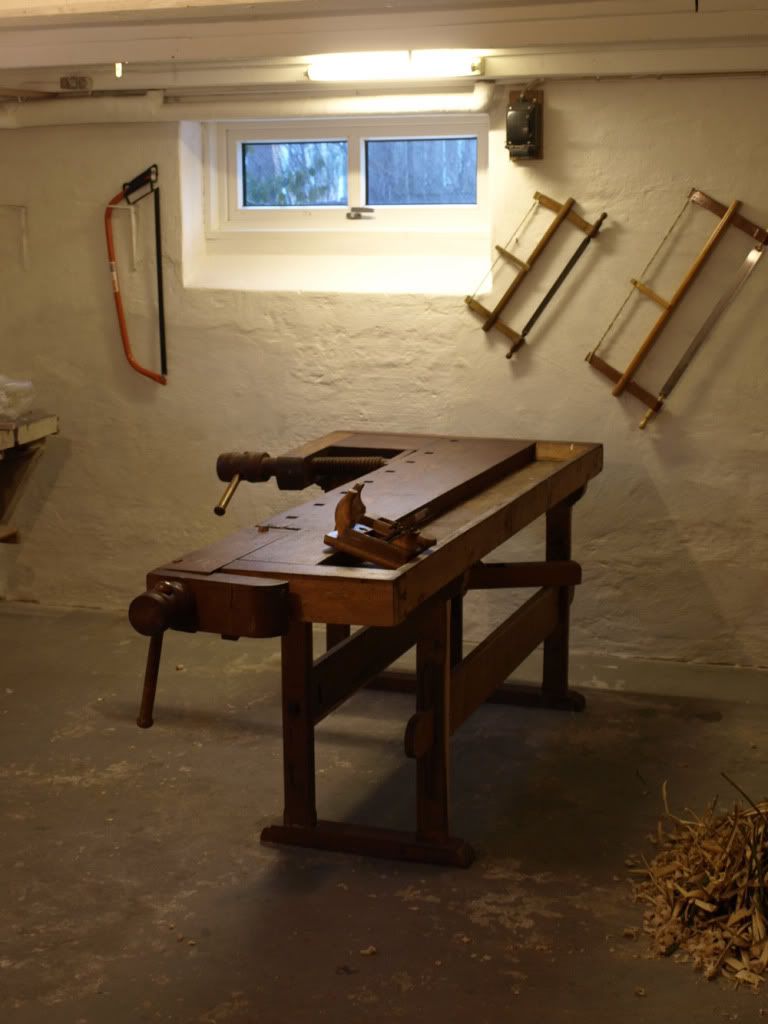
Lastly I want to show you my new (old) workbench. A real beauty!
I put some grease on the spindles and after that it worked like a dream.

I dont know how I even got by without this tool in the past. It really is a very versatile tool to have in the workshop.


Wednesday, February 24, 2010

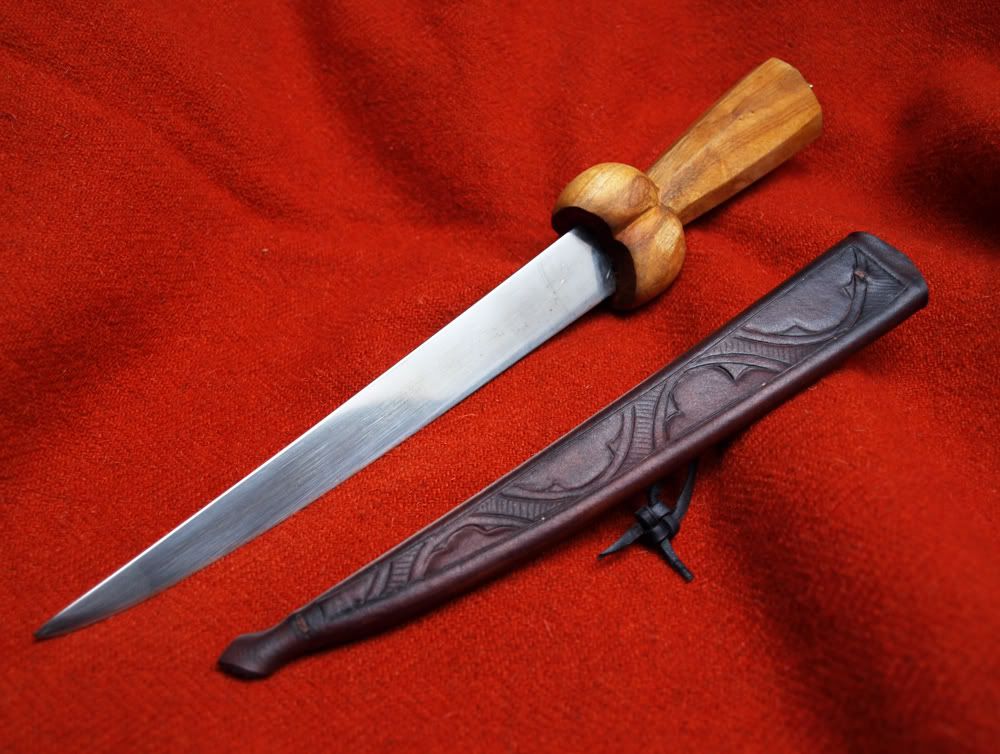
Bollock dagger

I have had this blade for a bollock dagger lying around for almost two years now. So I thought that it was due time to do something about it.
Therefore I spent some time during my winter holiday carving a handle for it.

I first ordered the blade when I saw this bollock dagger at the National museum in Copenhagen a couple of years ago. I really liked the octagonal handle and wondered why I hadn't really seen any reproductions of these daggers with that type of handle.
My handle is not a reproduction of the one I saw though. Just inspired by the shape of it.

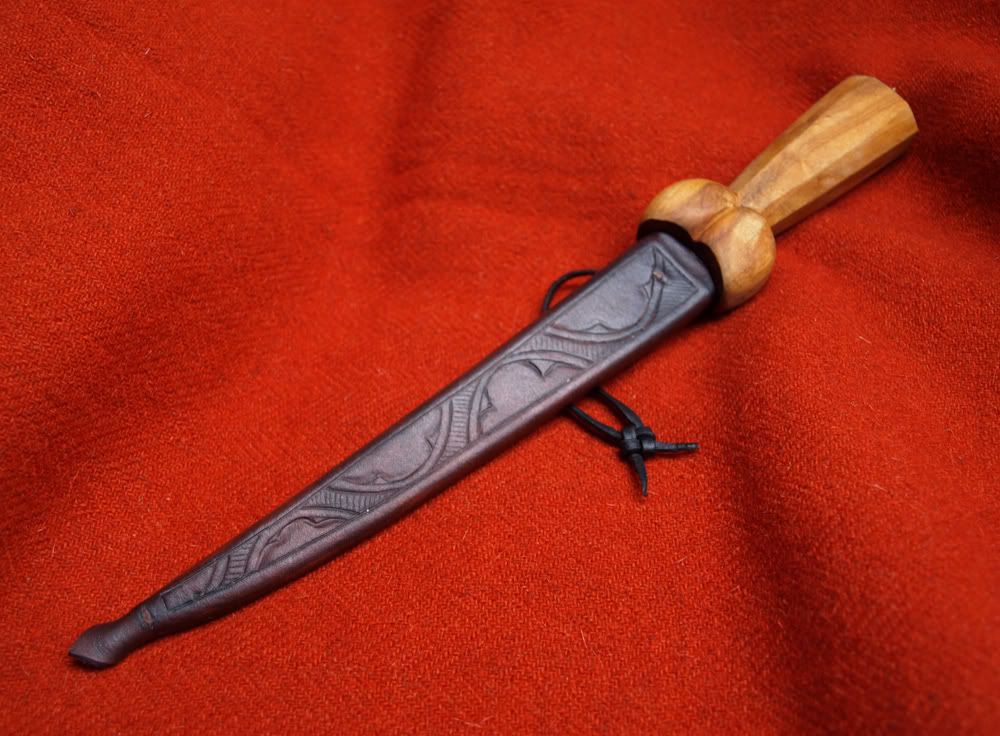
Here is the one I made:


The handle is made from the root of waht I believe was a cherry tree. I'm not exactly sure, since It had been on the ground for a long time. The bark was falling of and the leaves were long gone. But I managed to get a good chunk of one of the roots sticking up from the ground.


The scabbard-design is inspired from some of the scabbards in "Knives and scabbards" and is made from two layers of leather.

Monday, February 22, 2010

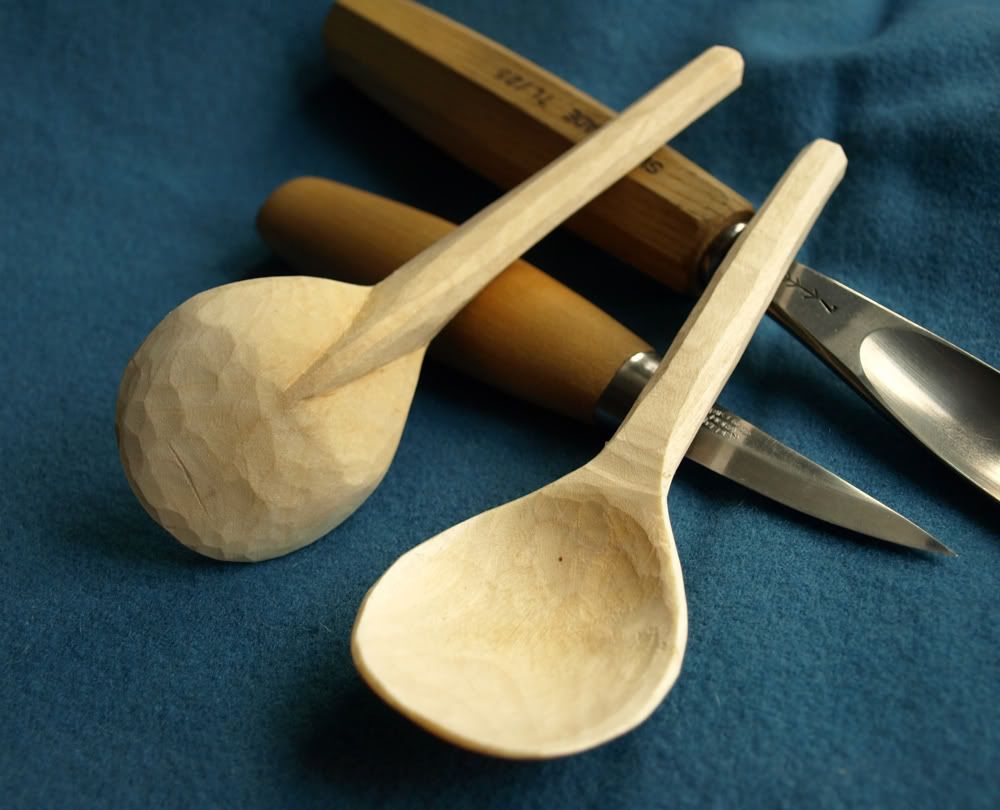
Spoons, spoons, spoons!

Lately I have been carving like crazy! I have set up a chopping block in our living room and spent almost every evening for the last couple of weeks carving spoons.
I suppose it is a bit like knitting... only a bit more manly.

Here are a couple of pictures of some of the projects I have been working on.

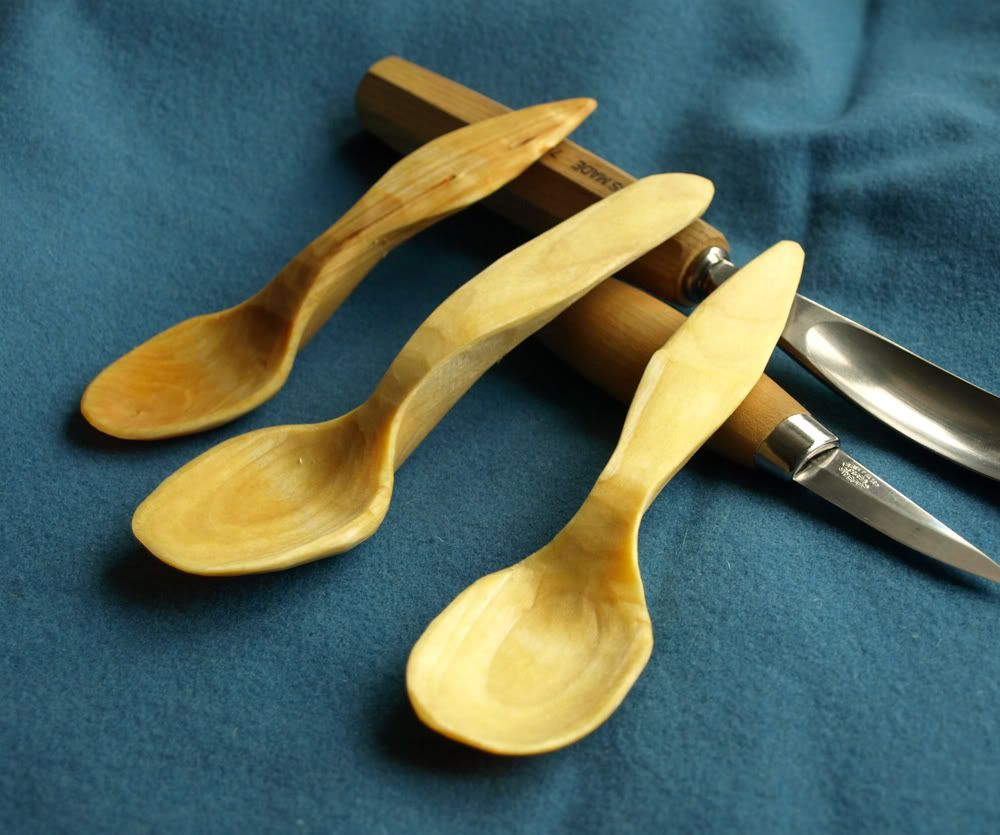
First these medieval spoons. I shamelessly copied the design from some spoons made by Robin Wood. They are based on a spoon from Lübeck, dated to "The middle ages" (ca. 1100-1500).


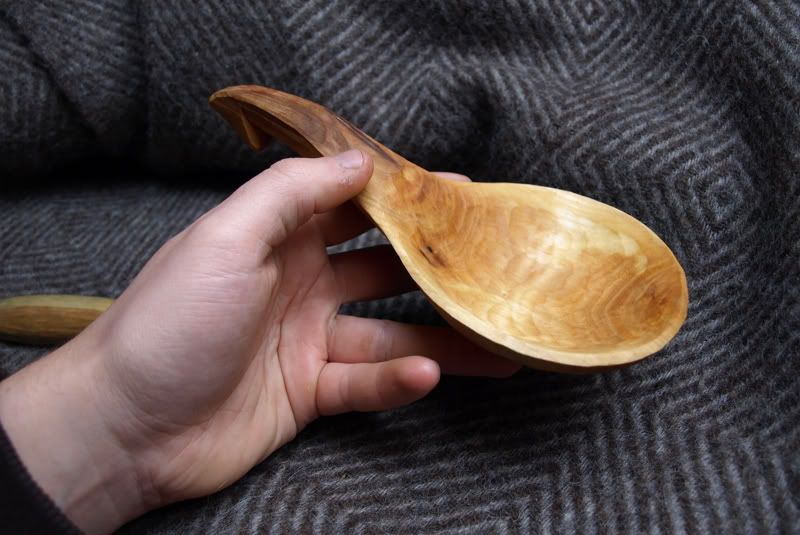
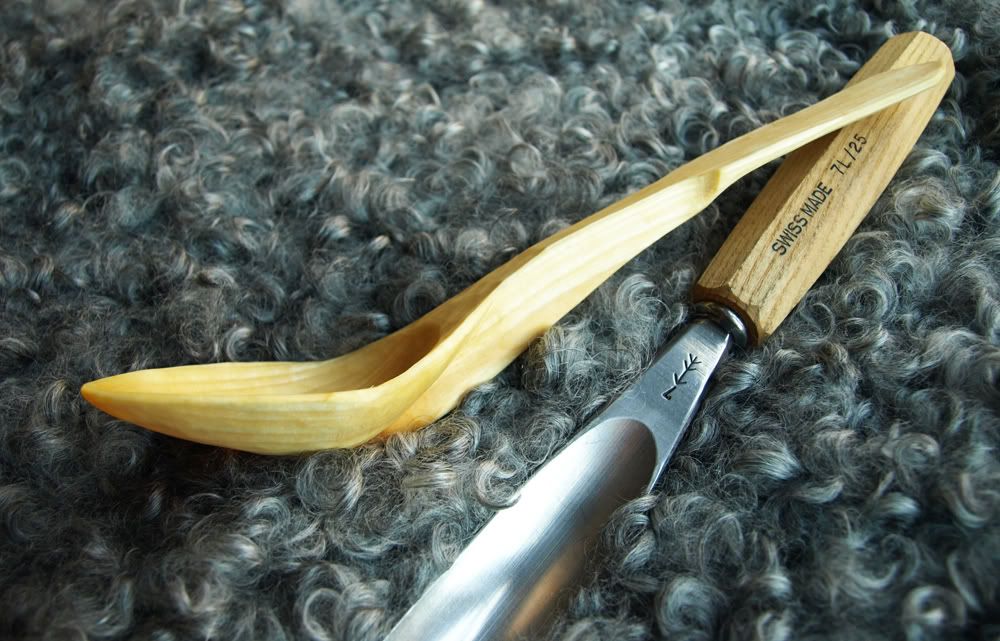
A ladle. Not based on anything i particular. I just liked this type of "spoon" som I decided to make one. The wood is birch like all the other spoons, that I have done. Only this turned quite dark, because I stored it in a plastic bag for a couple og days. I quite like the colour.


Normal spoons for eating. These are actually some of the first ones I made.


Another ladle carved from a crooked branch. The grain follows the curve of the bowl and handle. Making the spoon more durable.


I would do a guide on carving spoons if there wasn't already a couple of these out there. Therefore I will point you in the direction of some of these.

First a couple of videos (by the fabulous Robin Wood). Be sure to watch all four of them!

Second is the "Bodgers ask & awnser forum", wich I have linked to on earlier occasions. There are lots and lots of clever people using this forum. And they are always keen on helping.

Saturday, January 9, 2010

Spoon carving

As I am writing a project for an upcomming exam, I was getting desperate to get to do something other than writeing. So I decided to do a bit of carving.
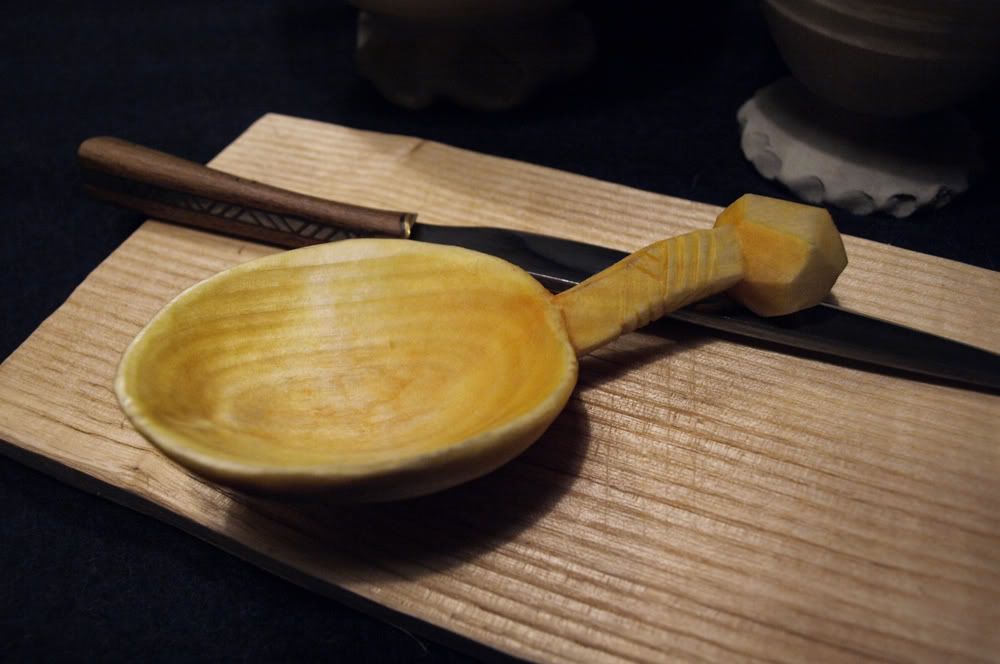
The result is this spoon.


It is based loosely on a type og medieval spoon. Charaterised by a wide cirkular bowl and a quite short handle.
This one is carved from birch wood (Betula pendula).

The inspiration came from this 15th century spoon... and the spoon to the right in this picture (From Nationalmuseet in Copenhagen)

The trick to eating with a spoon like this is to drink from the edge of the bowl rather than putting the whole thing in your mouth.

Wednesday, December 2, 2009

A recommendation

For those of you who are interested in carpentry.
I just found this book on different techniques for making joints in wood. It has a lot of pictures and descriptions of various techniques.

Woodwork joints

Sunday, August 23, 2009

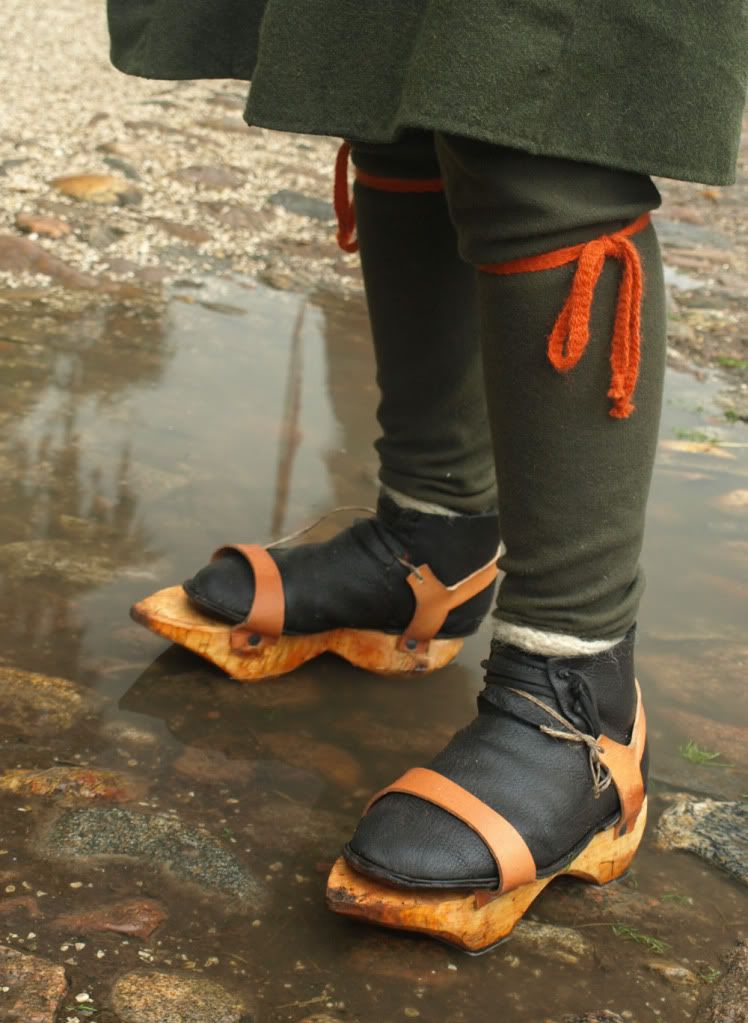
Pattens

Tha last project I did at Voergaard was a pair of pattens. They were made purely out of necessity, as we had a lot of rain that week.

They are made from alder (Alnus glutinosa), which was cleft and worked from the still fresh wood.
Alder will get very light when it dries, so the pattens won't be too heavy. Poplar or willow would also do just fine for pattens.

The most important thing about making pattens is to place the raised wedges in the right position, so it won't hinder the movement of the foot.
They need to be places right under the heel and right where the toes bend when you take a step.


And I really recomend people using medieval shoes (with leather soles) to get a pair of pattens!
They keep your feet warm and dry, and they make a fabulous noise when walking on cobblestone pavements :-)

Thursday, May 28, 2009

New shaving horse and riving wood.

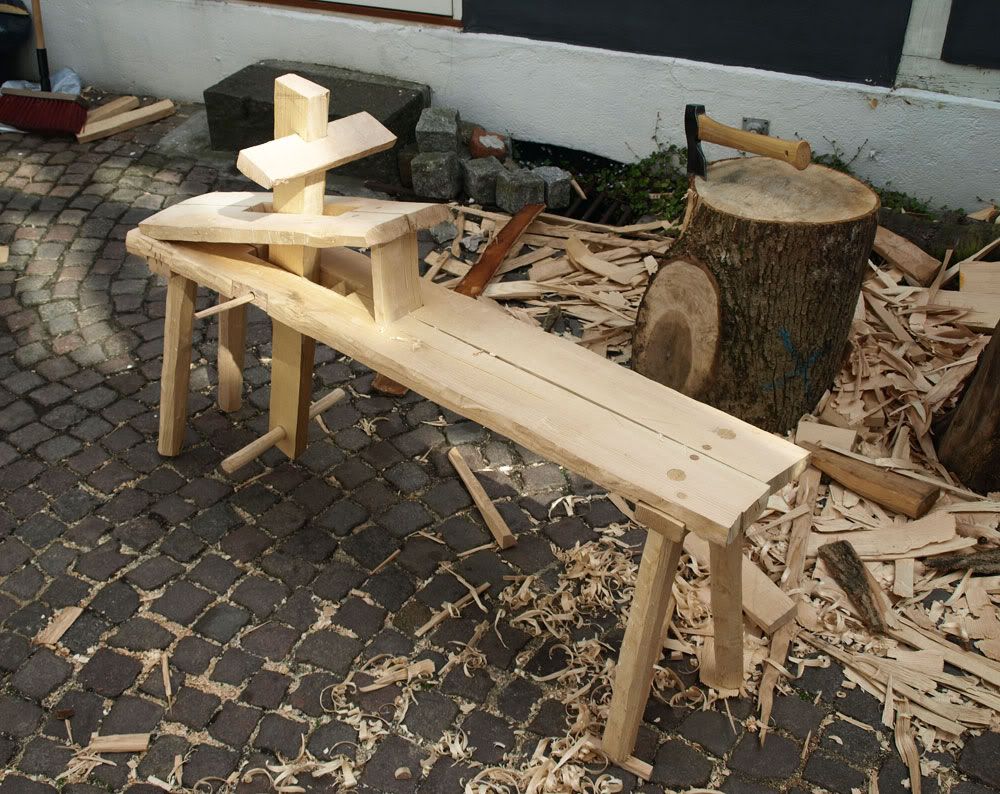
For a long time now I have wanted to make myself a shaving horse. And as the tent that Louise and I are working on is almost finished, I am definately going to need a shavinghorse for making the tentpoles. So a couple of weeks ago I decided to do something about it.

I called the local forester and bought a 5m long trunk of ash. And thats what I made this beauty from :-)


I have been reading alot about greenwood working lately, so I decided that it would be interesting to try making "The horse" from fresh riven wood. Hence the call to the forester.
With help from a colleague of mine I got the trunk sawn in to smaller pieces, that I could work with.

I then split the wood into quarters, that I could transport home (also with the help of my colleague and his trailer).
At home I rived the quarters into eights, wich were shaped into planks that I could use for making the bench. For that I used a small single bevel axe that my dear friend Jesper (Ildsmeden) made for me last year.

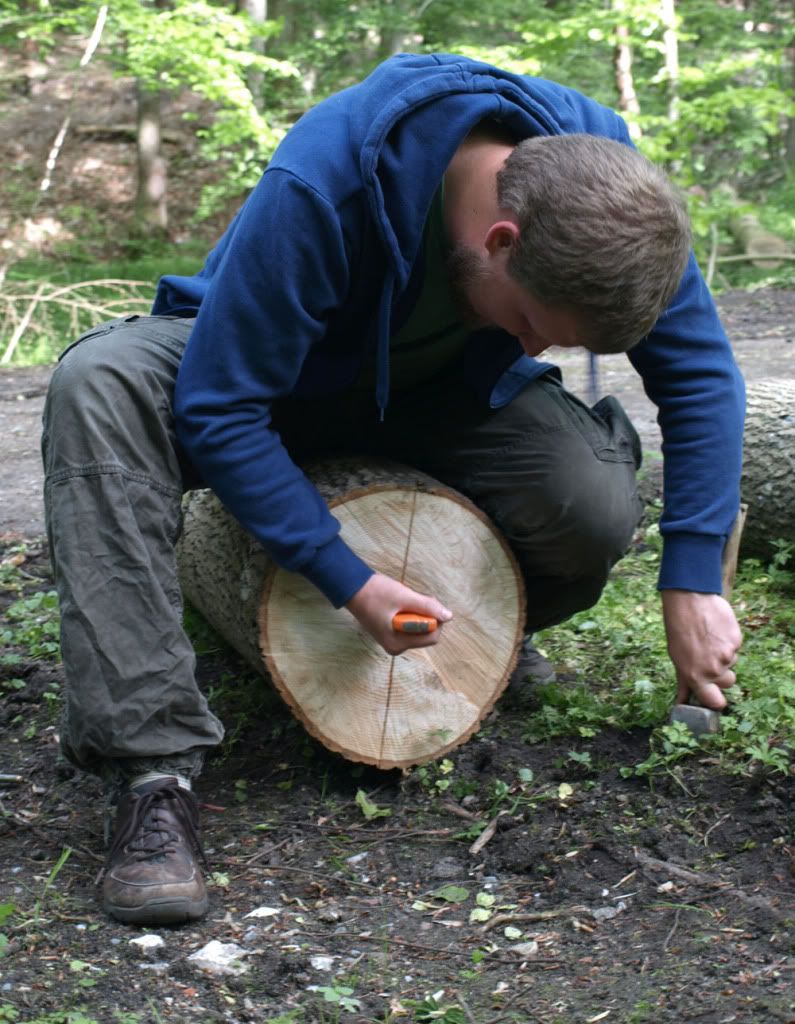
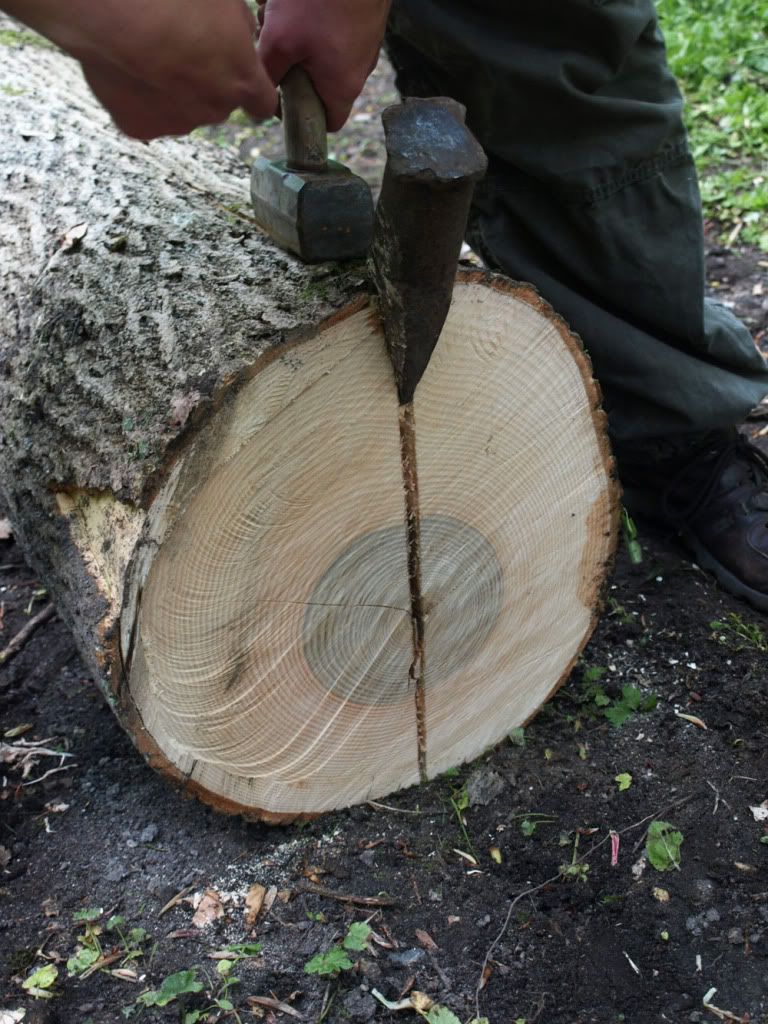
When riving large pieces of wood (that you want to split evenly down the centre) start by scoring the wood in a straight line across the end of the log. Make sure that the two halfs are of equal size.


Scoring the end of the log will create a plane of weakness through the wood, that will guide the split.

Start riving from the edge of the wood with the wedge set at 45 degres.


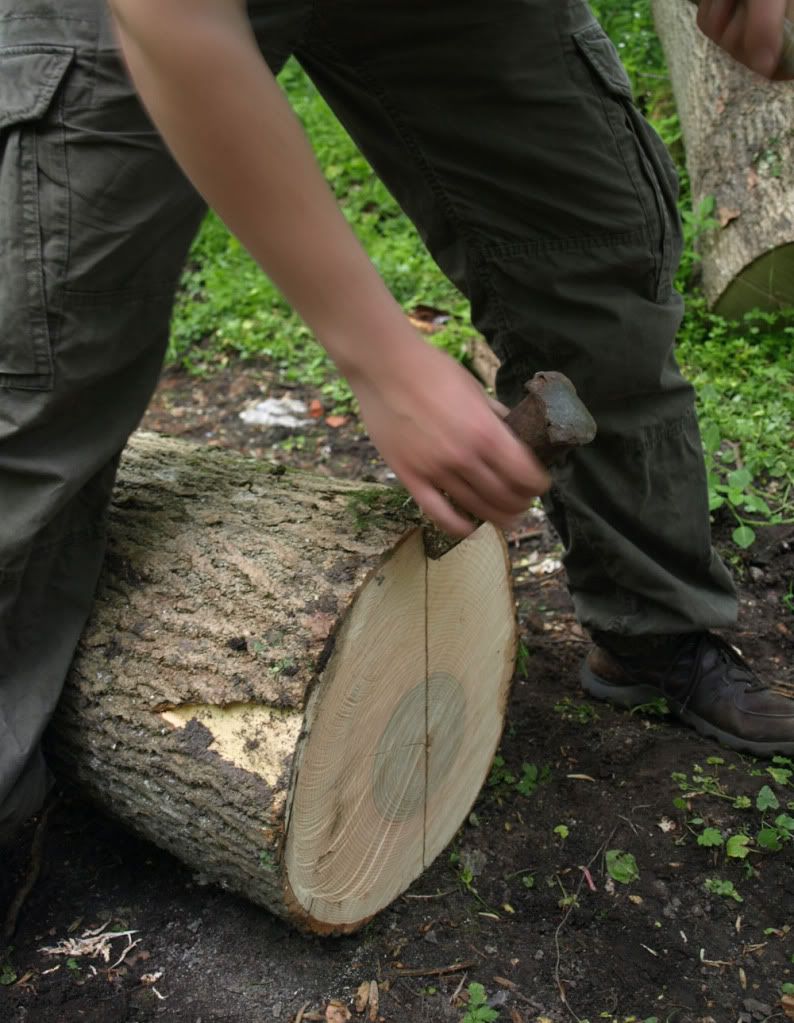
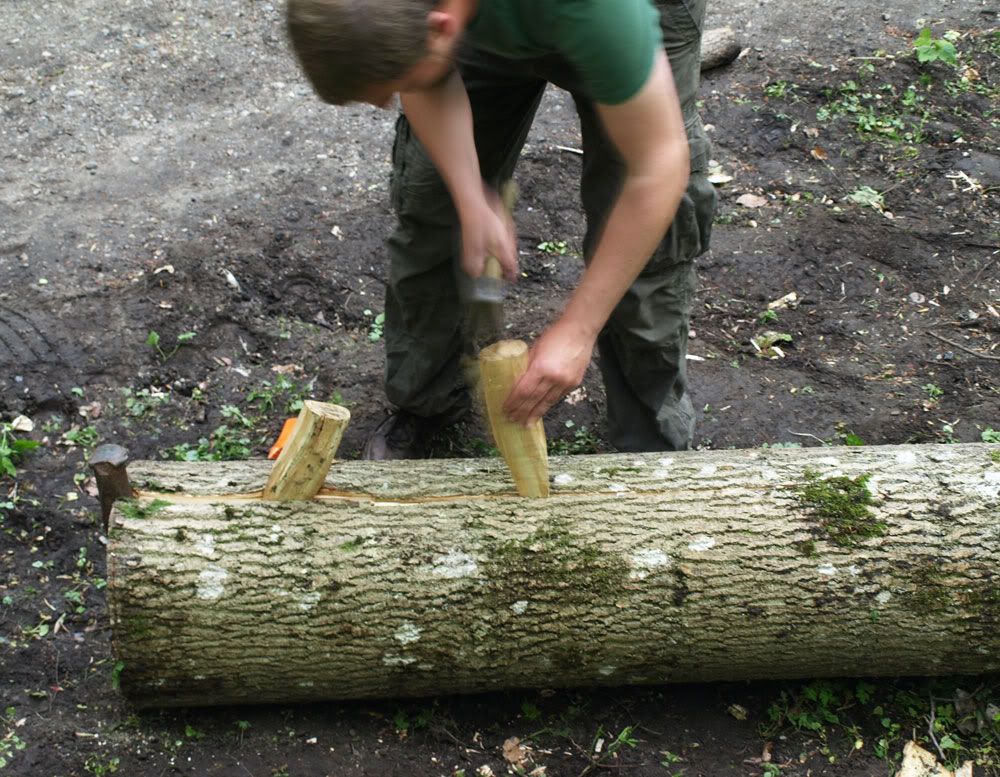
The wedge will open a split across the end and down the length of the log. Open this split further using wooden wedges, set into the split running down the side of the log.


Continue hammering wooden wedges into the split until the log cracks open.
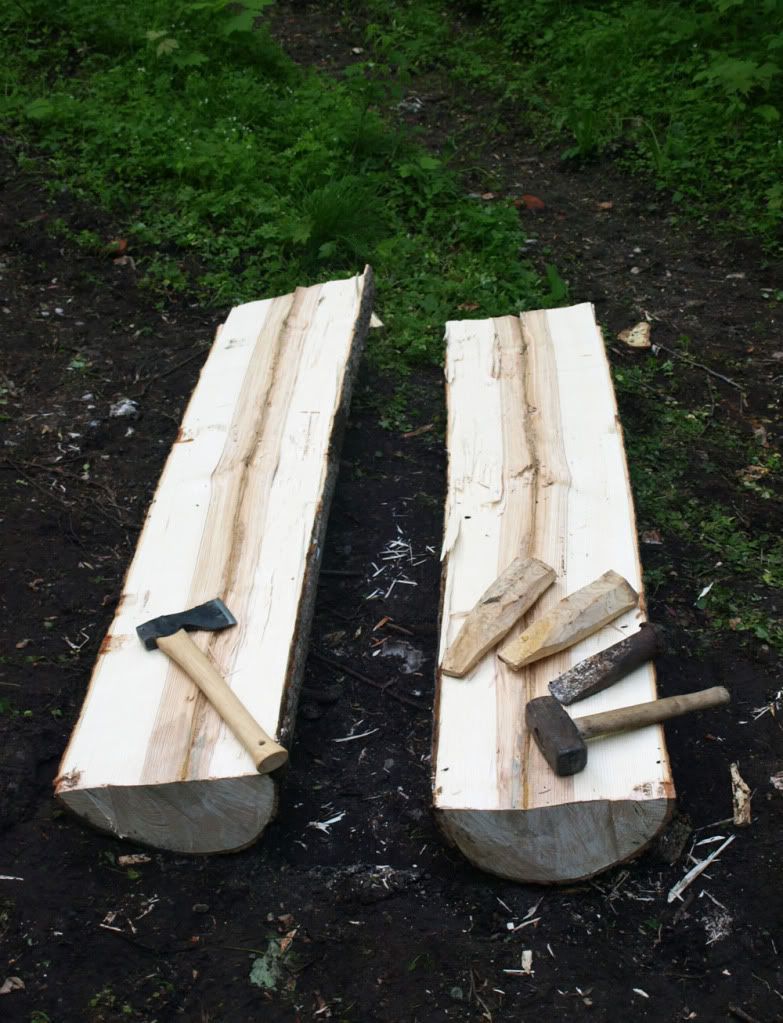
You will need an axe to clear out crossing fibers in the wood.


The result should be two halfs of equal size.


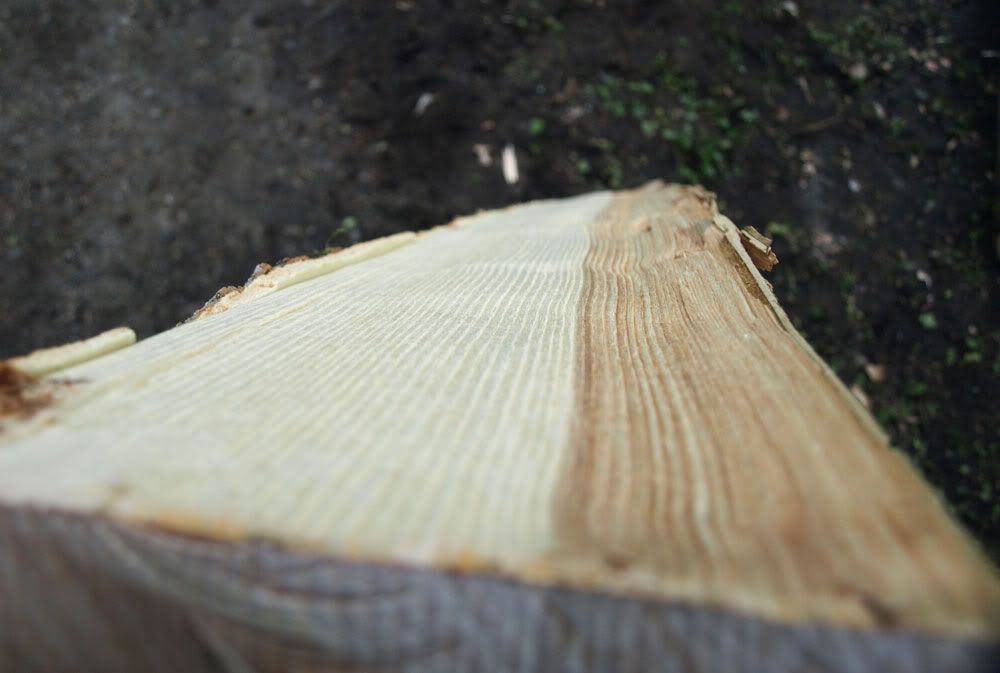
And here is a picture of how clean the split can actually be.
It's pretty incredible if you ask me!


For more info on riving and greenwood working, take a look at these sites:

Greenwoodworking.com

Peter Follansbee, joiner's notes (Blog)

Bodgers ask & anwser forum

Wednesday, April 29, 2009

15th century bench

I am currently working on some new furniture to put in our (soon to be finished) tent. I am working on two tables (+ trestles), some tent-poles and I am also going to make at lantern.

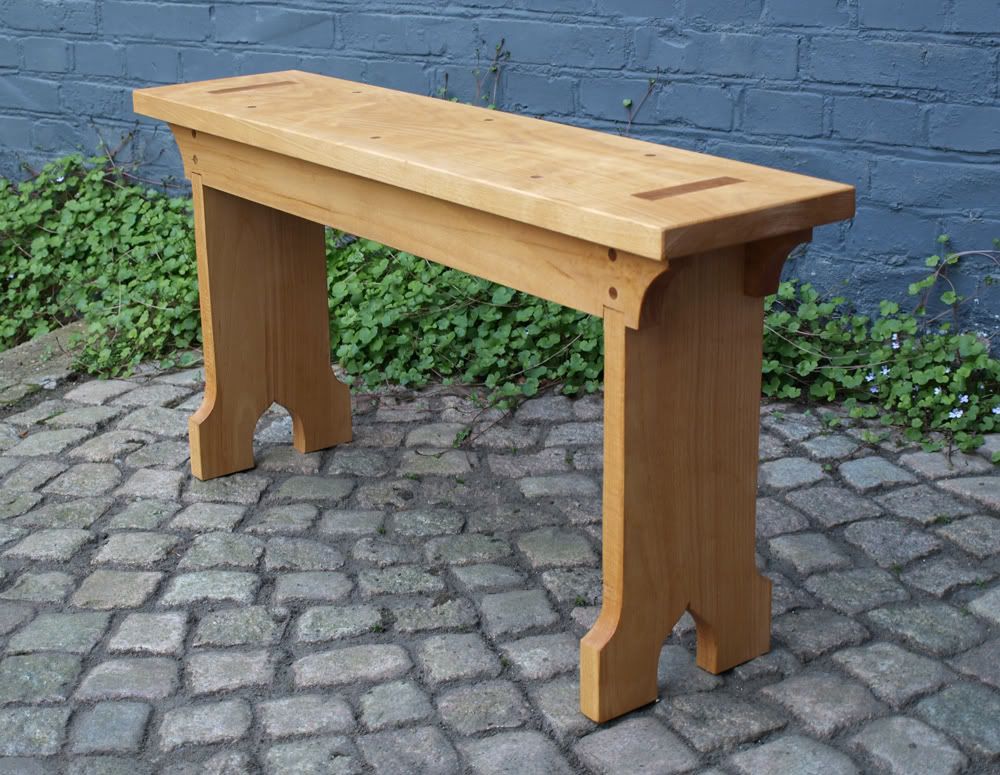
But today I finished a small bench.

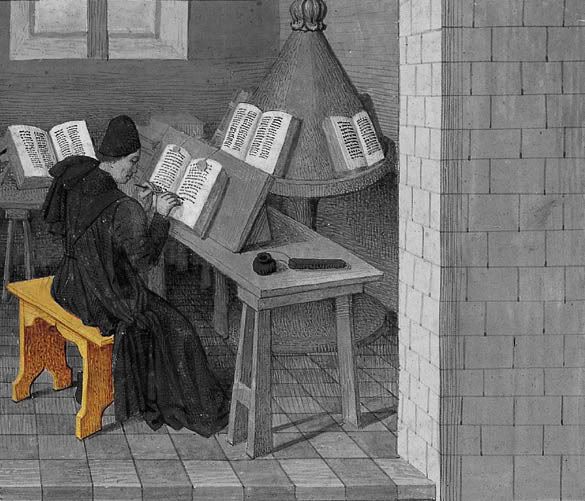
The bench-type that I have made can be seen on various 15th century paintings, and seem to be very common. It can be found in many variations, both simple and vith lots of fancy carvings.


I went for the simple style.


The construction is very simple and seem to be quite stable. So it was a nice project for a novice woodworker like me.
Again I used beech wood. And the whole thing is held togeather with wooden dowels (no glue).

The bench is 90 cm long, 25 cm wide and 45 cm high.


Here is a picture from 1475 of this specific type of bench. I am also going to make a couple of the 3-legged trestles that you see holding the table.


Hope to show you more furnifure soon!

Wednesday, April 22, 2009

Toolbox

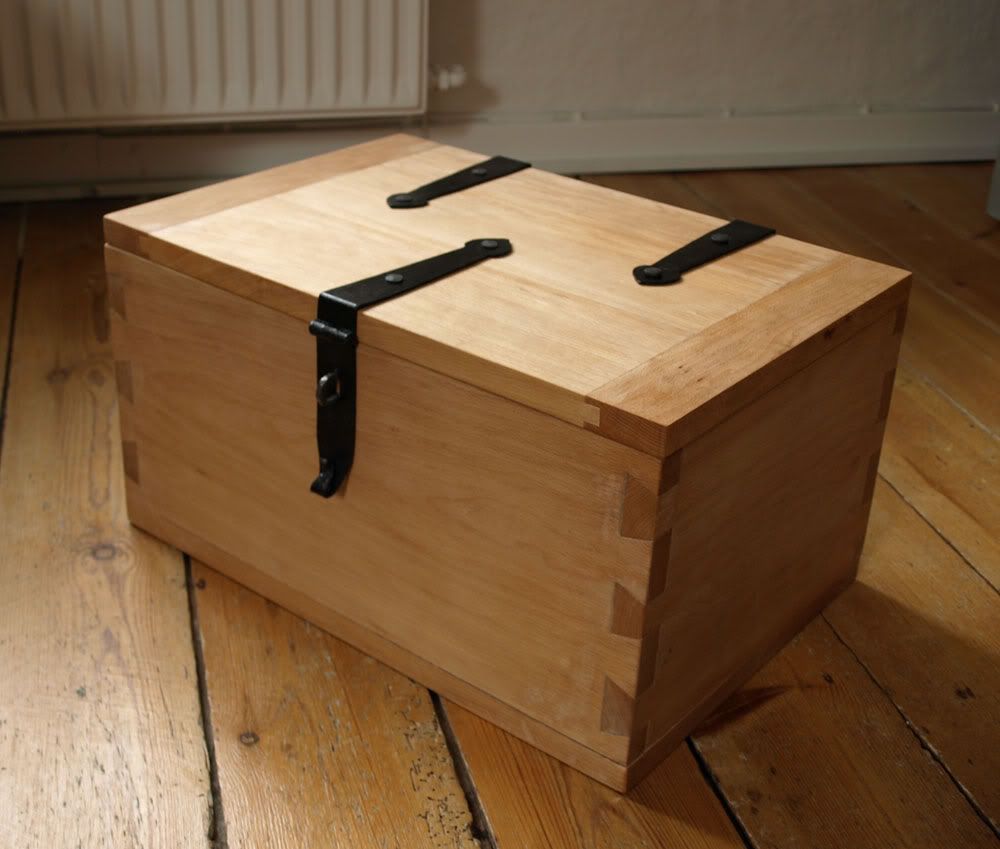
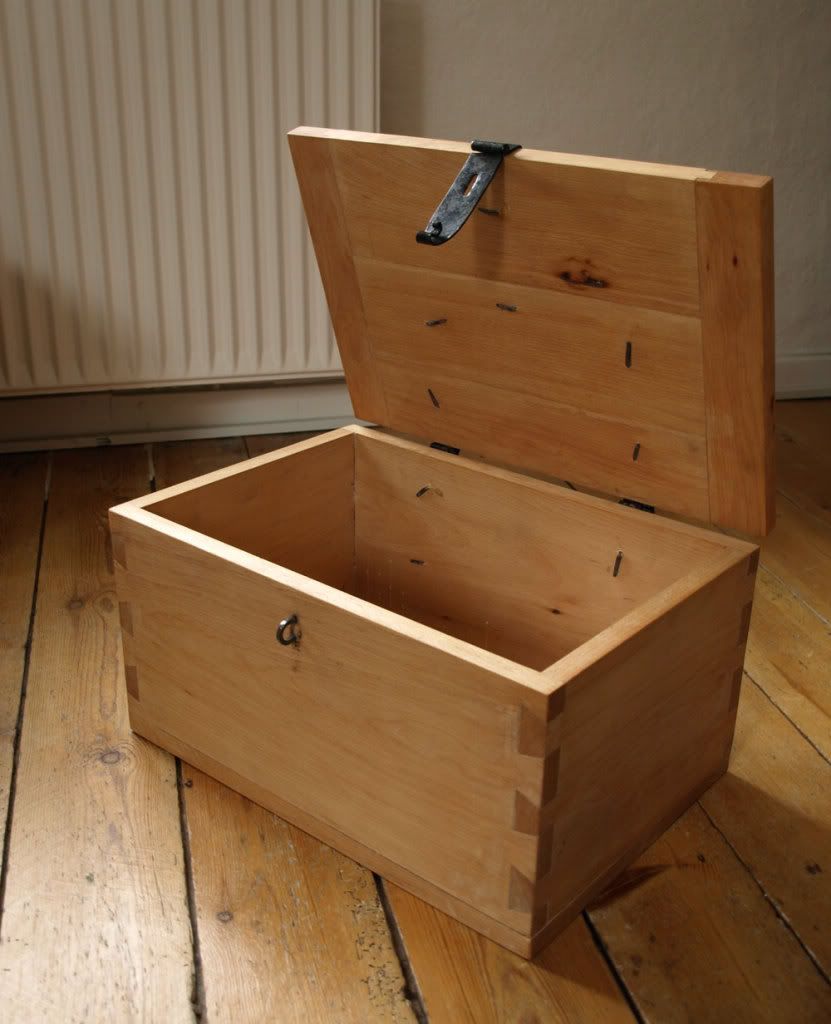
This is a box that I have had lying around half-finished for a couple of months. I made the box myself sometime before Christmas, but have been waiting for at friend to make me some nails.

Yesterday I recieved them in the mail and spent the evening drilling holes and hammering in the nails.

Now I have a nice sturdy toolbox!


The box is made from beech (Fagus sylvatica). A very common tree here in Denmark.


The design came from a chest that I saw at mittelalter möbel, so I´m guessing that the technique is somewhat authentic. Although it isn't based on a particular find.

I really liked this project because it´s (almost) the first wood-working project that I have done. And thus I learned a lot from it. Now I just hope to get to do some more of this type of woodwork! Eventhough most of the sawing and planeing was done using modern powertools I sawed and chiseled the dovetails by hand.

Now I just need to fill it with tools :-)

Monday, January 12, 2009

Thread reels (ca. 1200)

Lately I have been working on a couple of different projects, some are big som are small... And while I am working on the more complicated stuff, I will post a little something for all you needleworkers who are reading this blog :-)

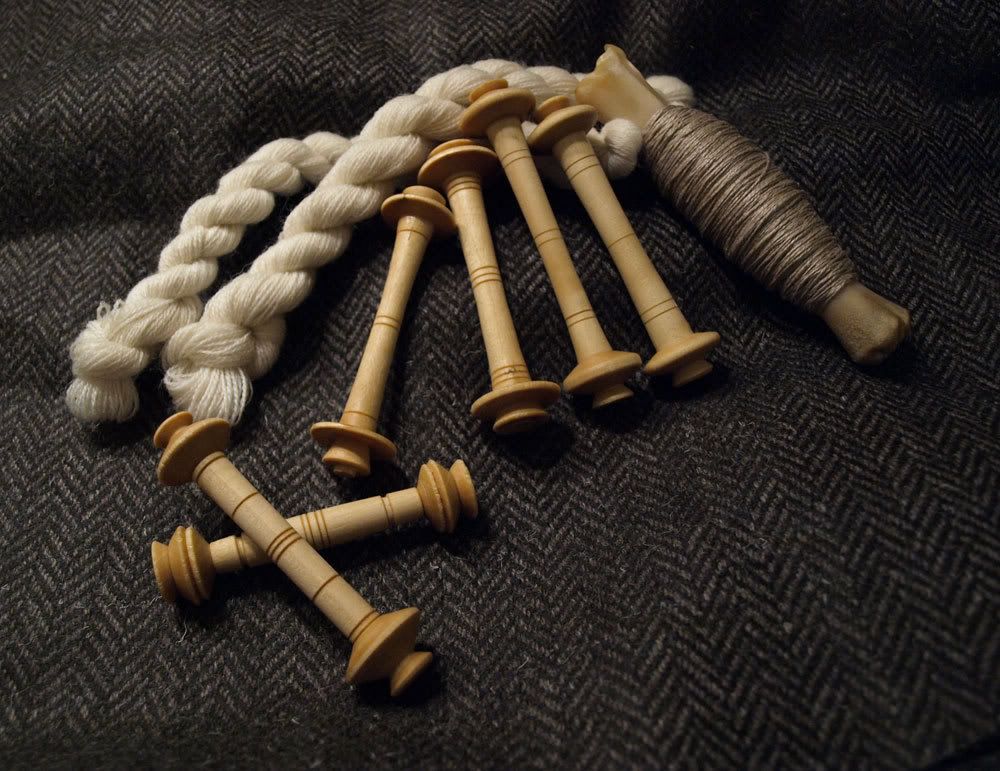
I have made some thread reels based on a finding from London. They aren't exact replicat, they are meerly inspired by the look of the original.
The original can be seen in the book: "The medieval household"


The thread reels I made have been turned on an electrical lathe and are all made from elderberry wood (Sambucus nigra).
Elderberry wood is very hard, despite the fact that elderberry is a quite fast growing tree. The grain is also very uniform and therfore, well suited for turning on a lathe.


The threadreel on the far right is a leg bone from a lamb. I have been using this for a long time and I think it has a very practical feel to it :-)
There are findings of this type of threadreels too, but unfortunately I don't have any pictures of it.

Monday, December 8, 2008

Pump-drill

I have wanted to make a drill for re-enactment purposes for at very long time now.
So last week, when i got an oppotunity to try some woodturning I desided that my first ever woorturning-project, was to be a so-called "pump-drill".


Although I don't have any sources of these drills being used in medieval times, I can only think that they must have had them...
The mecanism that rotates the drill is very simple and has been used for at least a couple of hundred years, by all sorts of craftsmen (namely goldsmiths).

I haven't made the drill-bits, for the pump-drill yet. But photos of these will follow as soon as I figure out how to make them... Along with a demonstration!

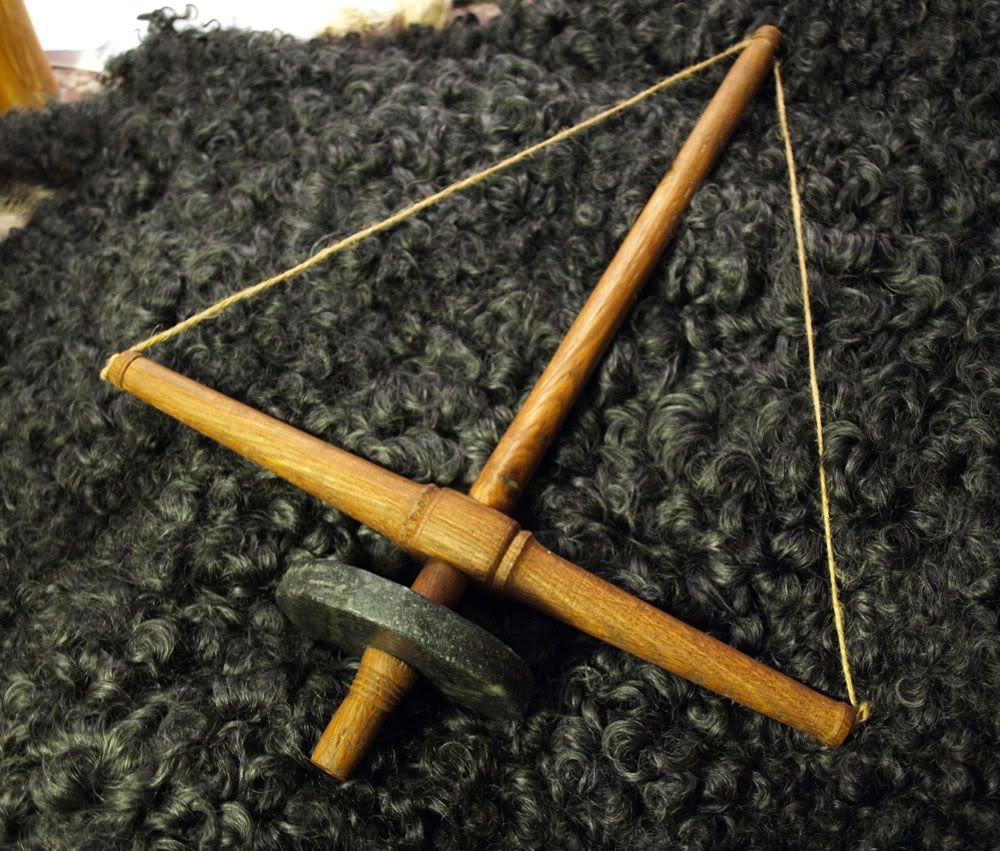
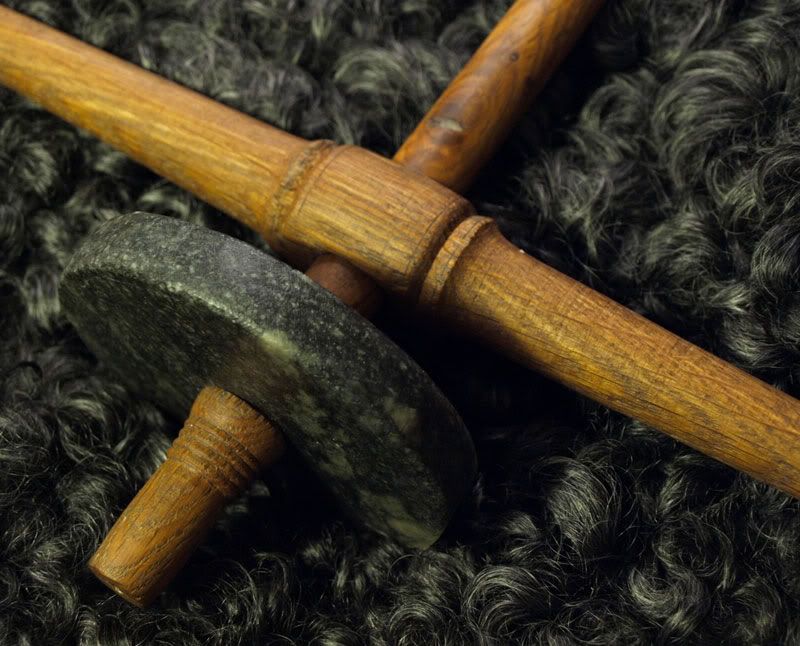
The drill is made from oak-wood and norwegian soapstone.


The soapstone fly-wheel makes the drill rotate steadily and wind up the cords that spins the shaft of the drill.


The cord is mounted on both ends of the "cross-bar" (?) by a knot tied to a small nail.


At the top of the shaft the cord passes through a hole. This makes sure that the cord is equally long on both ends of the "cross-bar".