
I have been thinking about doing one of these for ages, so when I was aksed if I wanted to make one, I was very exited.
The shape and design of these quivers have always facinated me. But I had been struggleing with finding propper sources to base the item on. Luckily my friend had an article published in the "Journal of the Society of Archer-Antiquaries", wich explained the construction of a german quiver from around 1480, wich is now part of the collection of the "Stibbert Museum" in Florence (http://www.museostibbert.it/).
The article is titeled "A Quiver for Crossbow Bolts", and written by Alessio Cenni.
I read the article, looked at some period illustrations of quivers and some pictures of original quivers from the late 15th/ early 16th century. Then made some sketches and discussed the design with my friend. We arrived at something that we both liked and the I got to work.
The quiver that I am makeing is not a reproduction og the quiver discussed in the article by Alessio, but a model wich is seen in al lot of period illustrations.
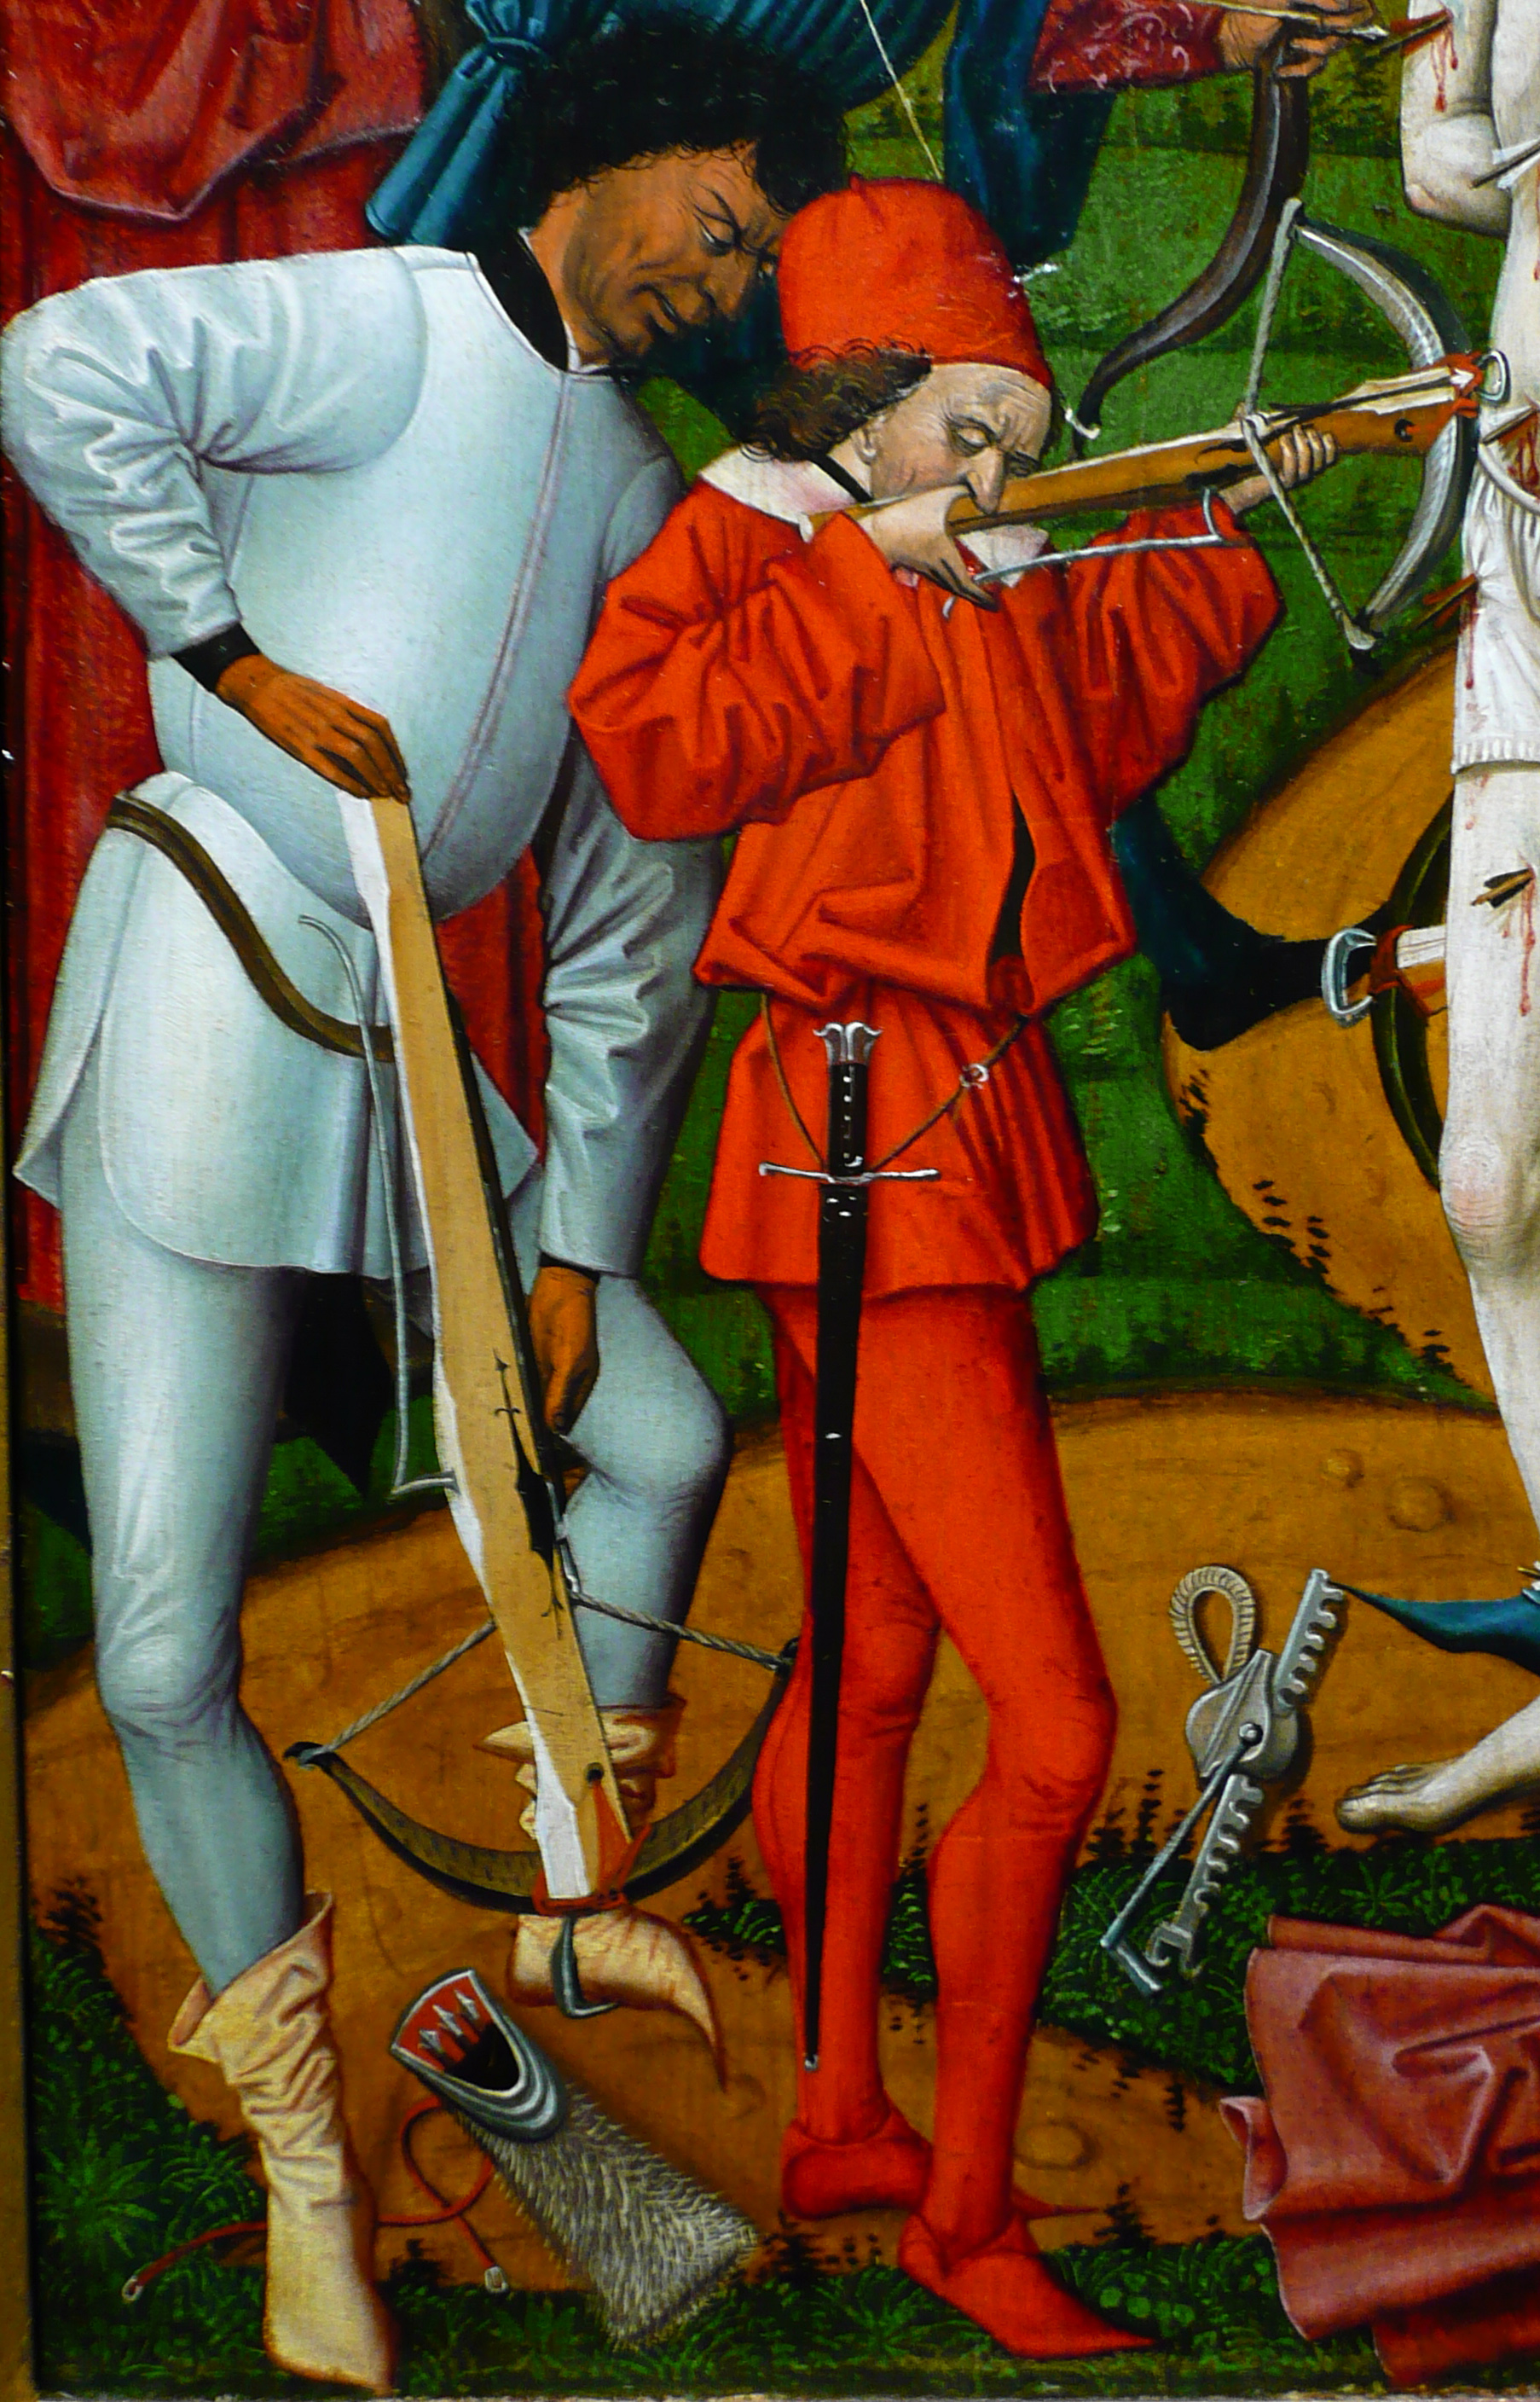
This type is partly covered in fur and tied to the waist of the user with a belt.
.jpg) |
| Detail from "The martyrdom of St. Sebastian", Oberbayern, 1475. Picture from Wikipedia |
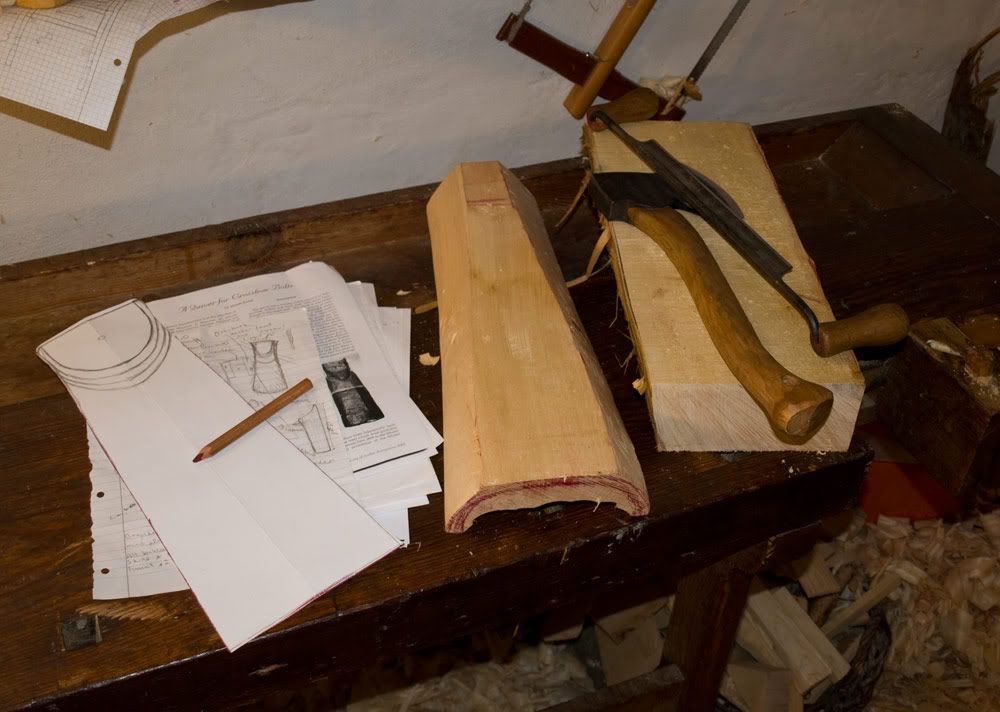 |
| Making a paper template will help getting the shape and dimensions right. |
I bought a board of lime wood, 7,5cm thick (That is 3" , for our american readers)
The quiver is basicly made from 3 pieces of wood. A thin (6mm/ 3/16") board for the back and bottom, and a thick piece for the concave front.
Be sure to plane the backside og the front piece before you start shaping and hollowing, because you need an even surface for laying out the rabbet that holdt the back. This is done after the hollowing is done.
I started by roughly shapeing the outside with an axe and a bandknife.

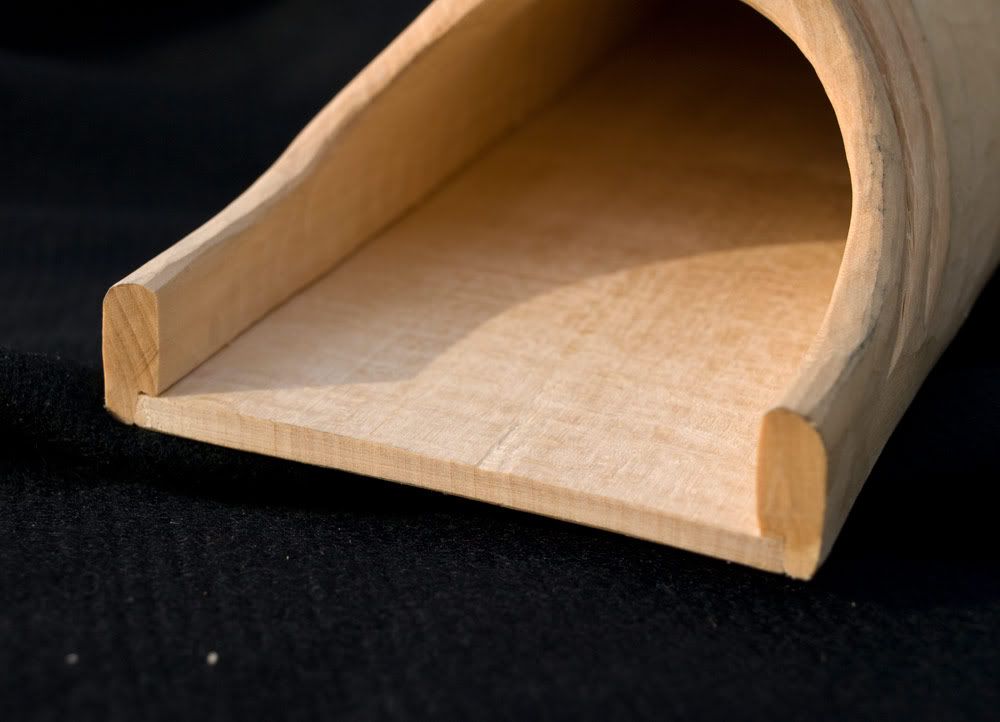
The inside is shaped by holloving the thick front board. I used gouges for this, but if you have an adze, I will recommend using that. The final thickness of the front piece should be no more than 6-8 mm (3/16"-4/16"), but leave it a bit thick at the mouth, so there is wood enough to carve the lips at the top.
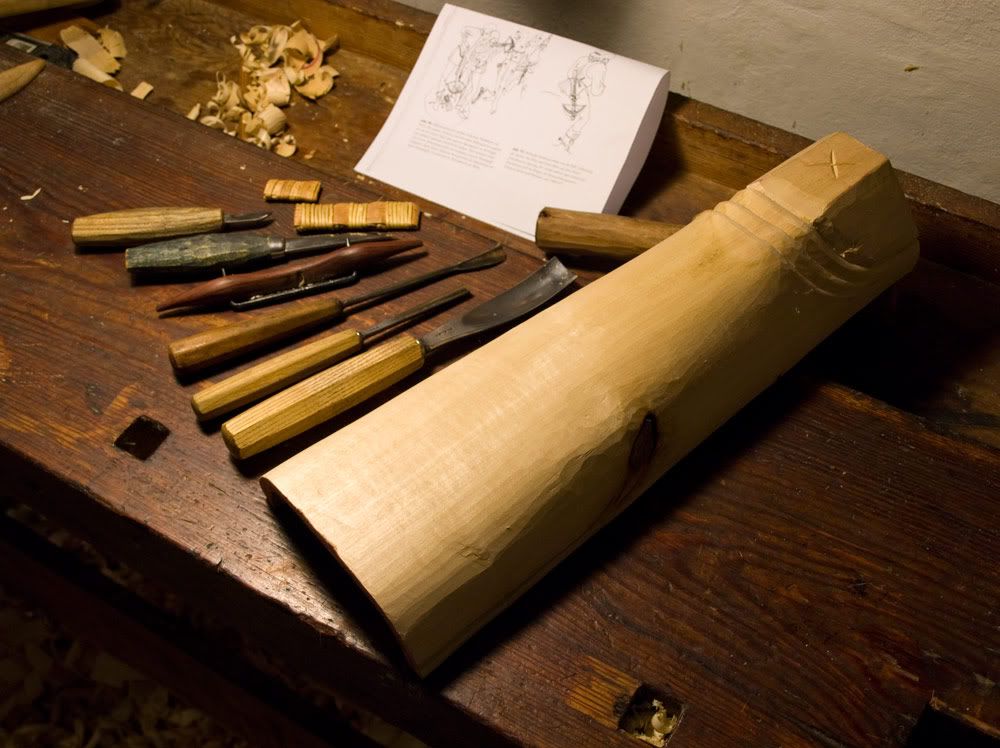 |
| Tools (Left to right): Chip carving knife, mora-knife no. 106, small wooden spokeshave, backswept gouge, v-tool, spoon-bent gouge. |
After hollowing the front I started carwing the lip at the mouth of the quiver. I used a couple of different gouges for this, but my chip carving knife and mora-knife also came in handy. I also remembered that i had a backswept gouge for carving convex shapes and ended up using i quite a lot for this part of the project.
The outside shape was refined with a small spokeshave and a scraper. Lastly i sawed out the mouth with a coping saw.
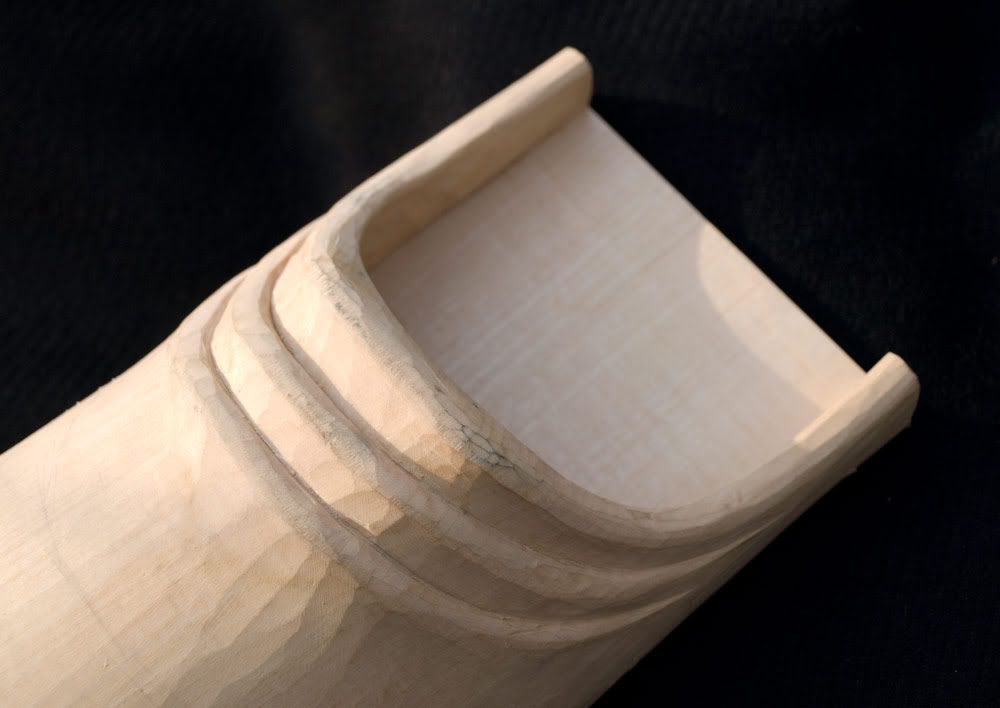 |
| The lips are slightly undercut. |
An important thing about the lips is that they have to be big enough to still be plainly visible when covered with leather. So make sure you make them a bit larger than you think nessecery.
The good thing is that you don't have to worry too much about the final finisk of the survace. The toolmarks will be covered and evened out by even a very thin piece of leather. The lover part can be even more rough as it vill be covered in fur.
 |
| Rabbet |
Here you can see the rabbet wich the back board is slotted in to. The three pieces are glued and pegged togeather. I used 3mm pegs made from some dry birch that I had.

One of the pictures of surviving quiverse that my friend showed me, had a small hatch on the back. We thought that it might be for inserting bolts into the quiver without the risk of damaging the feathers. But after making a similar hatch on this quiver I can safely say that this i not the case. The hatch on my quiver is actually a bit larger than tha one on the original, but it is still to small to allow room enough for a bolt. The bolt will be jammed between the bottom and the front, before it can be fully inserted.
But the hatch seems to be a neat feature none the less... Just have to figure out what it's for :-)

The bottom is also joined to the front and back with a rabbet, glued and pegged.
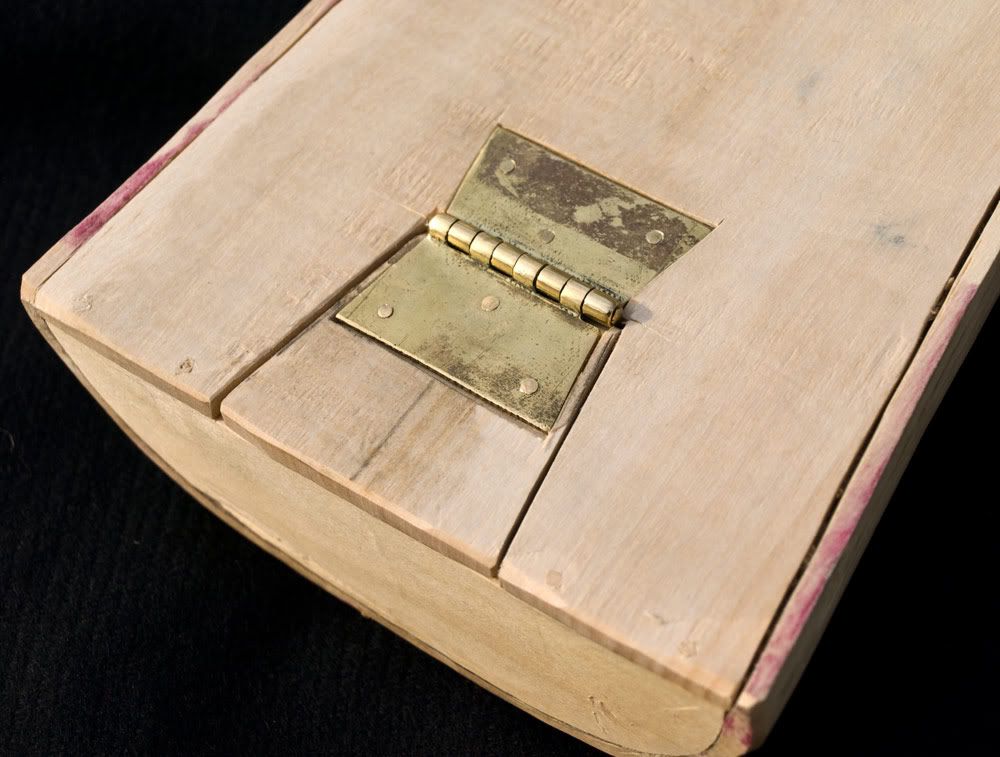
The plates of the hinges will be covered by leather, so I thought that I would just show it off before it gets covered. I am quite pleased with it.
Its made from brass plate and riveted to the back, using cast brass nails, that have been cut to length.

Hope you enjoy the reading. Feel free to comment.
I am really looking forward to doing the covering, and it is nice to be writeing again :-)
I am so impressed with your craftsmanship. I like the idea, and I think it'll end up looking awesome :)
ReplyDeleteNice work!
ReplyDeleteI really wonder the utility of the small hatch on the back! I never used a crossbow before, so I can't figure it out!
Keep us updated! ;)
Jorge from Portugal
When I showed this to my husband, he immediately suggested that the hinged opening at the base is an access panel to insert, clean (or remove for cleaning) the bottom lining in the quiver, since you can't clean or position it from the top easily. A clean and correctly positioned lining protects the tips from the wooden quiver (and the quiver from the tips!) The easier you make it to accomplish that, the better. Hope that helps!
ReplyDelete@Edyth:
ReplyDeleteI have been thinking about that too. And I have been considering putting in a leather liner at the bottom of the quiver.
Lime wood is quite soft, so it makes sense to protect it from wear.
Hey Mikkel!
ReplyDeleteLovely work. Those lips look really good.
I see in the first picture that the bolts are point up. Looks to be potential for an accident there when getting out a bolt, but it would save the base from the points. Maybe the cleaning hole is an improved design.
I also had a thought abut that hatch in the bottom of the quiver. If you look at the main picture, you will notice that the Bolts are Flight down, Point up, so may well be used for loading the quiver.
ReplyDeleteSorry very rude of me. Very nice work, and am looking dorward to part 2. Will be making a few of these for my Medieval Re-enactment Company.
ReplyDeleteThree speculatory uses for the hatch, in descending practicality:
ReplyDeleteA: to let water out when it is raining (a quiver makes a good bucket whether you intend so or not) and/or
B: as a kickstand or anti-tip device if you set it down.
C: as a spot to thread the quiver onto something eg. a shoulder strap or pack animal harness
Nice function!
ReplyDeleteI ponder the utility from the modest hatch around the back! My spouse and i never utilised some sort of crossbow before, so i can't determine that out there!
For the last couple of weeks I have been working on a project for at friend og mine: A quiver for crossbow bolts. I have been thinking about ... crossbowbolts.blogspot.com
ReplyDeleteThe blog is good enough, keep up writing such type of posts.
ReplyDeleteJack Lewis
Hello, awesome project. Unfortunately, I can't find the rest of your build. How have you finished your project? I am about to build one since I finished building my pavise. How tall in cm is the quiver?
ReplyDeleteThanks!
Indeed a great job you did for the readers.
ReplyDelete