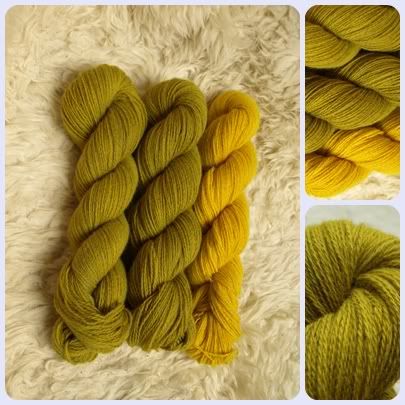
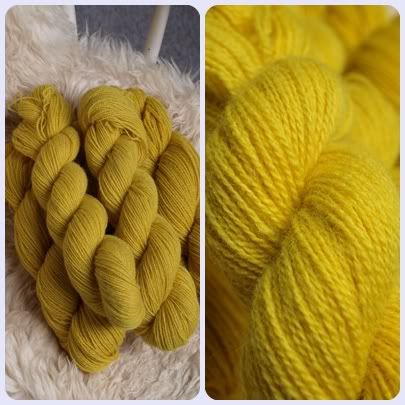
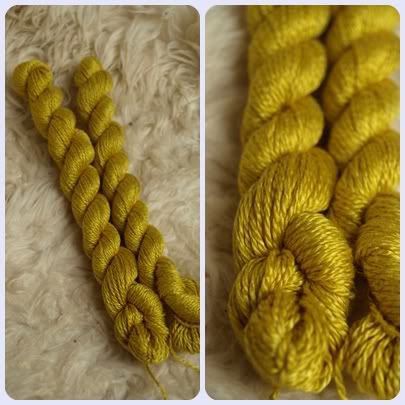
I have dyed with Solidago canadensis, also know as Canadian Goldenrod. I have dyed woth woolen yarns and silk and the green is from adding iron in the end of the dye.
Showing posts with label Natural dyes. Show all posts
Friday, February 19, 2010
More Colour please!
While winter is still here with lots of snow and frost I´m continuing with my in-door dyeing. Can´t help my self! It is great to find the medieval spirit again - I have some how lost it in a lot of knitting projects. But I can now see the forthcomming markets and great medievaltrips as a kind of carot in front of me and this really helps. I have already sold some of my dyed yarns and this finances bying more wool and yarns.


Sunday, January 31, 2010
Dyeing with mushroms
Winther have really got it´s strong hold on Denmark and for the moment it seems like a very long time to spring and summer. I´m really missing my plant dyeing and the colourfull yarns that it gives. Thankfully one of my friends from our medieval group gave me a large amount of mushroms in november in exchange for something nålebundet. I was thrilled that she had picked so many which were enough to dye fabric in the size of 1 m x 1,6 m.
So a couple of weeks ago I got the earge to dye and found the dryed mushroms in the basement.

I have never dyed with mushroms before and didn´t know how many grams to use for the 1 meter of fabric that I had. So this was kind of an experiment - to see how much colour the mushroms gave.The mushrom that I used is in danish called Cinnober-slørhat, and in latin Cortinarius cinnabarinus. It should give a redish colour which I was quite excited about since one of the only other plants that give red is madder.
Before dyeing I chopped the mushroms in to very small pieces and let them soak in water for 24 hours. Mikkel surgested this so that I could get as much colour out of the mushroms as possible. The colour soup became very red as you can see in the pictures and when the fabric went in it took in the colour very fast.

The result became much more dark in the colour than I had emagined but this was a very good result. I was very surprissed to see how close to madder the colouration really is.

There is some areas were you can see that the colourations is not perfekt. This might have something to do with a to small pot were the fabric wouldn´t more or/and that when I did the mordant I didn´t move the fabric enough. I used the colour soup for a secound time and was happy to see that this also gave some colour. I´m not sure that I´ll use the yarns for medieval things, but I can use it for knitting something moderne.
I´m really starting to want to dye again and thankfully I have some dryed plants in the basment. Now we just need the snow and frost to go away so that I can try my new modern gas cauldron that holds up to 60 liters.
So a couple of weeks ago I got the earge to dye and found the dryed mushroms in the basement.
I have never dyed with mushroms before and didn´t know how many grams to use for the 1 meter of fabric that I had. So this was kind of an experiment - to see how much colour the mushroms gave.The mushrom that I used is in danish called Cinnober-slørhat, and in latin Cortinarius cinnabarinus. It should give a redish colour which I was quite excited about since one of the only other plants that give red is madder.
Before dyeing I chopped the mushroms in to very small pieces and let them soak in water for 24 hours. Mikkel surgested this so that I could get as much colour out of the mushroms as possible. The colour soup became very red as you can see in the pictures and when the fabric went in it took in the colour very fast.
The result became much more dark in the colour than I had emagined but this was a very good result. I was very surprissed to see how close to madder the colouration really is.
There is some areas were you can see that the colourations is not perfekt. This might have something to do with a to small pot were the fabric wouldn´t more or/and that when I did the mordant I didn´t move the fabric enough. I used the colour soup for a secound time and was happy to see that this also gave some colour. I´m not sure that I´ll use the yarns for medieval things, but I can use it for knitting something moderne.
I´m really starting to want to dye again and thankfully I have some dryed plants in the basment. Now we just need the snow and frost to go away so that I can try my new modern gas cauldron that holds up to 60 liters.
Thursday, October 22, 2009
Dyeing in the fall
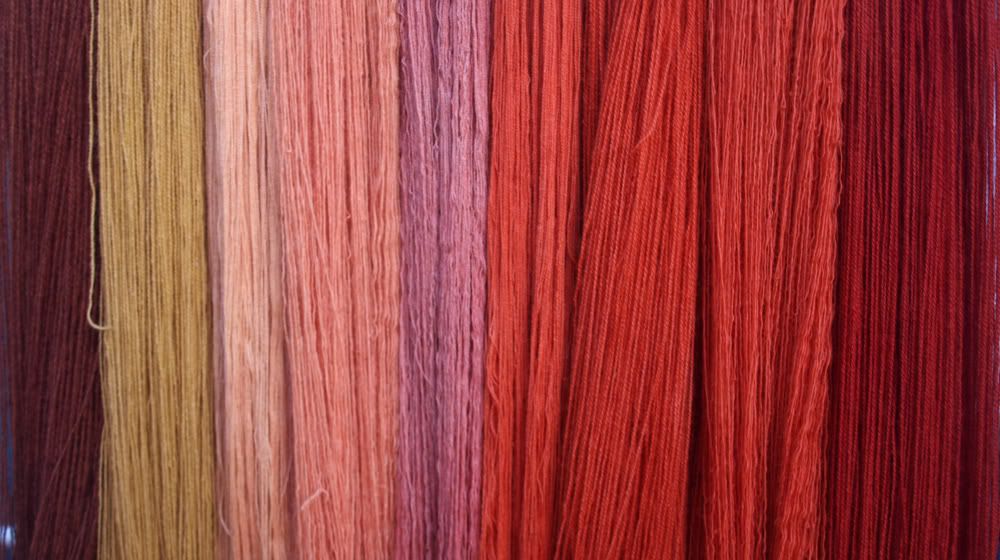
As Mikkel wrote in the last post the Handkraft team have been at two medieval events this October. The two events made it possible for me to do some dyening. At Vitskøl monestary we dyed with madder and mushroms, and at Spøttrup Castle we continued dyeing with madder. Have brought differnt types of yarns which you can see had a great impact on the results of the colours. We also dyed fabric but pictures of this will be saved for another post - this was mostly Mikkels project and I´m sure that he will show it to you later.

From left to right. Light grey yarn in 2. colourbath, white yarn in a bath made with mushrooms, the two next are white yarn in 3. colourbath, a light grey yarn in 3. colourbath, three next is different white yarns in 3. colourbath, and the last is a white yarn in 2. colourbath.
I rally love the colurs that we made. I made sure to make a lot of the really thin embroidery yarn, so that I can experiment with overdyening them with either yellows, greens or indigo. I have tried that in a small scale, with much succes. So now I want to dye some more yarn that I can use or sell.
From left to right. Light grey yarn in 2. colourbath, white yarn in a bath made with mushrooms, the two next are white yarn in 3. colourbath, a light grey yarn in 3. colourbath, three next is different white yarns in 3. colourbath, and the last is a white yarn in 2. colourbath.
I rally love the colurs that we made. I made sure to make a lot of the really thin embroidery yarn, so that I can experiment with overdyening them with either yellows, greens or indigo. I have tried that in a small scale, with much succes. So now I want to dye some more yarn that I can use or sell.
Friday, May 22, 2009
Dye-mania
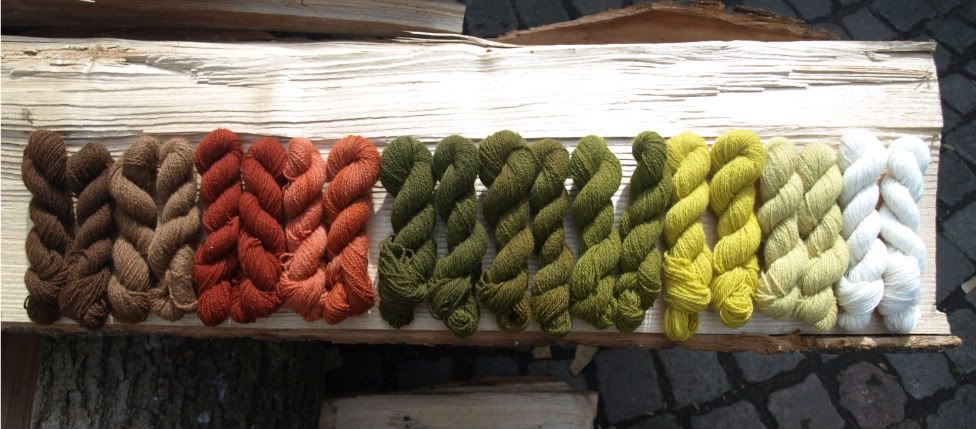
All though I should be reading for yet another exsam I haven´t been able to keep away from the dyeing pots. Mikkel and I (and friends) are going on a market in the middle of July and I wanted to bring different things to sell. My friends Janni and I have decided that we are going to show natural dyening and the yarns can then be used for embroidery and nalebinding. The picture below is some of the colours that I have produced so far. I´m quite happy with the result and it have been quite easy to make. I have been woundering if I/Janni and I should make a small texts about plant dyening that people could purchase. There is often a large interest when we do this kind of thing and a lot ask how we do it.

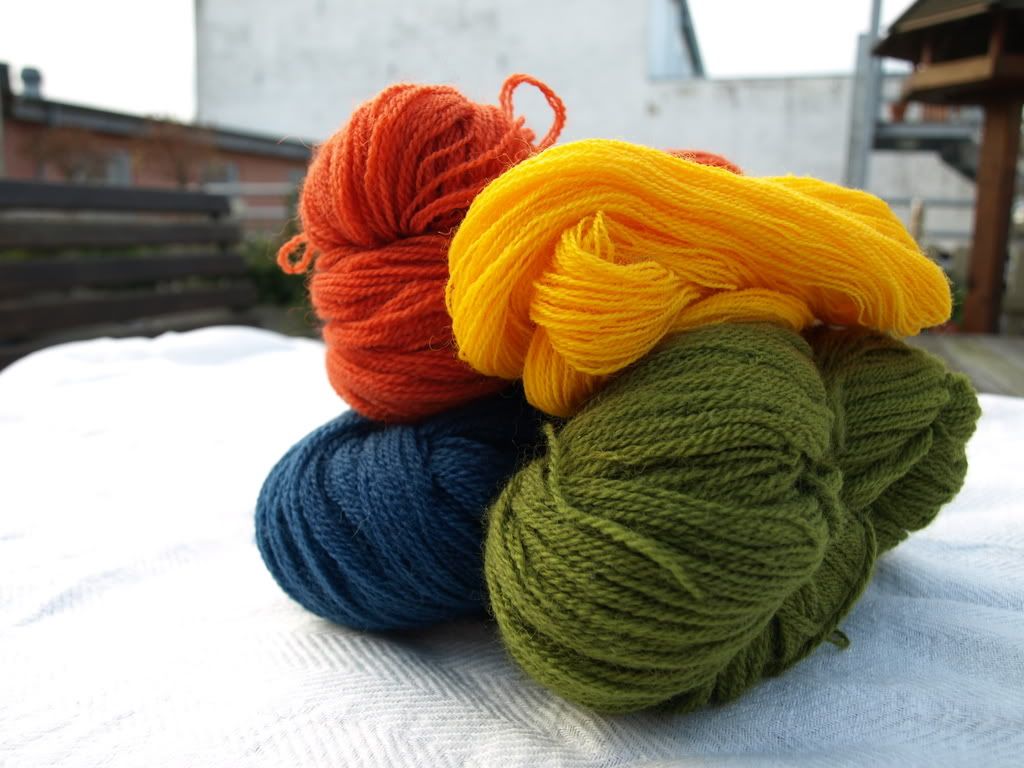
The plantes that I have use for these colours are (from the left):
- Walnut (the browns - 1. and 2. colour bath)
- Madder (the reds - 1. and 2. colurs bath)
- Birch (the greens and the bright yellow - the greens have been treathed with iron, and taken up at different time in the colour bath, the yellow is 1. colour bath)
- Goldenrot - (the light yellow - 1. colour bath)
The white is the original wool yarn
These small duckets are 50 m yarn and would be relly good for embroidery and very fine knitting. I´m dyening on three differnt types of embroidery yarns and one silk, and have also plans on dyening some more normal yarns for knitting and nalebinding.
The plantes that I have use for these colours are (from the left):
- Walnut (the browns - 1. and 2. colour bath)
- Madder (the reds - 1. and 2. colurs bath)
- Birch (the greens and the bright yellow - the greens have been treathed with iron, and taken up at different time in the colour bath, the yellow is 1. colour bath)
- Goldenrot - (the light yellow - 1. colour bath)
The white is the original wool yarn
These small duckets are 50 m yarn and would be relly good for embroidery and very fine knitting. I´m dyening on three differnt types of embroidery yarns and one silk, and have also plans on dyening some more normal yarns for knitting and nalebinding.
Friday, April 17, 2009
Natural dyed silk fabric
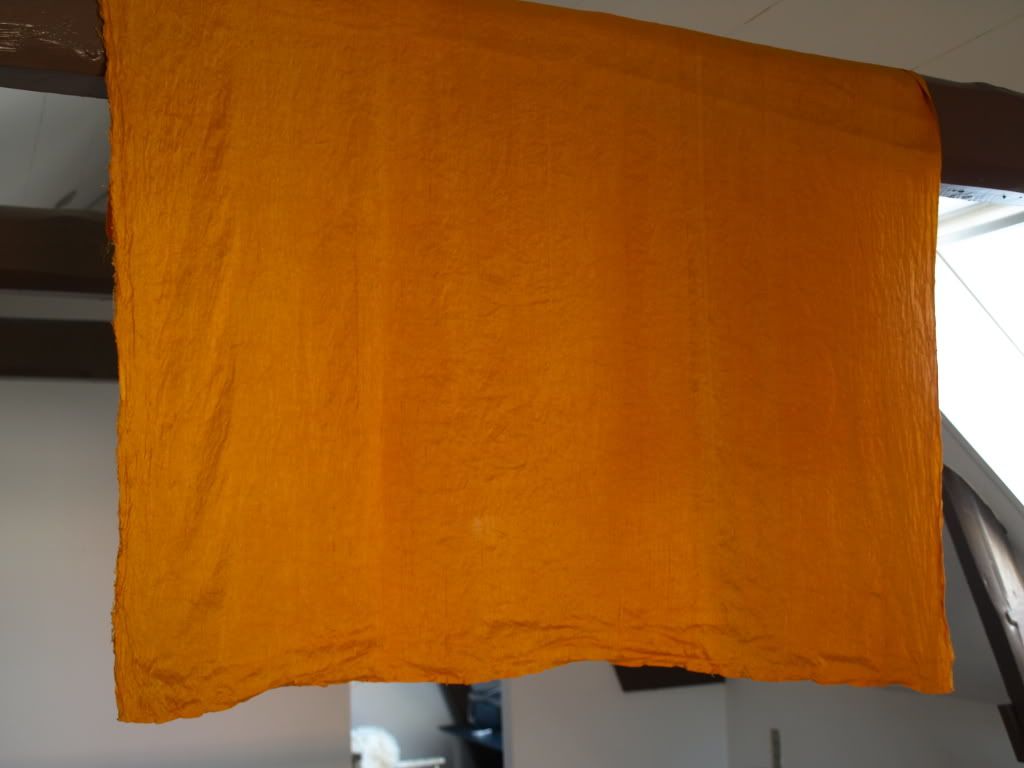
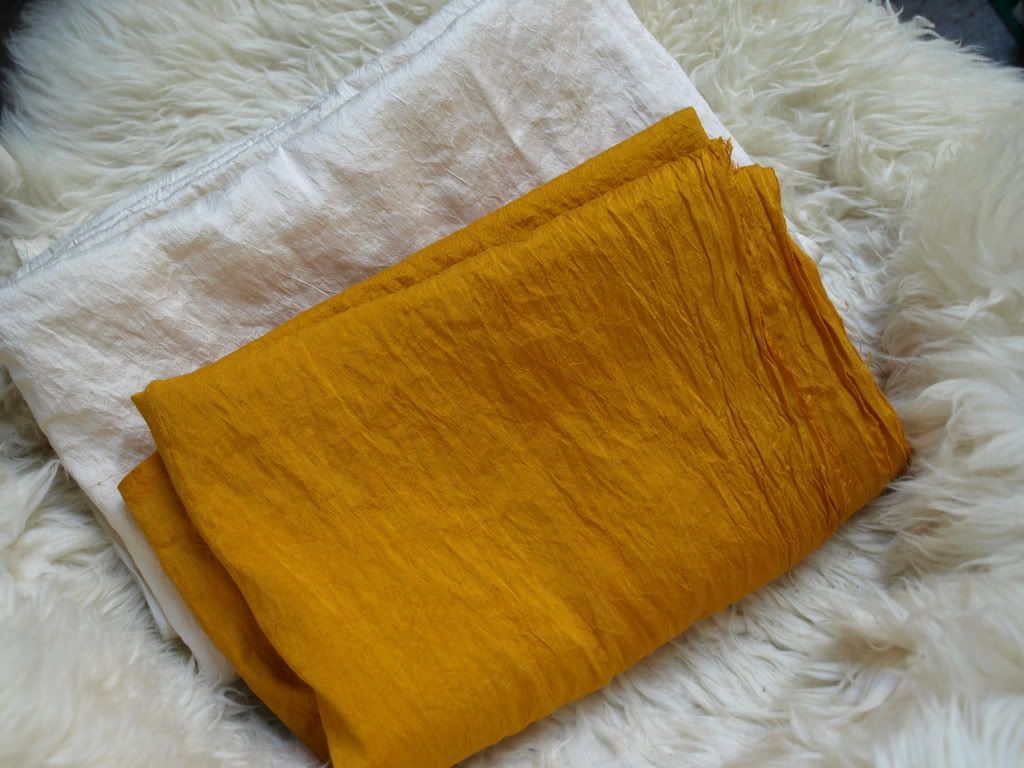
All though I´m really should be writing on my final thesis to finish my archeaology studies I couldn´t stop my self from trying to dye on silk fabric. Mikkel and I have been collecting onion shells for a while and there were now a big pile of shells. I know that the dye stitchs really well on wool and gives a great colour. And when I stumbled on this guys flickr I just had to try dyeing on silk.
So I found some white silk that I have bought at a tailor on sale and gave it a mordant (alun). The mordant water and the fabric was moved a lot. Then I made the colour water and after an hour of boiling it was ready for the fabric. I removed the onion shells and but in the fabric. The piece was about 1 m. The colour was on the fabric right away and during the next hour is stured all the time.
The result and the colour is amazing! It was much easier to dye on silk than I thought and I´m for sure going to make more silk during this summer.
This picture is taken in our livingroom and the light is not to good.

Here you can see the white silk and the plant dyed silk.
So I found some white silk that I have bought at a tailor on sale and gave it a mordant (alun). The mordant water and the fabric was moved a lot. Then I made the colour water and after an hour of boiling it was ready for the fabric. I removed the onion shells and but in the fabric. The piece was about 1 m. The colour was on the fabric right away and during the next hour is stured all the time.
The result and the colour is amazing! It was much easier to dye on silk than I thought and I´m for sure going to make more silk during this summer.
This picture is taken in our livingroom and the light is not to good.
Here you can see the white silk and the plant dyed silk.
Tuesday, December 23, 2008
Dyeing before Christmas
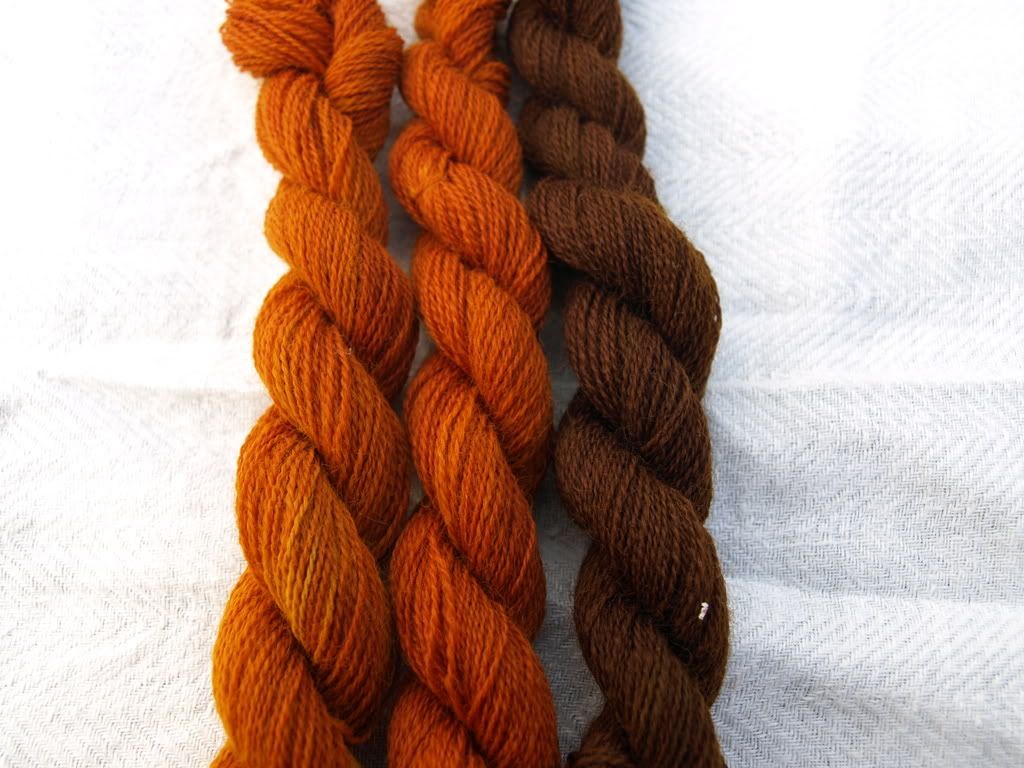
I have been collecting onion shells for a while now and decided last night that I had enough to try a little dyeing. I had seen the great results on Slingerbult´s page and have wanted to try it ever since. So I decides on dyeing small bundles of embroidery yarn which had been treated with alum. All three went in and and they took in the colour great. So I tried using ironsulfur for one of them (? - the danish word is jernvitriol). The colurs of the ones that had only been in onion shells went quite orange and the one treated with iron in the end went dark brown. I must say that I´m really happy about the result although the yarn is a bit spottet. I think this is due to the alum and that I didn´t move the yarn as much as I should have.

So filled with succes I wanted to try something else. My dear friend Christopher bought safran to me last time he was in Spain. It is much cheaper there than here in Denmark so he was so kind as to bring some home for me. It is said to be one of the most expensive/luxuary colours in the middle ages, next to indigo and kermes. I tried with a small bundle of yarn again and use about 4-5 grams of safran. It really doesn´t take much before it dyes and the colour is very strong so be careful not to make a mess with it.
The end result is SO beautiful! The colour is very yellow and very rich. So it is easy to understand that people wanted that colour. It was a great succes and I going to have Christopher to buy me some more safran in Spain next time he goes.

I put the yellow next to some of the other natual dyed colours that I have in my embroideri kit at the moment. On the to next to the safran it is madder. In the bottom it is indigo and an yellow that has been dipped in indigo.
So filled with succes I wanted to try something else. My dear friend Christopher bought safran to me last time he was in Spain. It is much cheaper there than here in Denmark so he was so kind as to bring some home for me. It is said to be one of the most expensive/luxuary colours in the middle ages, next to indigo and kermes. I tried with a small bundle of yarn again and use about 4-5 grams of safran. It really doesn´t take much before it dyes and the colour is very strong so be careful not to make a mess with it.
The end result is SO beautiful! The colour is very yellow and very rich. So it is easy to understand that people wanted that colour. It was a great succes and I going to have Christopher to buy me some more safran in Spain next time he goes.
I put the yellow next to some of the other natual dyed colours that I have in my embroideri kit at the moment. On the to next to the safran it is madder. In the bottom it is indigo and an yellow that has been dipped in indigo.
Monday, October 13, 2008
Natural dying - Madder
I have been on a medieval market this weekend and have dyed wool yarn with my friend Janni. I had prepared some wool from home with alum and also brught some that had not been treated. This was to see how different the wool took in the colour.
This is the result from the "hard" work.

I dyed two baches that have been treated which I´m going to use for "nålebinding"/"needlebinding". And the one in the middle that hadn´t been treated with alum is a very thin embroidery yarn. There is a clear difference in the two types of yarn but I´m very excited about both colours. And I were very happy to see that the embroidery yarn took in so much colour. So for the future I´m going to dye some more for embroidery purposes.
We got a lot of response on your dying and people really were interested in hearing about natural dying. Though some kids thought that we were making red pasta with blod :0).
This is the result from the "hard" work.
I dyed two baches that have been treated which I´m going to use for "nålebinding"/"needlebinding". And the one in the middle that hadn´t been treated with alum is a very thin embroidery yarn. There is a clear difference in the two types of yarn but I´m very excited about both colours. And I were very happy to see that the embroidery yarn took in so much colour. So for the future I´m going to dye some more for embroidery purposes.
We got a lot of response on your dying and people really were interested in hearing about natural dying. Though some kids thought that we were making red pasta with blod :0).
Sunday, September 28, 2008
Leather dyeing
For a long time I have been somewhat unsatisfied with the colours available from the traditional alcoholic based leather dyes.
Partly because the colour-range is limited (althoug the coluors can be mixed) and partly because the dyes are far from being historicly acurate (In must admit that I don't even have a clue as to wich pigments are used in the alcoholic dyes).
Therefore I have done some experiments with "natural" dyes. Two different dyes to be specific.
One based on iron and one based on tannins.
The reason for this experiment is also that I am currently working on a "reconstruction" of a purse found at Helgeandsholmen in Sweden.
I want this purse to be as authentic as I can make it... within the reach of my capabilities.

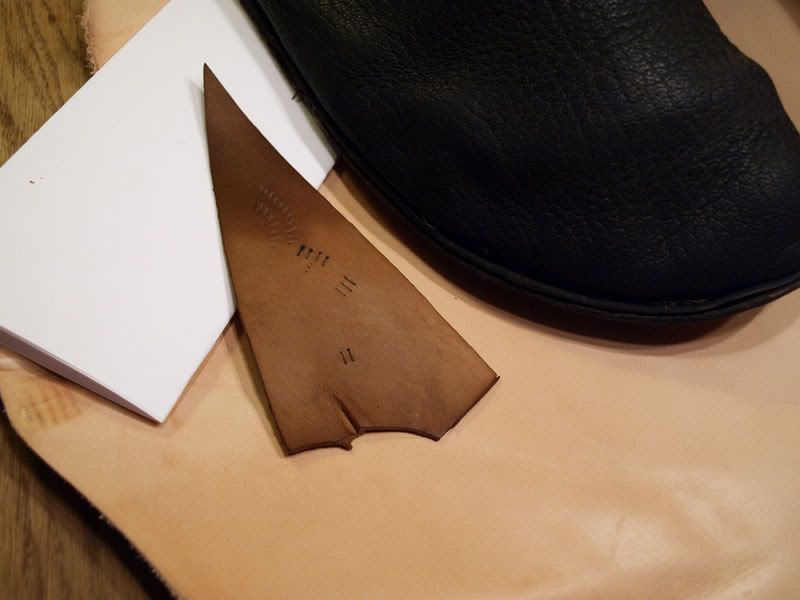
The picture above shows the two kinds of dye that I have used. The leather in the background is plain, undyed vegetable tanned leather (from a cow). The black shoe in the upper right corner is dyed with iron and the brown piece og leather in the middle is dyed with walnut leaves and shells (the green shells of the fruit, not the brown hard shells of the nut).
The paper in the background is there to give you some idear of the real depth of the colours.
Iron oxide (black):
this i made very simply by dissolving iron in an acidic liquid. The iron is dissolved and absorbed into the leather. When the leather is dried the iron oxidises and turns the leather black (a blueish black).
I used steel wool wich i immersed in water with a dash of vinegar. The tannins contained in the leather should be enough, but i added a bit of vinegar to speed up the process a bit.
The leather should be left in the water for a day or two and stirred about at least a couple of times daily.
The leather will slowly turn black... and when it is greased the colour will become somewhat deeper and darker.
Walnut leaves/shells (Dark brown):
by boiling leaves and shells of walnuts the tannins in the plant is drawn out and can be used as a dye.
The process is very simple.
Pick some leaves or shells fra a walnut tree. Put them in a pot and add as much water as is needed to barely cover the leaves. Boil the whole thing for a couple of hours until the water turns brown (like very strong cofee). Filter the dye to remove the leaves and shells.
When the mixture is cooled, it is ready for use.
The leather that is to be dyed, is then immersed in the dye and left there for 8-10 hours. Maybe longer if you desire a darker tone.
When you are happy with the colour the leather should be rinsed in running water for a short while and left to dry.
The result is a grayish brown, wich gaines a lot from being greased. This will deepen the colour (the tip of the brown piece of leather in the middle of the picture has been greased).
Partly because the colour-range is limited (althoug the coluors can be mixed) and partly because the dyes are far from being historicly acurate (In must admit that I don't even have a clue as to wich pigments are used in the alcoholic dyes).
Therefore I have done some experiments with "natural" dyes. Two different dyes to be specific.
One based on iron and one based on tannins.
The reason for this experiment is also that I am currently working on a "reconstruction" of a purse found at Helgeandsholmen in Sweden.
I want this purse to be as authentic as I can make it... within the reach of my capabilities.
The picture above shows the two kinds of dye that I have used. The leather in the background is plain, undyed vegetable tanned leather (from a cow). The black shoe in the upper right corner is dyed with iron and the brown piece og leather in the middle is dyed with walnut leaves and shells (the green shells of the fruit, not the brown hard shells of the nut).
The paper in the background is there to give you some idear of the real depth of the colours.
Iron oxide (black):
this i made very simply by dissolving iron in an acidic liquid. The iron is dissolved and absorbed into the leather. When the leather is dried the iron oxidises and turns the leather black (a blueish black).
I used steel wool wich i immersed in water with a dash of vinegar. The tannins contained in the leather should be enough, but i added a bit of vinegar to speed up the process a bit.
The leather should be left in the water for a day or two and stirred about at least a couple of times daily.
The leather will slowly turn black... and when it is greased the colour will become somewhat deeper and darker.
Walnut leaves/shells (Dark brown):
by boiling leaves and shells of walnuts the tannins in the plant is drawn out and can be used as a dye.
The process is very simple.
Pick some leaves or shells fra a walnut tree. Put them in a pot and add as much water as is needed to barely cover the leaves. Boil the whole thing for a couple of hours until the water turns brown (like very strong cofee). Filter the dye to remove the leaves and shells.
When the mixture is cooled, it is ready for use.
The leather that is to be dyed, is then immersed in the dye and left there for 8-10 hours. Maybe longer if you desire a darker tone.
When you are happy with the colour the leather should be rinsed in running water for a short while and left to dry.
The result is a grayish brown, wich gaines a lot from being greased. This will deepen the colour (the tip of the brown piece of leather in the middle of the picture has been greased).
Subscribe to:
Posts (Atom)